

Comparing PowerSync with Neon Realtime? See PowerSync vs Neon Realtime.
- A Neon account
- A PowerSync Cloud account
- pnpm installed
Architecture
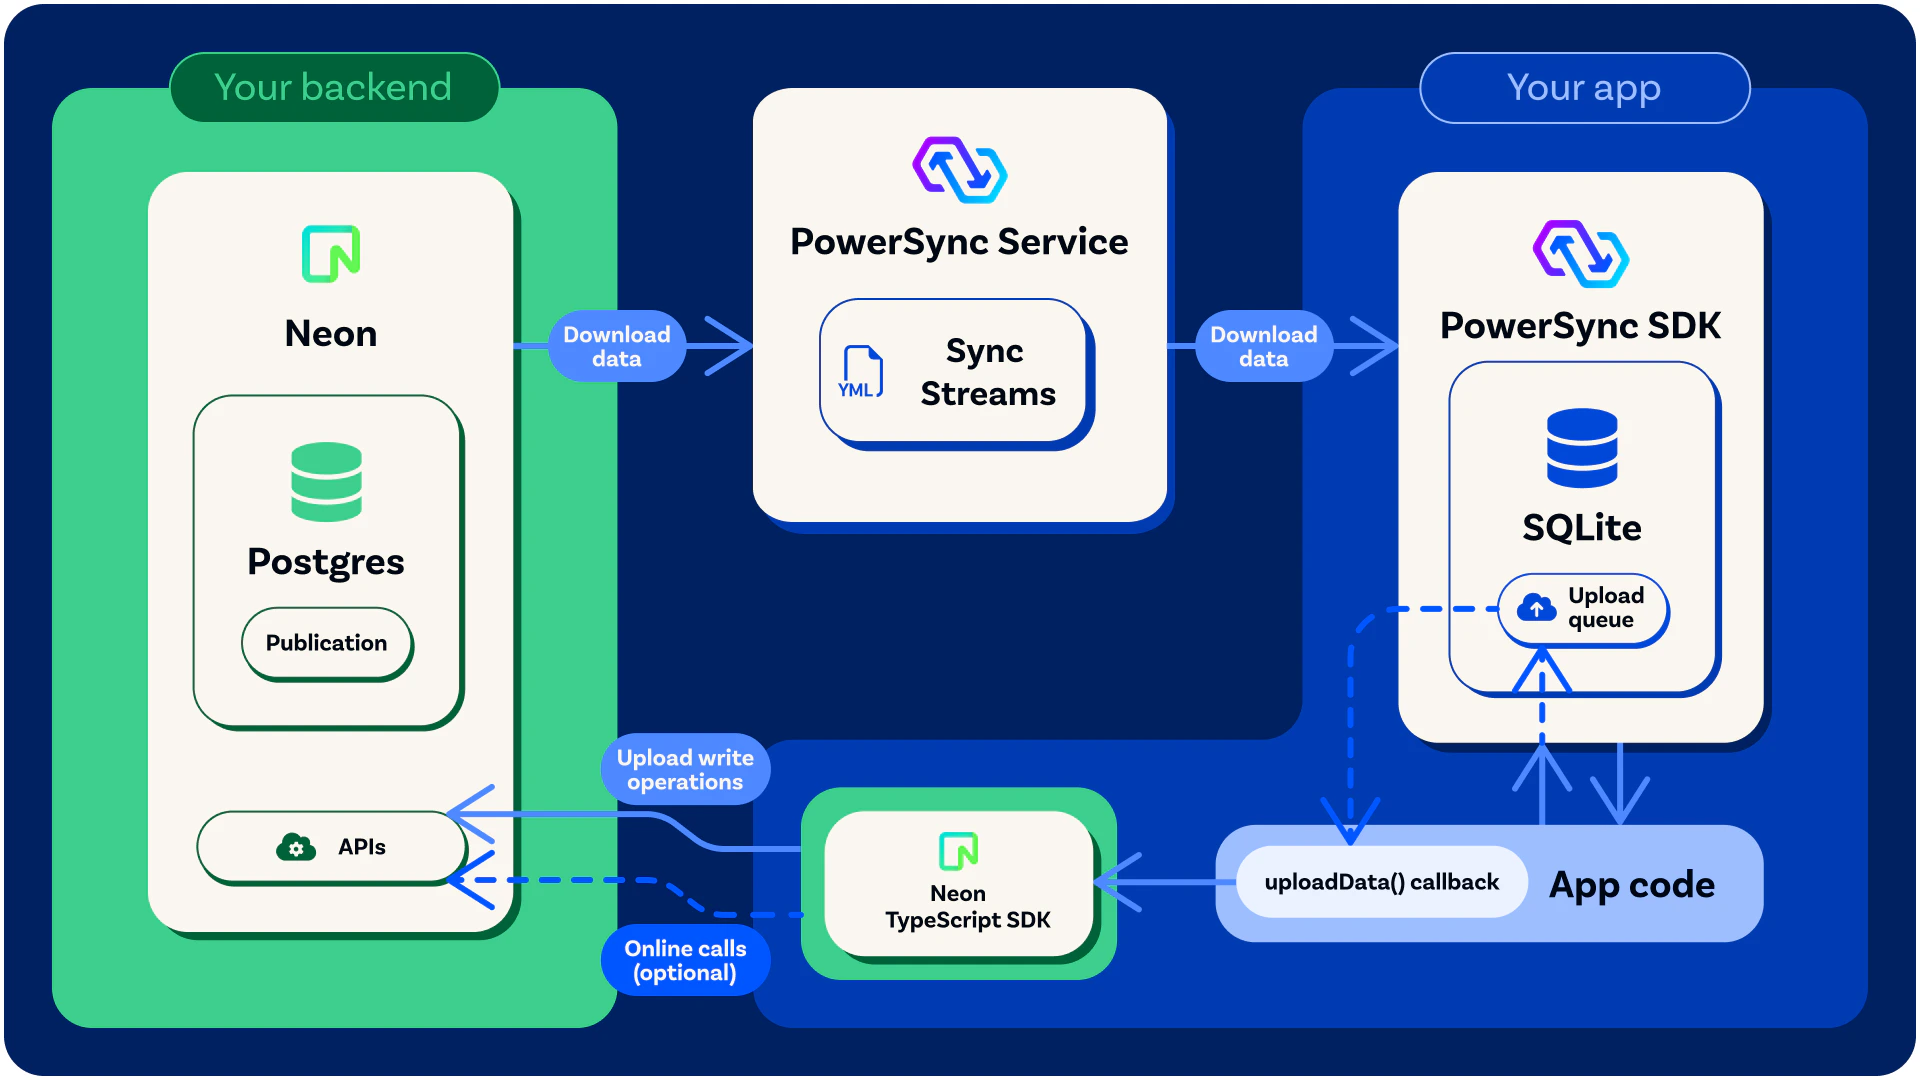
Neon + PowerSync architecture
uploadData() function, which sends queued changes to Neon through the Neon Data API.
Neon Auth handles sign-in. The Data API and PowerSync both accept the JWTs that Neon Auth issues. For more on how PowerSync works, see the Architecture Overview.
Overview
1
Configure Neon
- Create a Neon project with Neon Auth and the Data API
- Enable logical replication
- Create the demo database schema
- Create the PowerSync database user and publication
2
Configure PowerSync
- Connect PowerSync to Neon
- Configure Neon Auth
- Configure Sync Streams
3
Run the Demo App
Configure and run the notes demo app, then test sync.
Configure Neon
Create a Neon Project
Create a project with Neon Auth, Neon’s managed Better Auth service, and the Data API.- Web UI
- CLI
- In the Neon Console, create a project.
- Enable Better Auth.
- Enable the Data API under Postgres database > Data API. Keep Use Neon Auth selected and select Grant public schema access, which is off by default.
authenticated role. Grant public schema access (--add-default-grants in the CLI) gives this role read and write access to tables in the public schema, including tables you create later. Without these grants, the demo app’s uploads fail.
Enable Logical Replication
PowerSync uses Postgres logical replication to read changes from your database. Enabling logical replication can’t be undone. It also restarts your project’s computes, which drops active connections.- Web UI
- CLI
In the Neon Console, go to Settings > Postgres and enable Logical Replication.
While PowerSync is connected, its replication connection keeps your Neon compute active, so the compute doesn’t scale to zero. This uses compute hours continuously, which counts toward your Neon plan’s limits.
Create the Demo Database Schema
The demo app uses Drizzle migrations to create its tables and Row Level Security (RLS) policies.- Clone the demo app and install its dependencies:
- Get a direct connection string:
- Web UI: In the Neon Console, click Connect, turn off Connection pooling, and copy the connection string.
- CLI: Run
neon connection-string --project-id <project-id>. It returns a direct connection string by default.
- Create a
.envfile in the demo directory and add the connection string: - Run the migration:
Create a PowerSync Database User
Run the following SQL in the Neon Console under Postgres database > SQL Editor, or withpsql "$(neon connection-string --project-id <project-id>)". The role needs BYPASSRLS so that PowerSync can replicate every row of the RLS-protected demo tables. Your Sync Streams then decide which rows each user receives.
SELECT privilege, and for the publication mentioned in the next step (as well as for any other publications that may exist).
Create the Postgres Publication
Run the following SQL in the SQL Editor or withpsql:
Configure PowerSync
Create a PowerSync Cloud Instance
- Web UI
- CLI
When creating a project in the PowerSync Dashboard, Development and Production instances of the PowerSync Service will be created by default. Select the instance you want to configure.If you need to create a new instance, follow the steps below.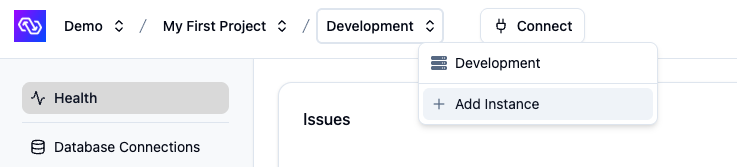
- In the dashboard, select your project and open the instance selection dropdown. Click Add Instance.
- Give your instance a name, such as “Production”.
- [Optional] You can change the default cloud region. You can’t change the region after you create the instance. See Regions for details.
- Click Create Instance.
Connect PowerSync to Neon
- Web UI
- CLI
- In the Neon Console, click Connect, turn off Connection pooling, and copy the connection string.
- In the PowerSync Dashboard, select your project and instance and go to the Database Connection view.
- Select the Postgres tab.
- Paste the connection string into the URI field. PowerSync fills in the other connection fields from the URI.
- Change Username and Password to the
powersync_roleand password you created in Create a PowerSync Database User. - Keep SSL Mode set to
verify-full. PowerSync trusts Neon’s certificate by default, so you don’t need to add a server certificate. - Click Test Connection and fix any errors.
- Click Save Connection.
Configure Neon Auth
The demo app sends PowerSync the JWT that Neon Auth issues for the signed-in user. To verify these JWTs, PowerSync needs two values from Neon:- JWKS URL: The public keys that Neon Auth publishes as a JSON Web Key Set (JWKS), for example
https://ep-cool-darkness-123456.neonauth.c-2.us-east-2.aws.neon.tech/neondb/auth/.well-known/jwks.json. - JWT audience: The origin of your Neon Auth URL, which is the URL without the path and without a trailing
/, for examplehttps://ep-cool-darkness-123456.neonauth.c-2.us-east-2.aws.neon.tech. PowerSync rejects a token if itsaudvalue doesn’t match exactly.
- Web UI
- CLI
Find the Auth URL and JWKS URL in the Neon Console under Settings > Better Auth. Then, in the PowerSync Dashboard, go to the Client Auth view and set the following fields:
- Development tokens: Enable this setting.
- JWKS URI: Enter the JWKS URL from Neon.
- JWT Audience: Enter the origin of the Auth URL from Neon.
Configure Sync Streams
Sync Streams define which data syncs to which users’ devices. In the demo app, each user syncs their own notes and paragraphs, plus all shared notes and their paragraphs. Use the following Sync Config:- Web UI
- CLI
- In the PowerSync Dashboard, go to the Sync Streams view.
- Replace the contents of the editor with the Sync Config above.
- Click Validate and fix any errors.
- Click Deploy.
Run the Demo App
Configure Environment Variables
Add the following variables to the.env file in the demo directory:
neon data-api get --project-id <project-id> --database neondb prints the Data API URL, and neon neon-auth status --project-id <project-id> prints the Auth URL as base_url. Your PowerSync instance URL is https://<instance-id>.powersync.journeyapps.com, where <instance-id> is the instance_id value in powersync/cli.yaml.
Start the App
Start the development server:localhost while Allow Localhost is on, which is the default. If you deploy the app, add its domain in the Neon Console under Settings > Better Auth > Domains.
The notes list is empty at first. Create a note, then disconnect your device from the network (for example, turn off Wi-Fi) and edit the note. When you reconnect, the SDK uploads the queued changes, and they appear in the notes and paragraphs tables in Neon.
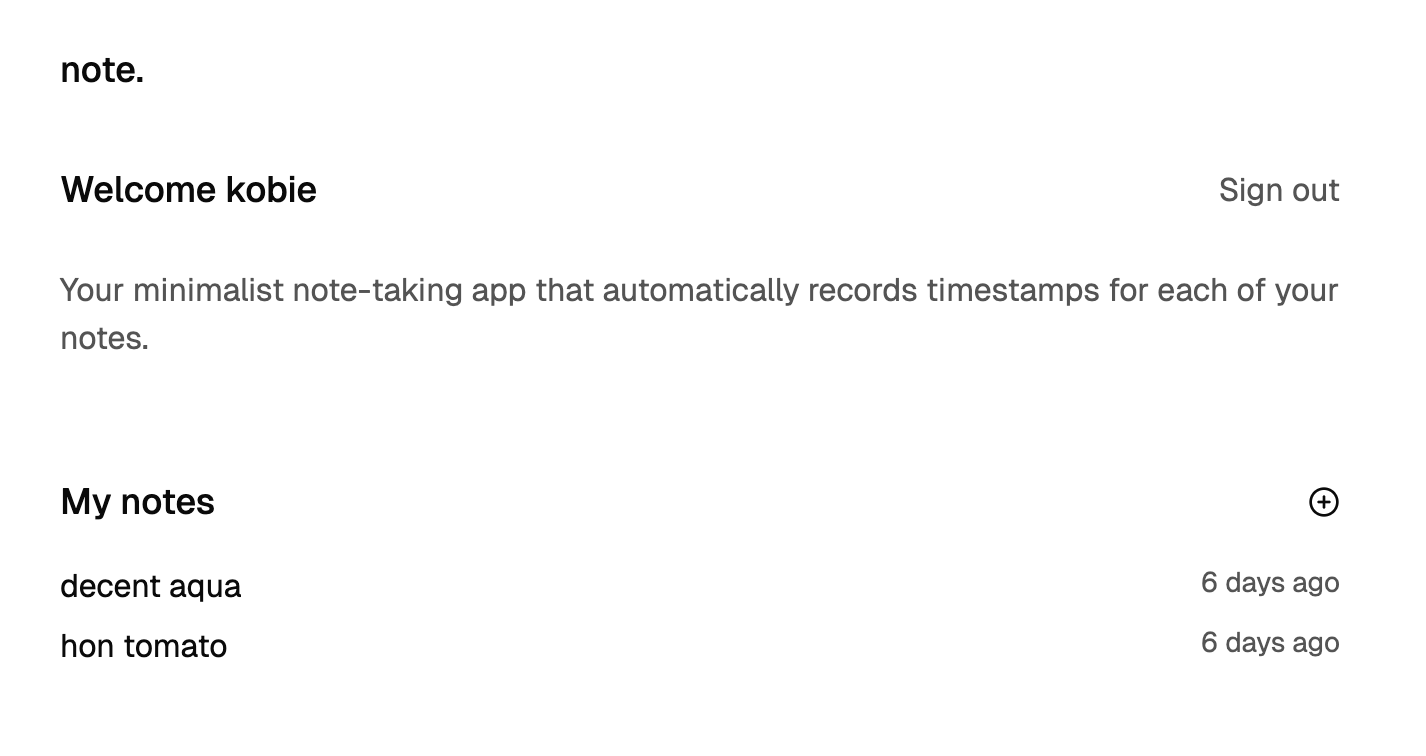
The demo app after creating two notes
If a note disappears shortly after you create it, the Data API rejected the upload with a permission error (
42501), and the demo app discarded the change. To grant access to the demo tables, run GRANT SELECT, INSERT, UPDATE, DELETE ON notes, paragraphs TO authenticated; in the SQL Editor.Test Your Sync Streams (Optional)
To see which data syncs to a specific user, generate a development token for a user who signed up in the demo app, and open it in the Sync Diagnostics Client. Use the user’s ID as the token subject. This ID is theowner_id value of the user’s notes.
- Web UI
- CLI
In the PowerSync Dashboard, go to the Sync Test view. Enter the user ID as the token subject, then click Generate token and Launch Sync Diagnostics Client.