Video walkthrough of the integration guide.
This guide takes 10-15 minutes to complete.
- A Supabase account
- A PowerSync Cloud account
- For mobile/desktop apps: Flutter, React Native, Kotlin, or Xcode set up for your platform of choice
- For web apps: pnpm installed
Architecture
Upon successful integration of Supabase + PowerSync, your system architecture will look like this: (click to enlarge image)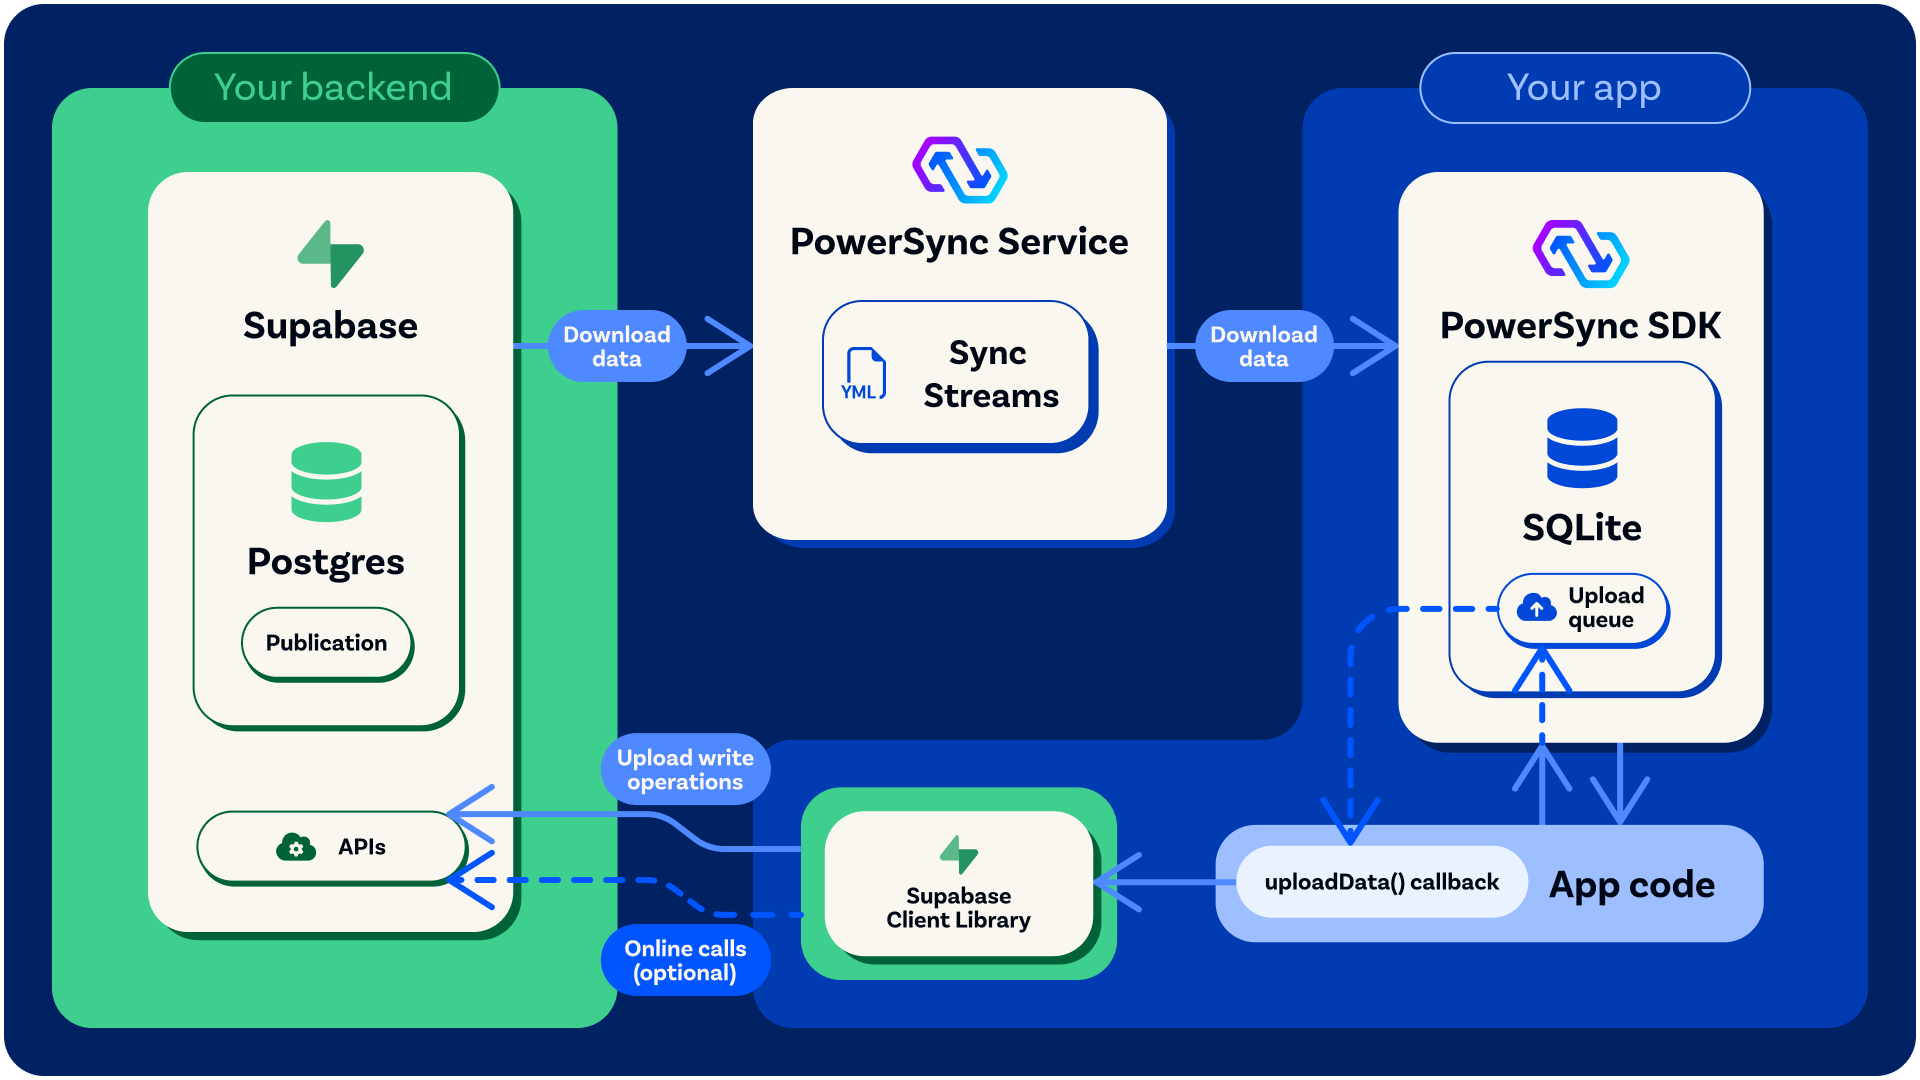
For more details on PowerSync’s general architecture, see here.
Integration Guide/Tutorial Overview
We will follow these steps to get an offline-first ‘To-Do List’ demo app up and running:1
Configure Supabase:
- Create the demo database schema
- Create the Postgres user and publication
2
Configure PowerSync:
- Create connection to Supabase
- Configure Sync Streams
3
Test the configuration
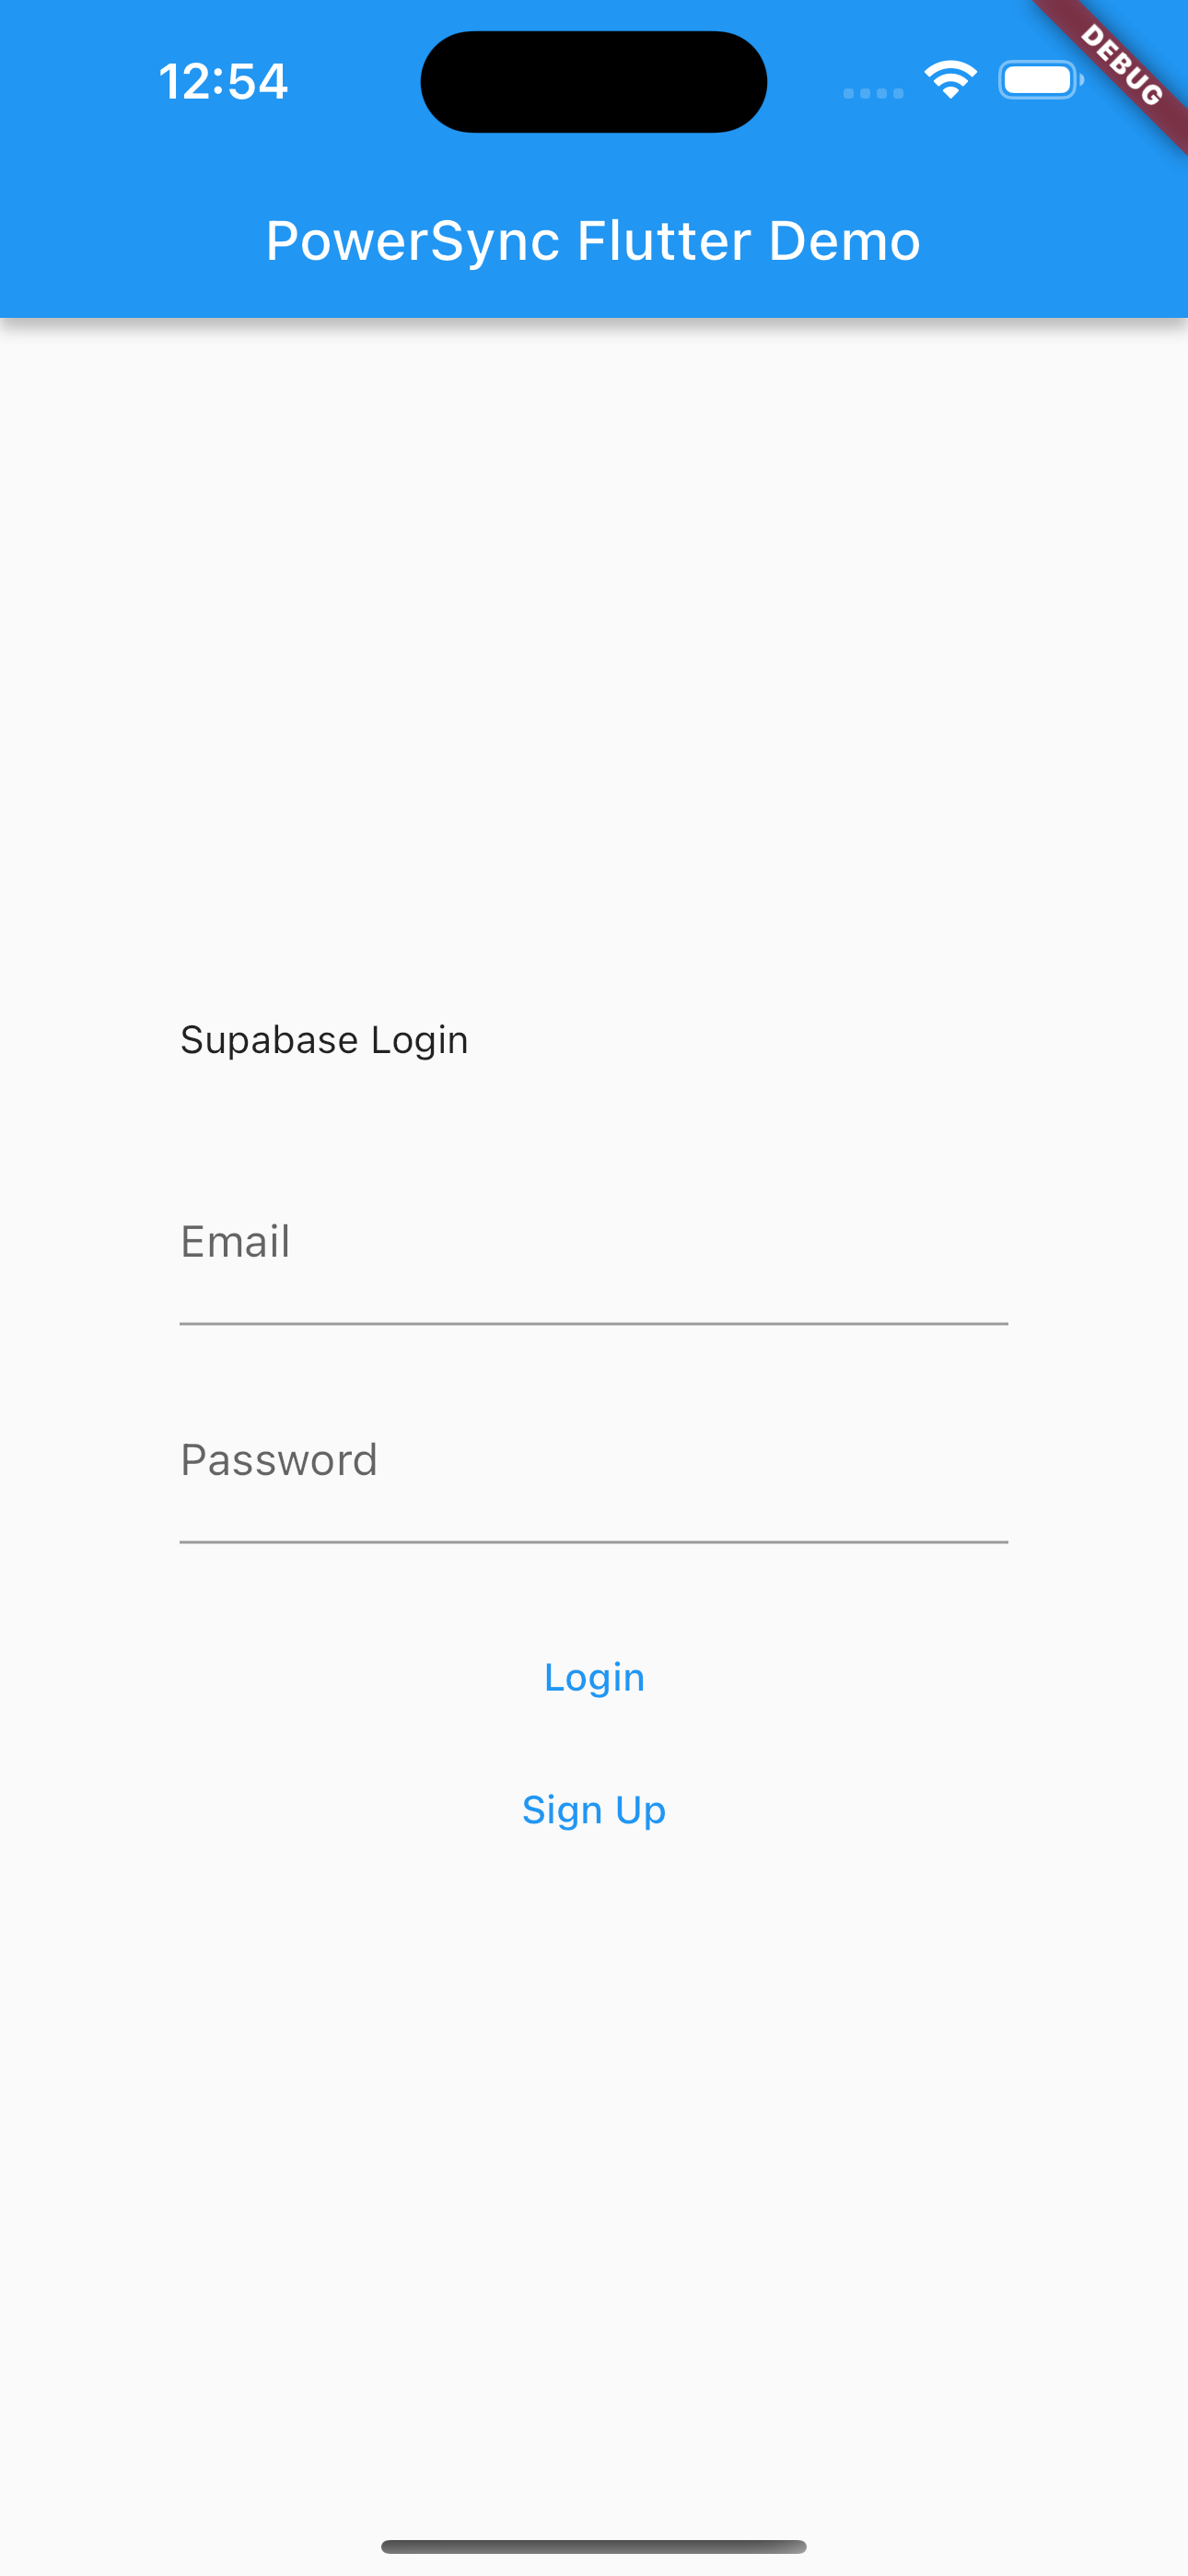
Test the configuration using our provided PowerSync-Supabase ‘To-Do List’ demo app with your framework of choice.
Configure Supabase
Create a new Supabase project (or use an existing project if you prefer) and follow the below steps.Before You Start: Project Creation Settings
When you create a new Supabase project, two settings on the project creation screen affect how the demo app behaves. Reviewing them now saves debugging later. Automatically expose new tables and functions This controls whether tables you create in thepublic schema are reachable via the Supabase Data API. The Data API is the auto-generated REST and GraphQL layer that the Supabase client libraries (such as supabase-js) call. In this integration, PowerSync handles the download path by replicating data from Postgres to client SQLite databases, but client writes still go back to Postgres through the Data API using supabase-js. If the tables are not exposed, the demo app cannot write changes back to your database. Supabase is rolling out a new default:
- From April 28, 2026: the setting is available as an opt-in. New projects can choose to require explicit
grantstatements. - From May 30, 2026: the new default for all new projects is that tables in
publicare not exposed to the Data API on creation. - From October 30, 2026: the new default is enforced on all existing projects.
grant statements, so the demo app works under either default. See this for more details.
Enable automatic RLS
This adds an event trigger that automatically enables Row Level Security on every new table created in the public schema. Enabling it is recommended because RLS is the authoritative security layer for any writes that reach Postgres through the Data API. If you leave it disabled, you can still enable RLS per table as the schema SQL in this guide does.
Create the Demo Database Schema
To set up the Postgres database for our To-Do List demo app, we will create two new tables:lists and todos. The demo app will have access to these tables even while offline.
Run the below SQL statements in your Supabase SQL Editor:
Grants and RLS do different jobs, and you need both. Grants control which Postgres roles can touch a table through the Data API. Without a grant,
supabase-js returns a 42501: permission denied for table error before RLS is ever evaluated. RLS runs after the grant succeeds and filters which rows that role can read or modify. Skipping RLS means any user with the anon or authenticated key can read and write every row.This guide grants authenticated because the demo app requires sign-in. The anon role is intentionally left ungranted. If you wanted to expose a table for public read-only access (for example, a shared catalog visible to signed-out users), you would add grant select on public.your_table to anon along with an RLS policy scoping which rows anon can read.Create a PowerSync Database User
PowerSync uses the Postgres Write Ahead Log (WAL) to replicate data changes in order to keep PowerSync SDK clients up to date. Run the below SQL statement in your Supabase SQL Editor to create a Postgres role/user with replication privileges:SELECT privilege, and for the publication mentioned in the next step (as well as for any other publications that may exist).
Create the Postgres Publication
Run the below SQL statement in your Supabase SQL Editor to create a Postgres publication:Configure PowerSync
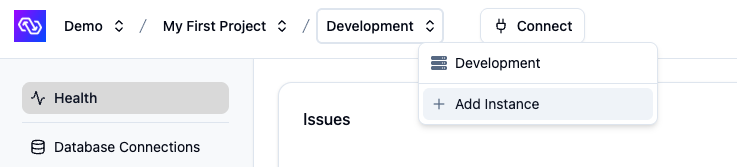
Create a PowerSync Cloud Instance
When creating a project in the PowerSync Dashboard, Development and Production instances of the PowerSync Service will be created by default. Select the instance you want to configure. If you need to create a new instance, follow the steps below.- In the dashboard, select your project and open the instance selection dropdown. Click Add Instance.
- Give your instance a name, such as “Production”.
- [Optional] You can change the default cloud region from US to EU, JP (Japan), AU (Australia) or BR (Brazil) if desired.
- Note: Additional cloud regions will be considered on request, especially for customers on our Enterprise plan. Please contact us if you need a different region.
- Click Create Instance.
Connect PowerSync to Your Supabase
-
From your Supabase Dashboard, select Connect in the top navigation bar (or follow this link):
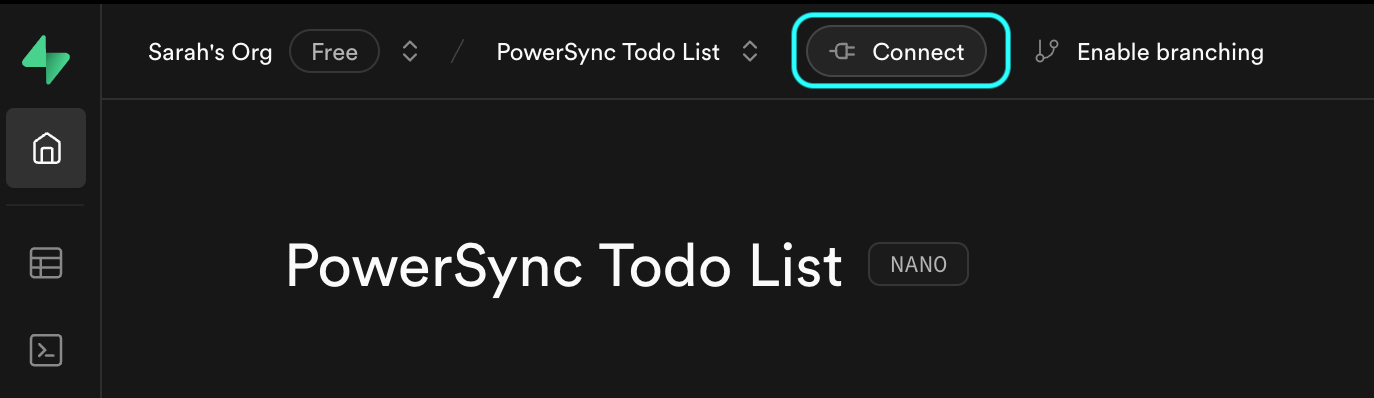
-
In the Direct connection section, copy the complete connection string (including the
[YOUR-PASSWORD]placeholder):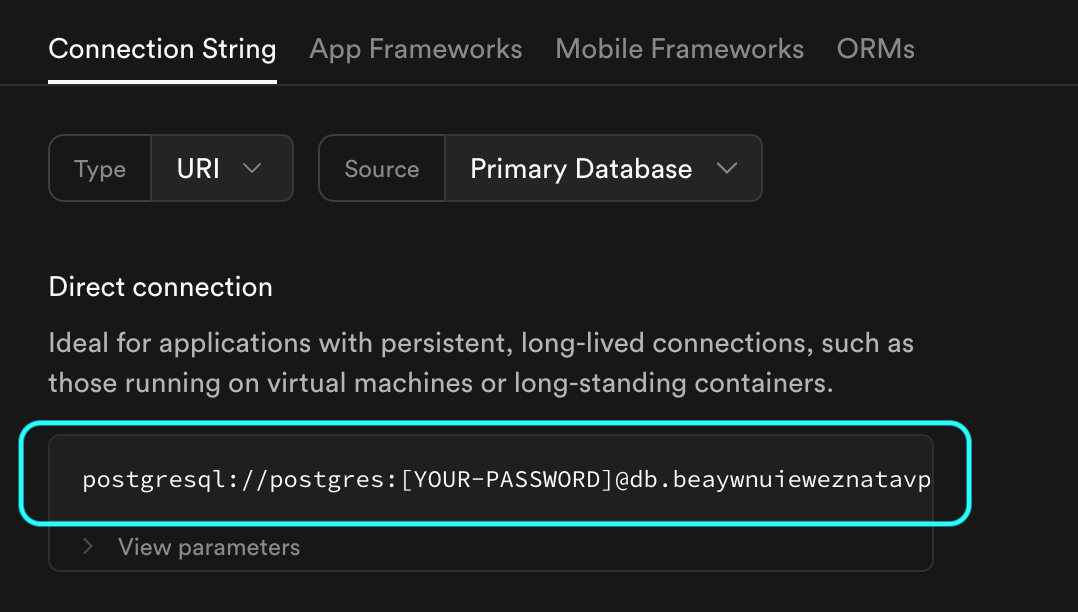
- In the PowerSync Dashboard, select your project and instance and go to Database Connections.
- Click Connect to Source Database and ensure the Postgres tab is selected.
- Paste the connection string into the URI field. PowerSync will automatically parse this URI to populate the database connection details.
-
Update the Username and Password fields to use the
powersync_roleand password you created when configuring your Supabase for PowerSync (see Source Database Setup). -
Note: PowerSync includes Supabase’s CA certificate by default, so you can use
verify-fullSSL mode without additional configuration.
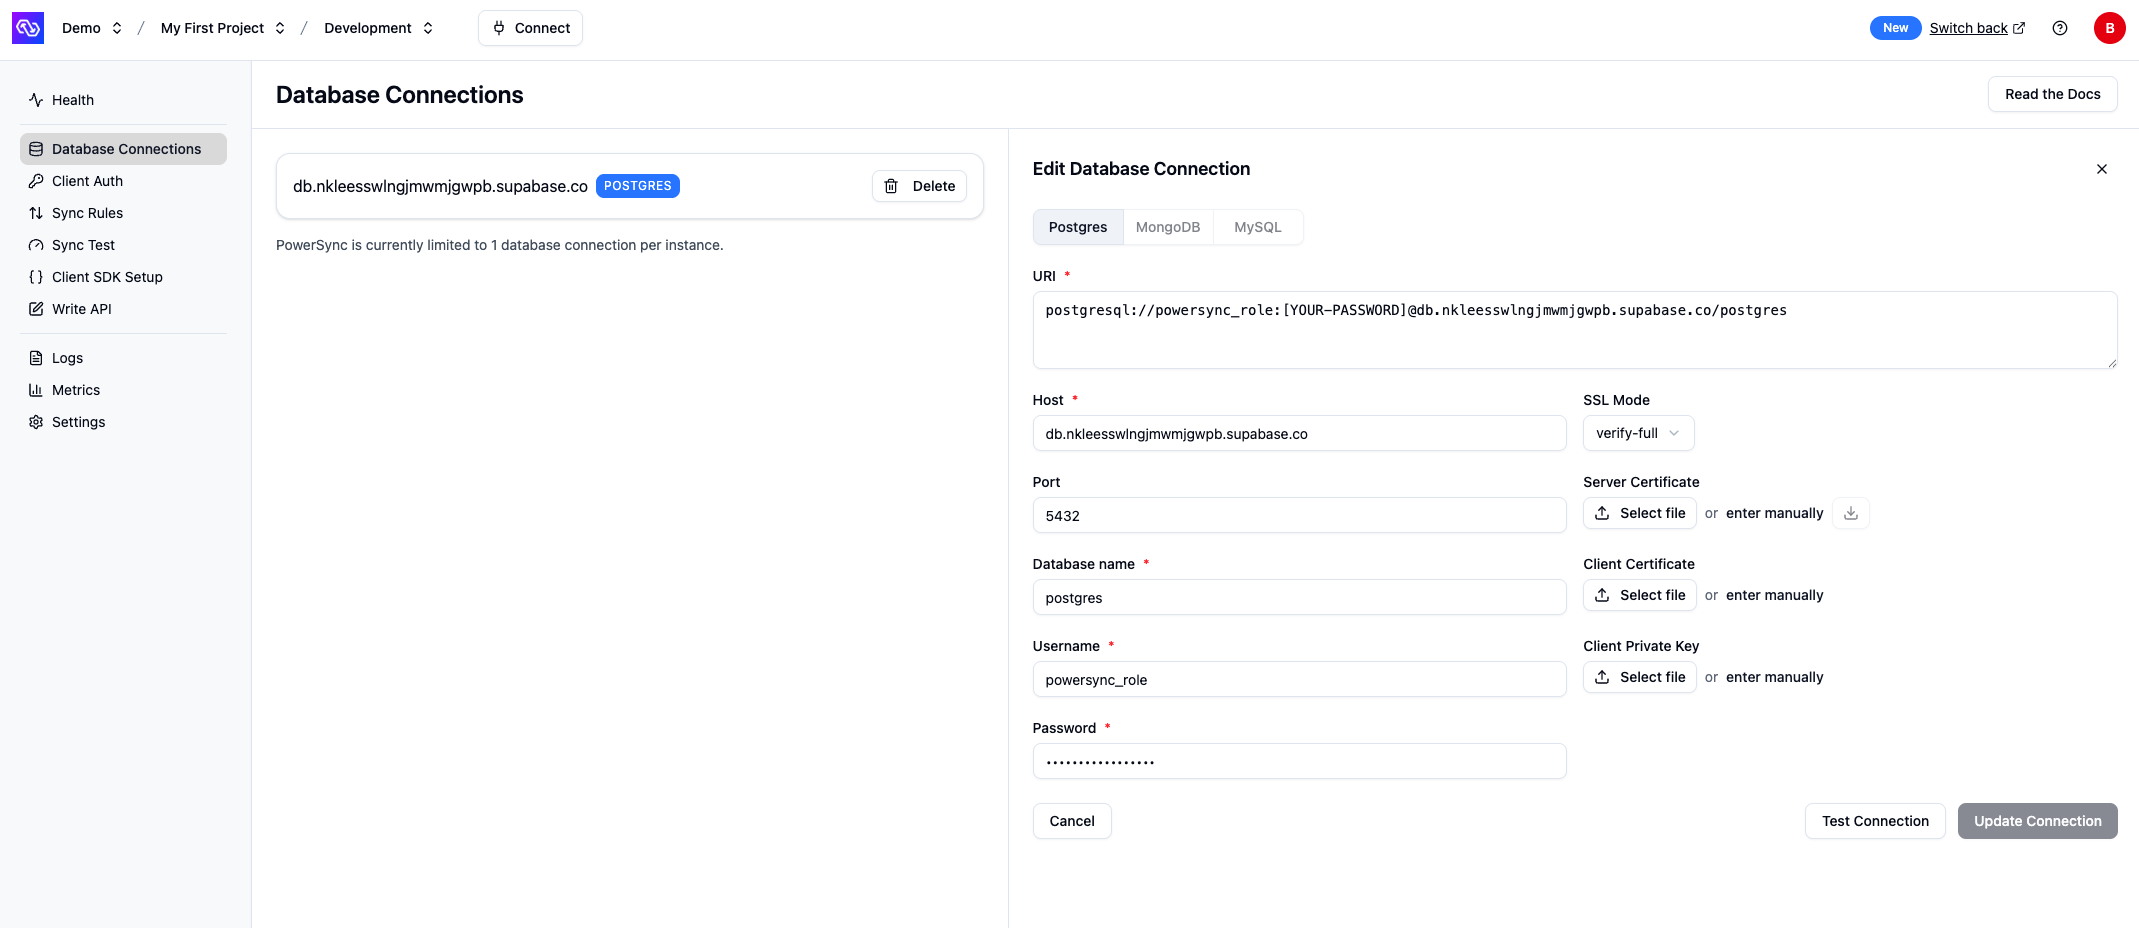
Your Supabase connection details should look similar to this.
- Verify your setup by clicking Test Connection and resolve any errors.
- Click Save Connection.
Enable Supabase Auth
After your database connection is configured, enable Supabase Auth:- In the PowerSync Dashboard, go to Client Auth for your instance.
- Enable the Use Supabase Auth checkbox.
- If your Supabase project uses the legacy JWT signing keys, copy your JWT Secret from your Supabase project’s settings (JWT Keys) and paste the secret into the Supabase JWT Secret (optional) Legacy field in the PowerSync Dashboard. If you’re using Supabase’s new JWT signing keys, you can leave this field empty (PowerSync will auto-configure the JWKS endpoint for your project).
- Click Save and Deploy to apply the changes.
Configure Sync Streams
Sync Streams (or legacy Sync Rules) allow developers to control which data gets synced to which user devices using a SQL-like syntax in a YAML file. For the demo app, we’re going to specify that each user can only see their own to-do lists and list items.- In the PowerSync Dashboard, select your project and instance and go to the Sync Streams view (shown as Sync Rules if using legacy Sync Rules).
- Edit the Sync Streams in the editor and replace the contents with the below:
- Sync Streams (Recommended)
- Sync Rules (Legacy)
- Click “Validate” and ensure there are no errors. This validates your Sync Config against your Postgres database.
- Click “Deploy” to deploy your Sync Config.
Test Everything (Using Our Demo App)
In this step you’ll test your setup using a ‘To-Do List’ demo app provided by PowerSync.Clone the Demo App
Clone the demo app based on your framework:Configure the Demo App to Use Your PowerSync Instance
Locate the relevant config file for your framework:Supabase has replaced the legacy anon key with publishable keys (prefixed
sb_publishable_…) by default on new projects. The demos still read environment variables named SUPABASE_ANON_KEY / supabaseAnonKey, but the value is interchangeable: paste your publishable key into the same variable. Existing projects that still use legacy JWT keys can continue to use the anon key directly.- In the relevant config file, replace the values for
supabaseUrl(from the Project URL section in the Supabase dashboard) andsupabaseAnonKey(from the API Keys section in the Supabase dashboard). - For the value of
powersyncUrl, click Connect in the top bar of the PowerSync Dashboard and copy the instance URL from the dialog.
Run the App
For ease of use of the demo app, you can disable email confirmation in your Supabase Auth settings. In your Supabase project, go to “Authentication” -> “Providers” -> “Email” and then disable “Confirm email”. If you keep email confirmation enabled, the Supabase user confirmation email will reference the default Supabase Site URL of
http://localhost:3000 — you can ignore this.