powersync_attachments_helper package for Flutter. This guide uses Supabase Storage as the remote storage provider to store and serves photos. Other media types, like PDFs, and storage providers, are also supported.
At a high level, the [powersync_attachments_helper] package syncs attachments by:
- Storing files locally on the device in a structured way, linking them to specific database records.
- Maintaining attachment metadata in the local SQLite database to track the sync state of each attachment.
- Managing uploads, downloads, and retries through a local attachment queue to ensure local files stay in sync with remote storage.
- Providing a file operations API with methods to add, remove, and retrieve attachments.
Prerequisites
To follow this guide, ensure you have completed the FlutterFlow + PowerSync integration guide. At minimum, you should have implemented everything up to step 4, which involves reading data where your app’slists are displayed and clickable.
Update schema to track attachments
Here we add aphoto_id column to the lists table to link a photo to a list.
Update Supabase schema
- In your Supabase dashboard, run the below SQL statement in your Supabase SQL Editor to add the
photo_idcolumn to theliststable: - In FlutterFlow, under “App Settings” -> “Integrations”, click “Get Schema”.
Update PowerSync schema
The schema of the local SQLite database should now be updated to include the newphoto_id column. Additionally, we need to set up a local-only table to store the metadata of photos which is being managed by the helper package.
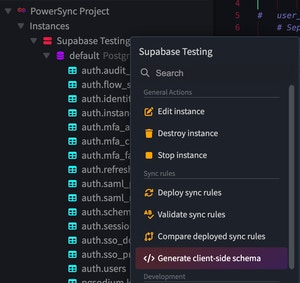
- In the PowerSync Dashboard, select your project and instance and click the Connect button in the top bar to generate the client-side schema based on your Sync Rules. Select “FlutterFlow” as the language.
- In FlutterFlow, under “App Settings” -> “Project Dependencies” -> “FlutterFlow Libraries”, click “View Details” of the PowerSync library.
- Copy and paste the generated schema into the “PowerSyncSchema” field.
Configure Supabase Storage
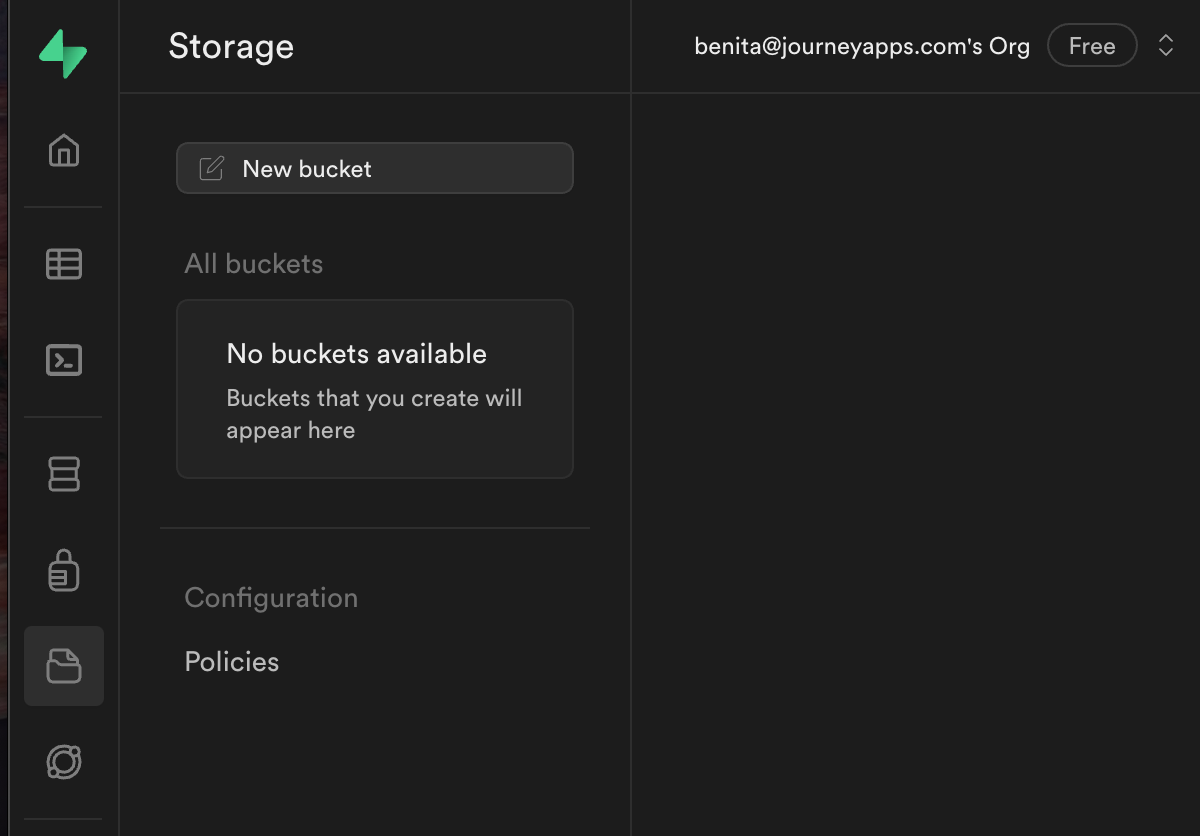
- To configure Supabase Storage for your app, navigate to the Storage section of your Supabase project and create a new bucket:
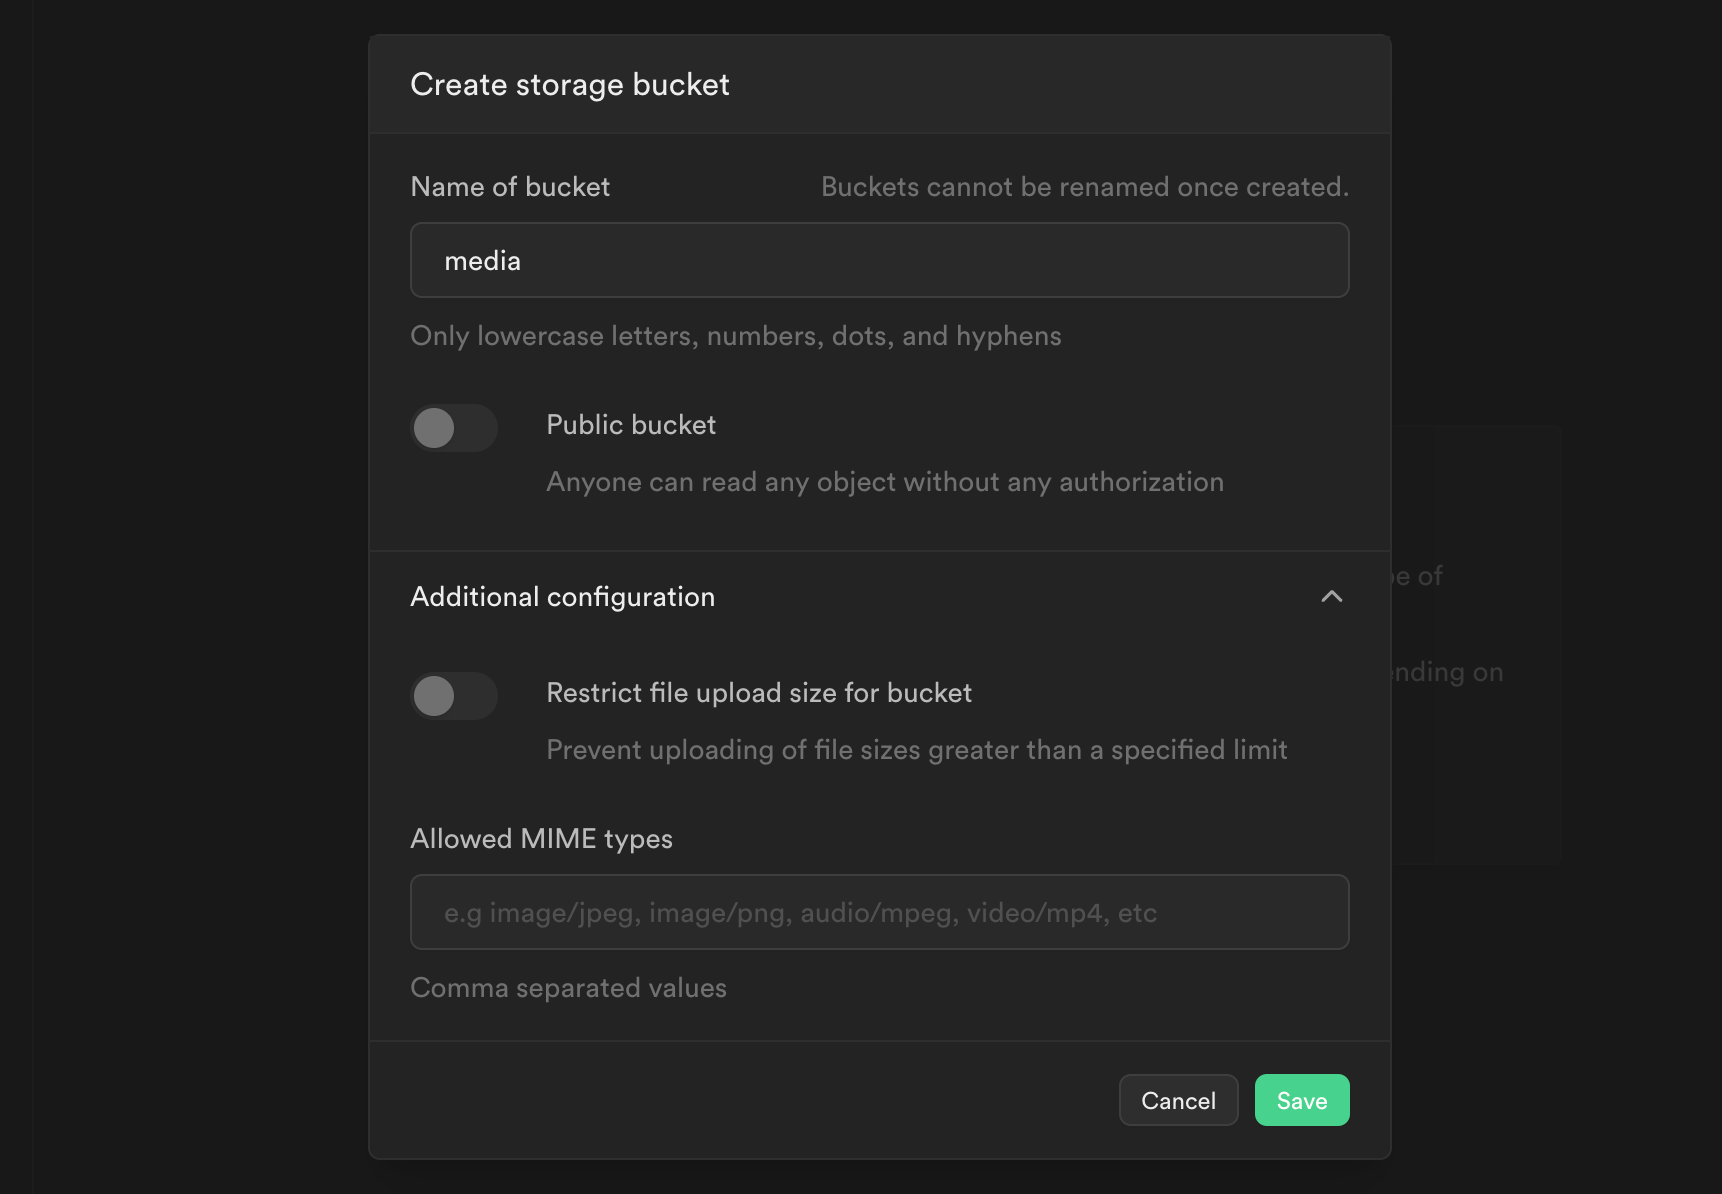
- Give the storage bucket a name, such as media, and hit “Save”.
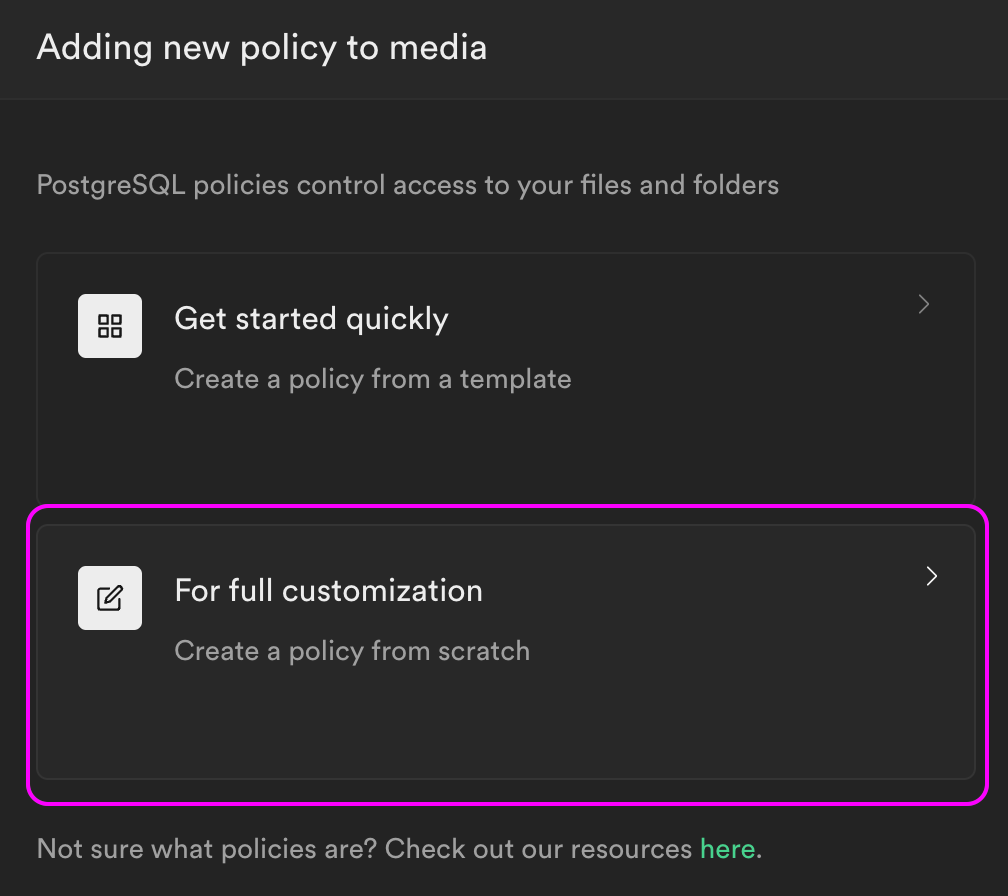
- Next, configure a policy for this bucket. For the purpose of this demo, we will allow all user operations on the media bucket.
- Create a new policy for the media bucket:

- Give the new policy a name, and allow SELECT, INSERT, UPDATE, and DELETE.
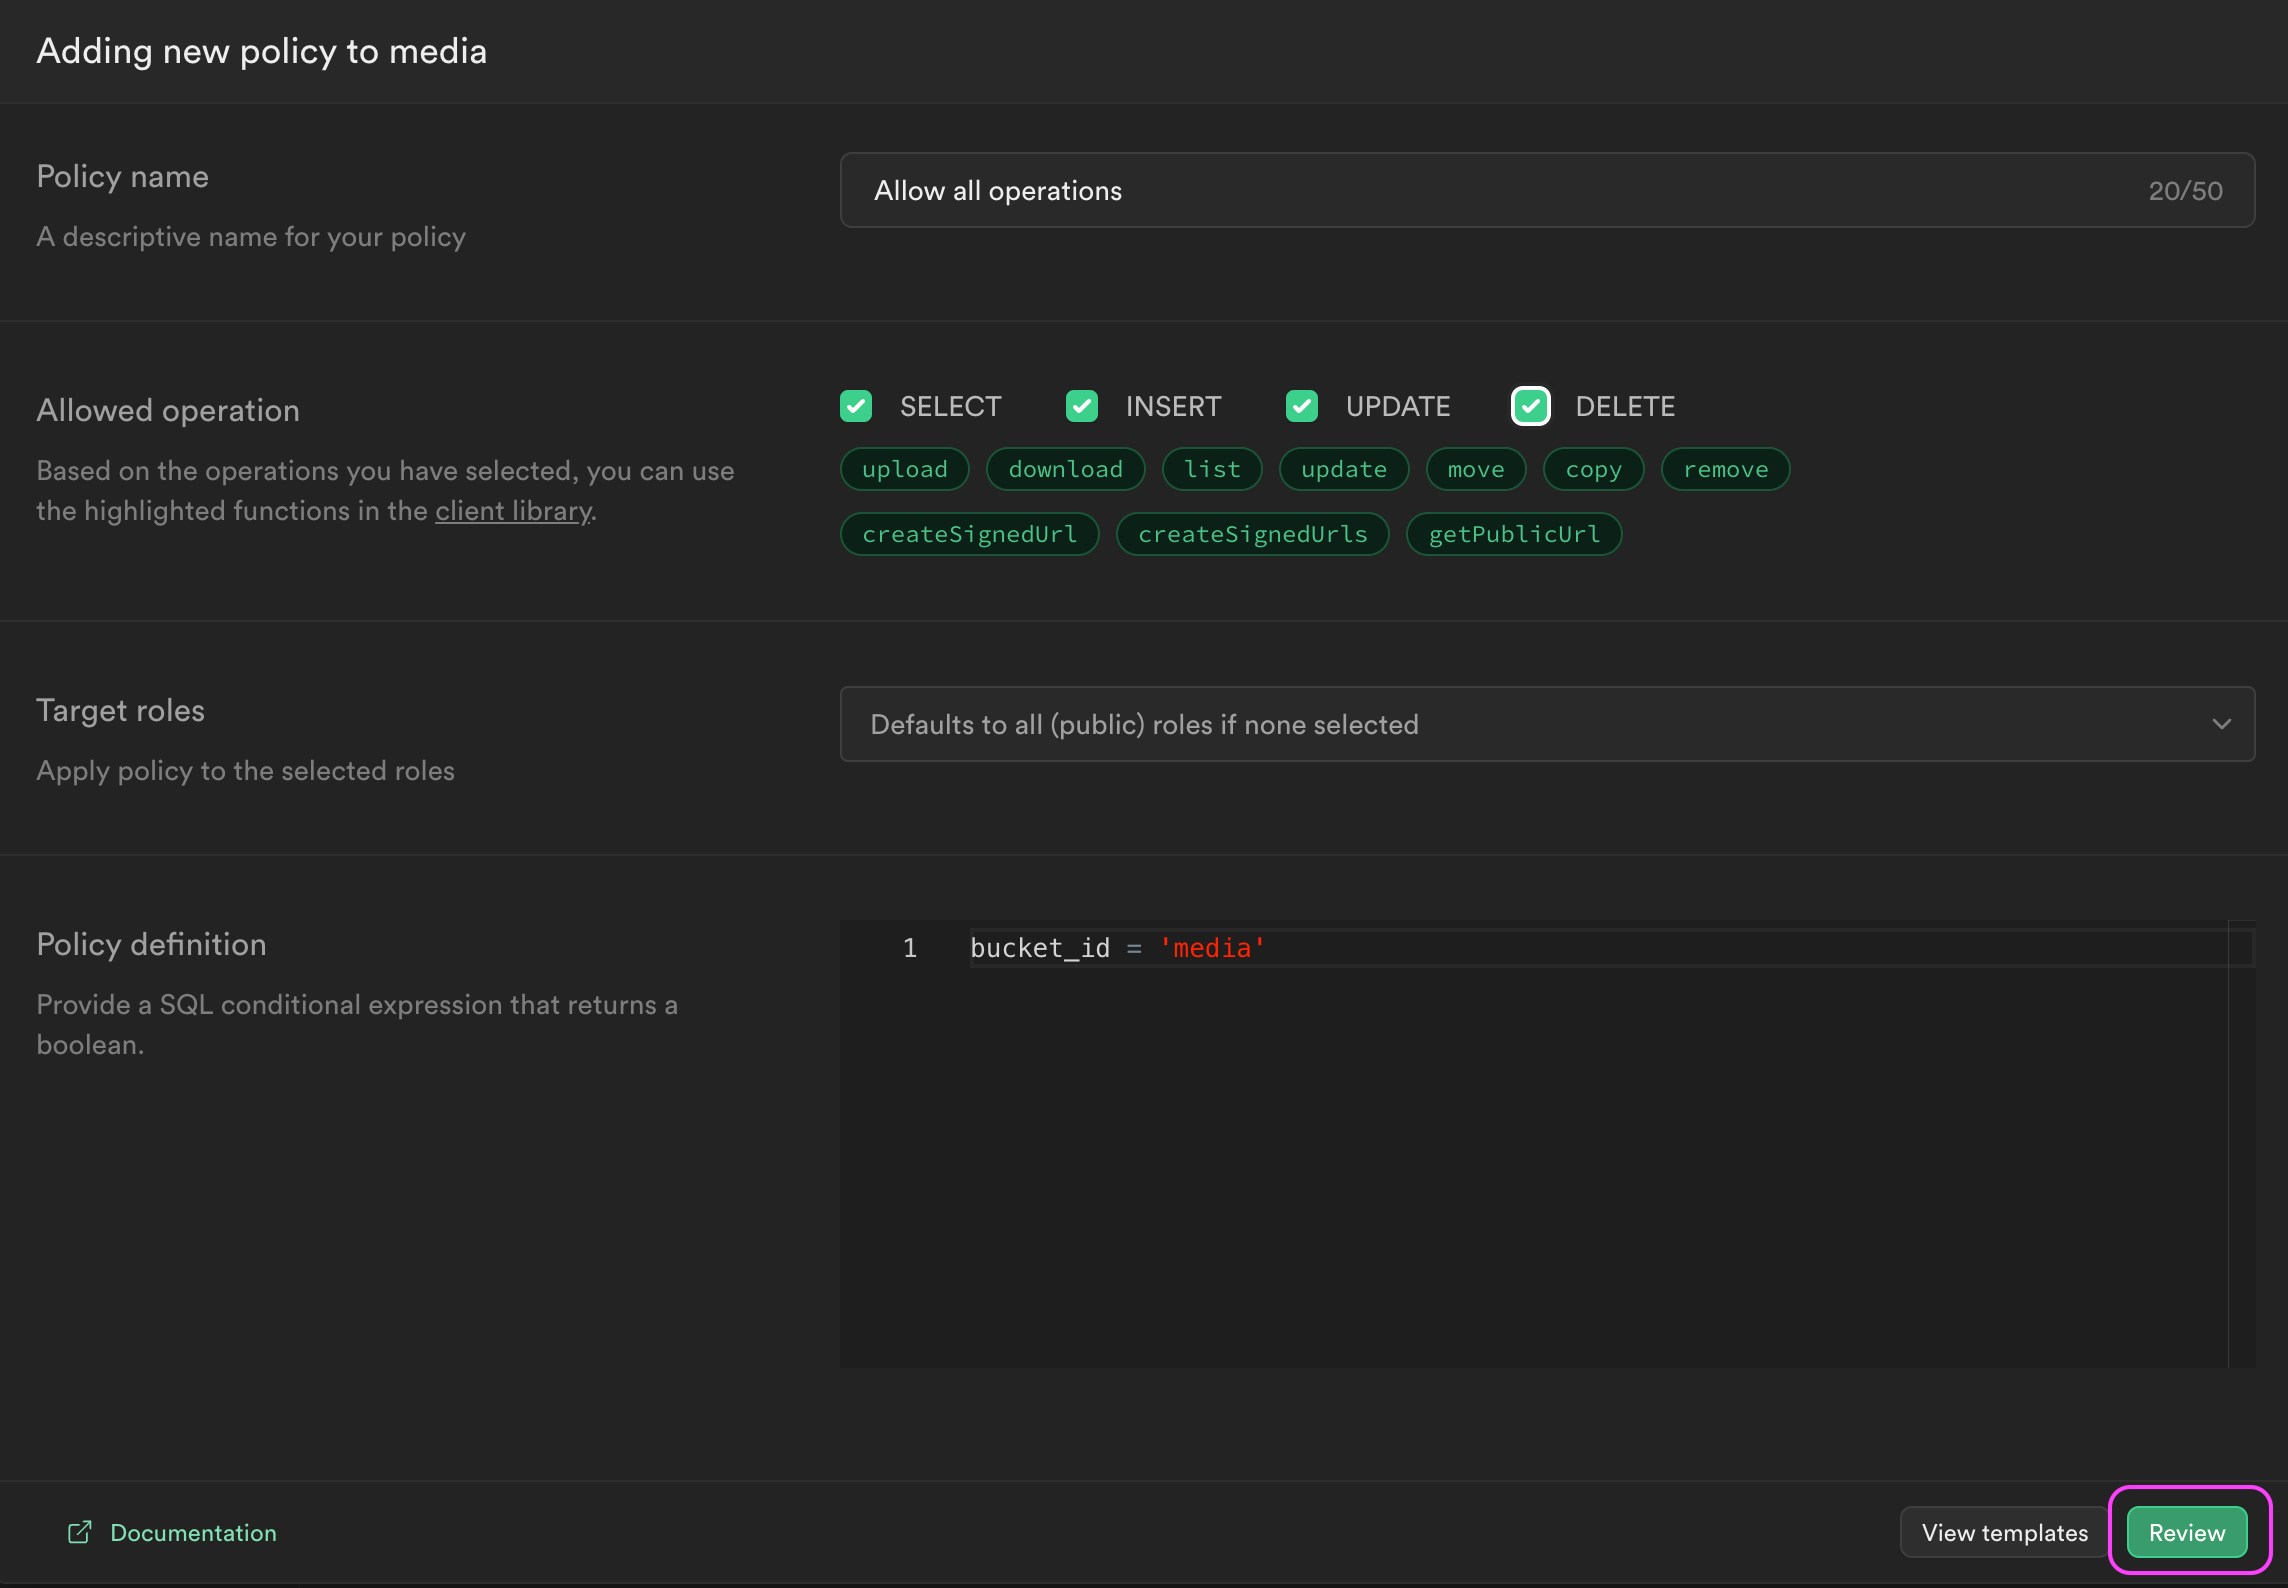
- Proceed to review and save the policy.
- Finally, back in FlutterFlow, create an App Constant to store the bucket name:
- Under “App Values” -> “Constants”, click “Add App Constant”.
- Set “Constant Name” to
supabaseStorageBucket. - Click “Create”.
- Set the “Value” to the name of your Supabase Storage bucket, e.g.
media.

Add the PowerSync Attachments Helper to your project
- Under “App Settings” -> “Project Dependencies” -> “Custom Pub Dependencies” click “Add Pub Dependency”.
- Enter
powersync_attachments_helper: ^0.6.18. - Click “Add”.
Create setUpAttachments Custom Action
This creates an attachment queue which is responsible for tracking, storing and synching attachment metadata and CRUD operations.
- Navigate to “Custom Code” and add a Custom Action.
-
Name the action
setUpAttachments. -
Add the following code:
In the below code,
power_sync_b0w5r9is the project ID of the PowerSync library. Update it if it changes. - Click “Save Action”.
Add Final Actions to your main.dart
We need to call initializePowerSync from the Library to create the PowerSync database, and then call setUpAttachments to create the attachments queue. These actions need to happen in this specific order since setUpAttachments depends on having the database ready.
- Still under Custom Code, select
main.dart. Under File Settings -> Final Actions, click the plus icon. - Select
initializePowerSync. - Click the plus icon again, and select
setUpAttachments.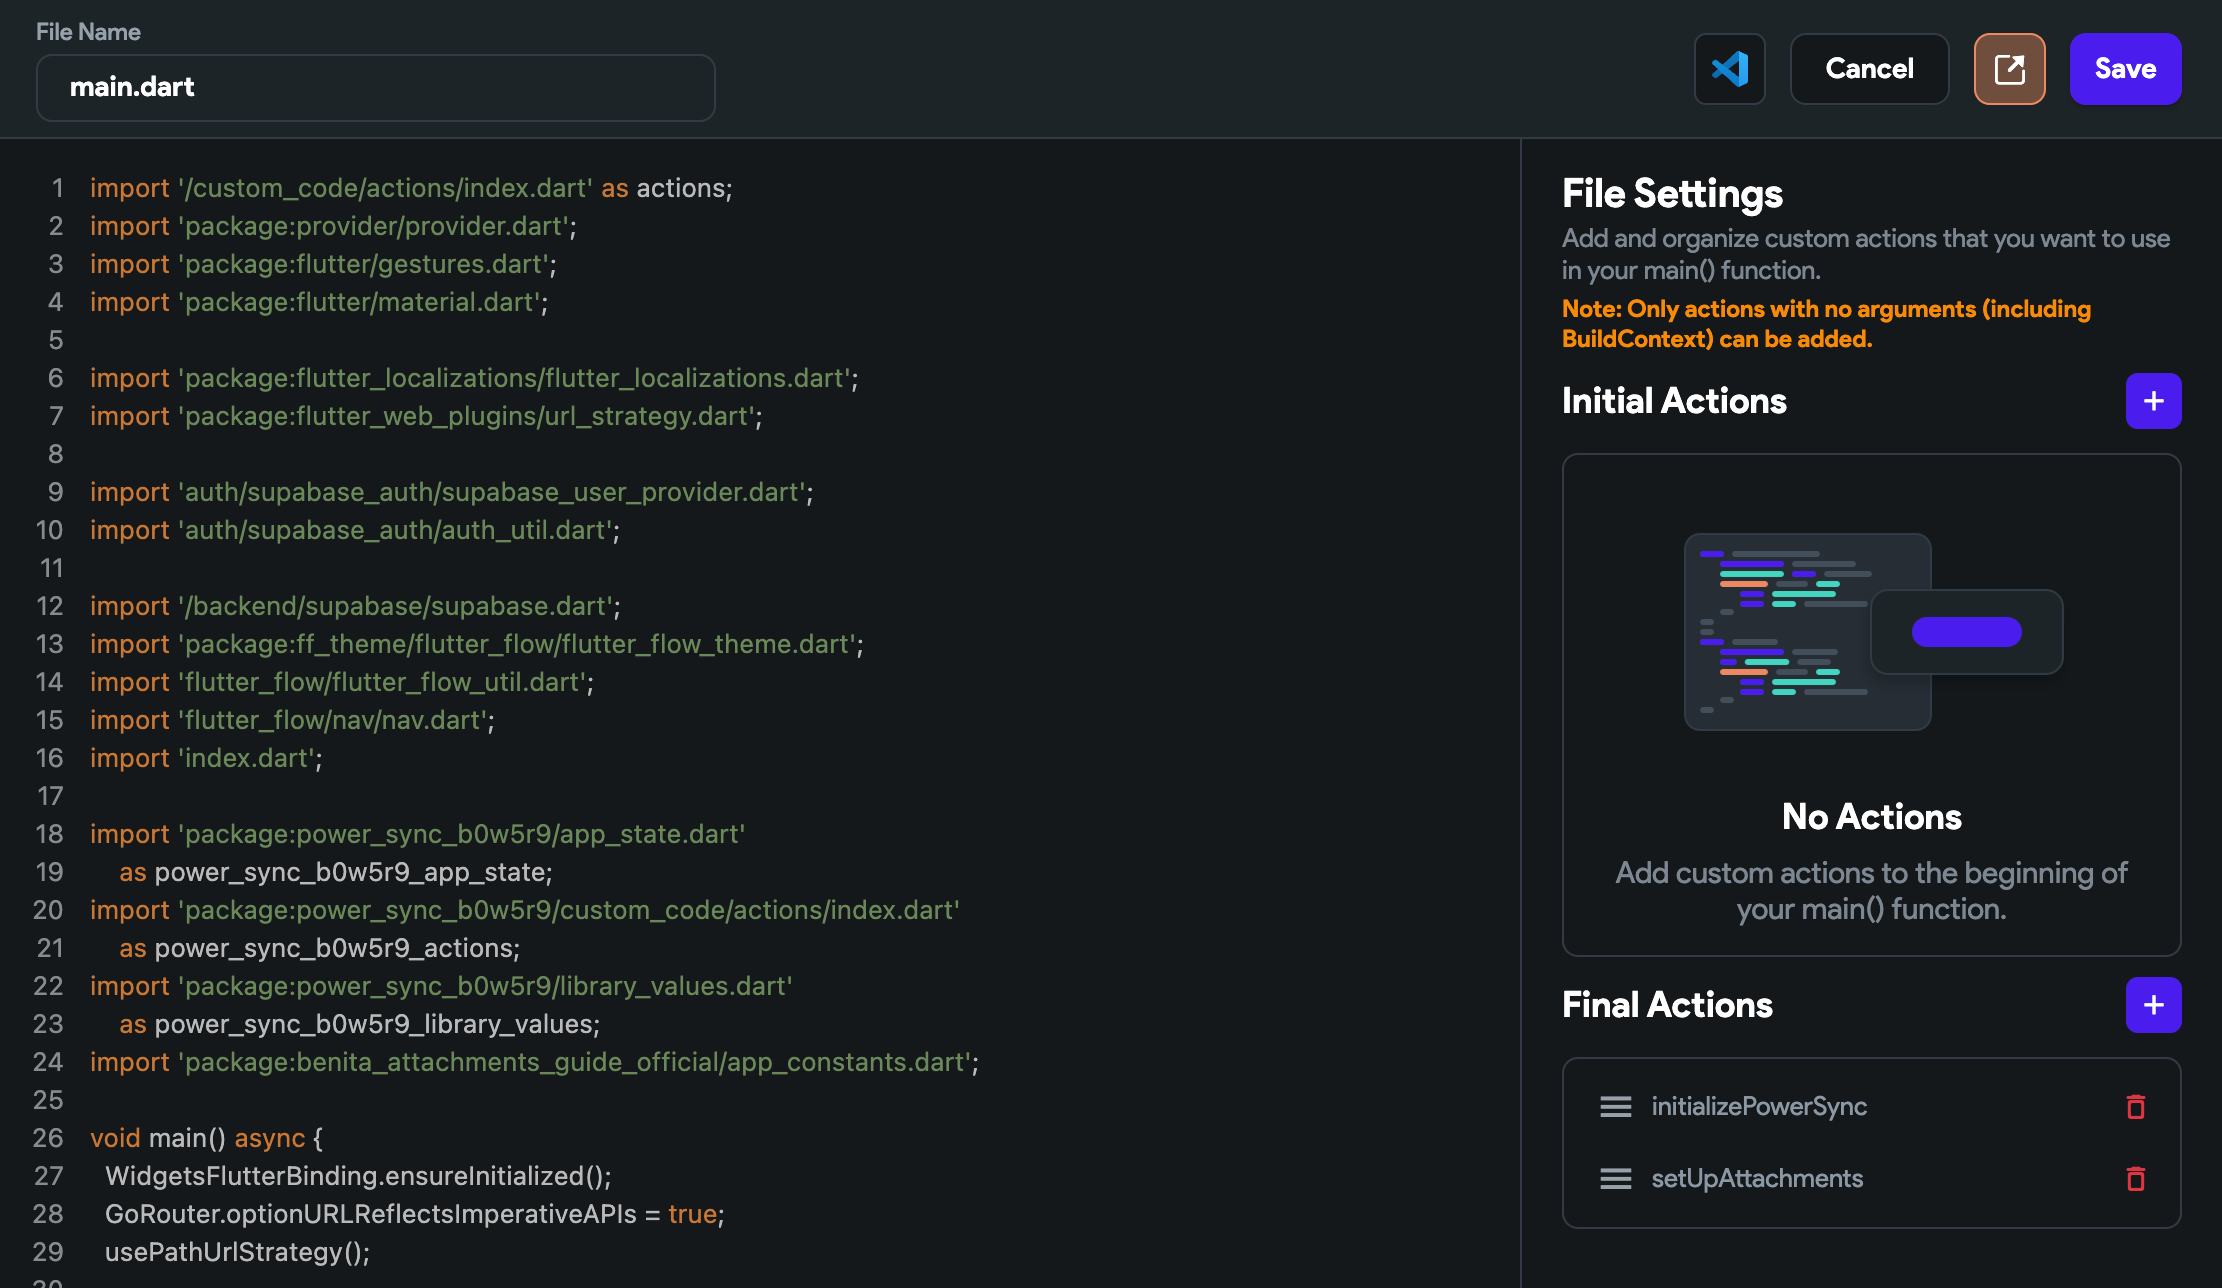
- Save your changes.
Create resolveItemPicture Custom Action (downloads)
This action handles downloads by taking an attachment ID and returning an UploadedFile, which is FLutterFlow’s representation of an in-memory file asset. This action calls attachmentQueue.getLocalUri() and reads contents from the underlying file.
- Create another Custom Action and name it
resolveItemPicture. - Add the following code:
- Under Action Settings -> Define Arguments on the right, click “Add Arguments”.
- Set the “Name” to
id.
- Set the “Name” to
- Click “Save Action”.
- Click “Yes” when prompted about parameters in the settings not matching parameters in the code editor.
Create setItemPicture Custom Action (uploads)
This action handles uploads by passing the UploadedFile to local storage and then to the upload queue.
-
Create another Custom Action and name it
setItemPicture. -
Add the following code:
In the below code,
power_sync_b0w5r9is the project ID of the PowerSync library. Update it if it changes. -
Under Action Settings -> Define Arguments on the right, click “Add Arguments”.
- Set the “Name” to
picture. - Under “Type” select “UploadedFile”.
- Set the “Name” to
-
Click “Add Arguments” again.
- Set the “Name” to
applyToDatabase. - Under “Type” select “Action”.
- Add an Action Parameter.
- Set the “Name” to
photoId. - Set its “Type” to “String”.
- Set the “Name” to
- Click “Save Action”.
- Click “Yes” when prompted about parameters in the settings not matching parameters in the code editor.
-
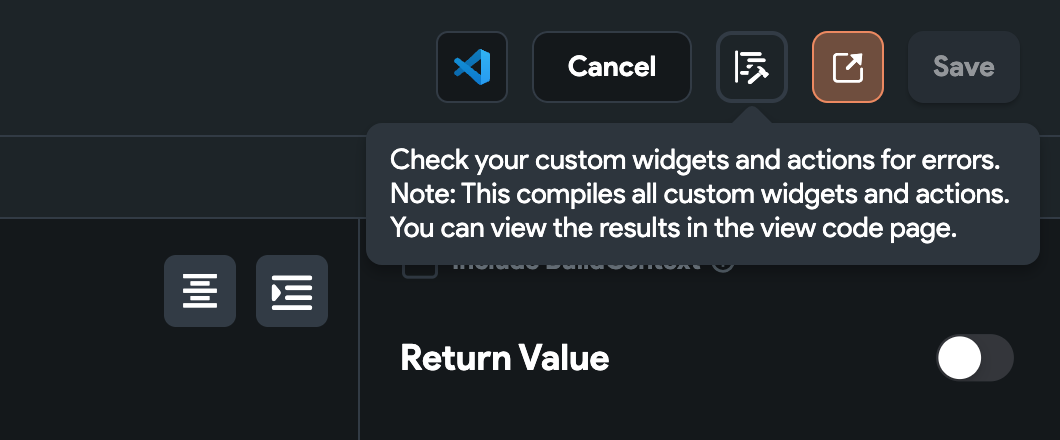
Check the Custom Actions for any errors.
Create a Custom Component to display and upload photos
Next, we’ll create a custom component that displays an image and includes a button to upload or replace the image file. You can use this component throughout your app wherever you need to display and update images.Create the UI widgets of the component
- Under the “Page Selector”, click “Add Page, Component, or Flow”.
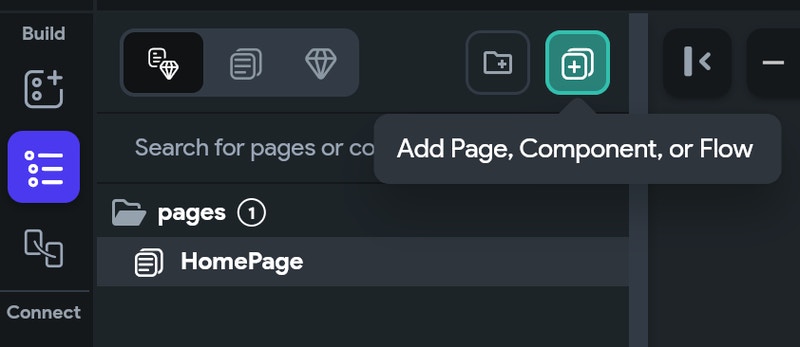
- Select the “New Component” tab.
- Select “Create Blank” and call the component
ListImage. - Under the “Widget Tree”, click on “Add a child to this widget”.
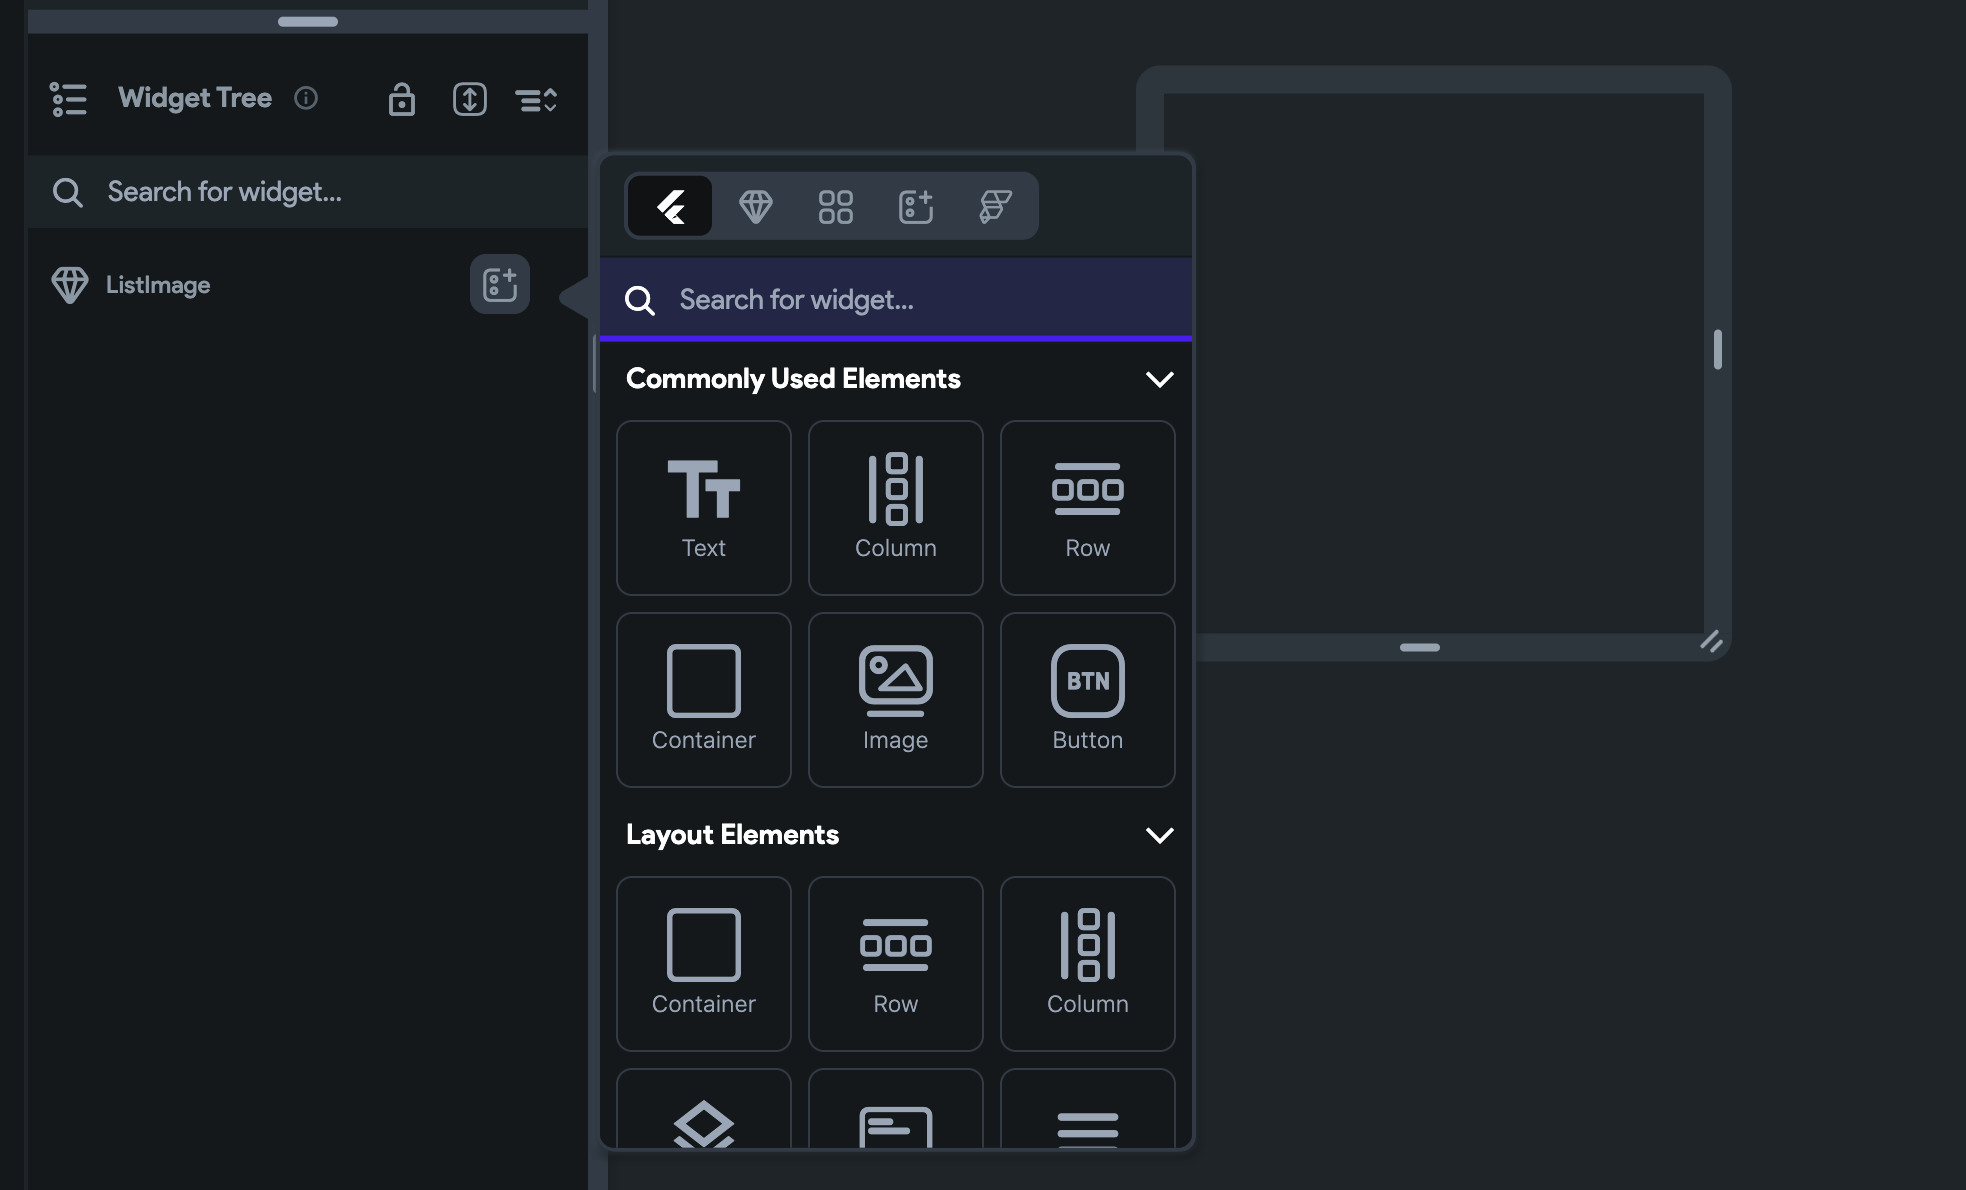
- Add the “Image” widget.
- Expand the width of the image to fill the available space.

- Click on “Add a child to this widget” for the
ListImageagain.- Add the “Button” widget.
- Select “Wrap in Column” when prompted.
Set component parameters and state variables
- Still under the “Widget Tree”, select the
ListImagecomponent.- At the top right under “Component Parameters” click “Add Parameters”.
- Click “Add Parameter”.
- Set its “Name” to
listId. - Set its “Type” to
String. - Click “Confirm”.
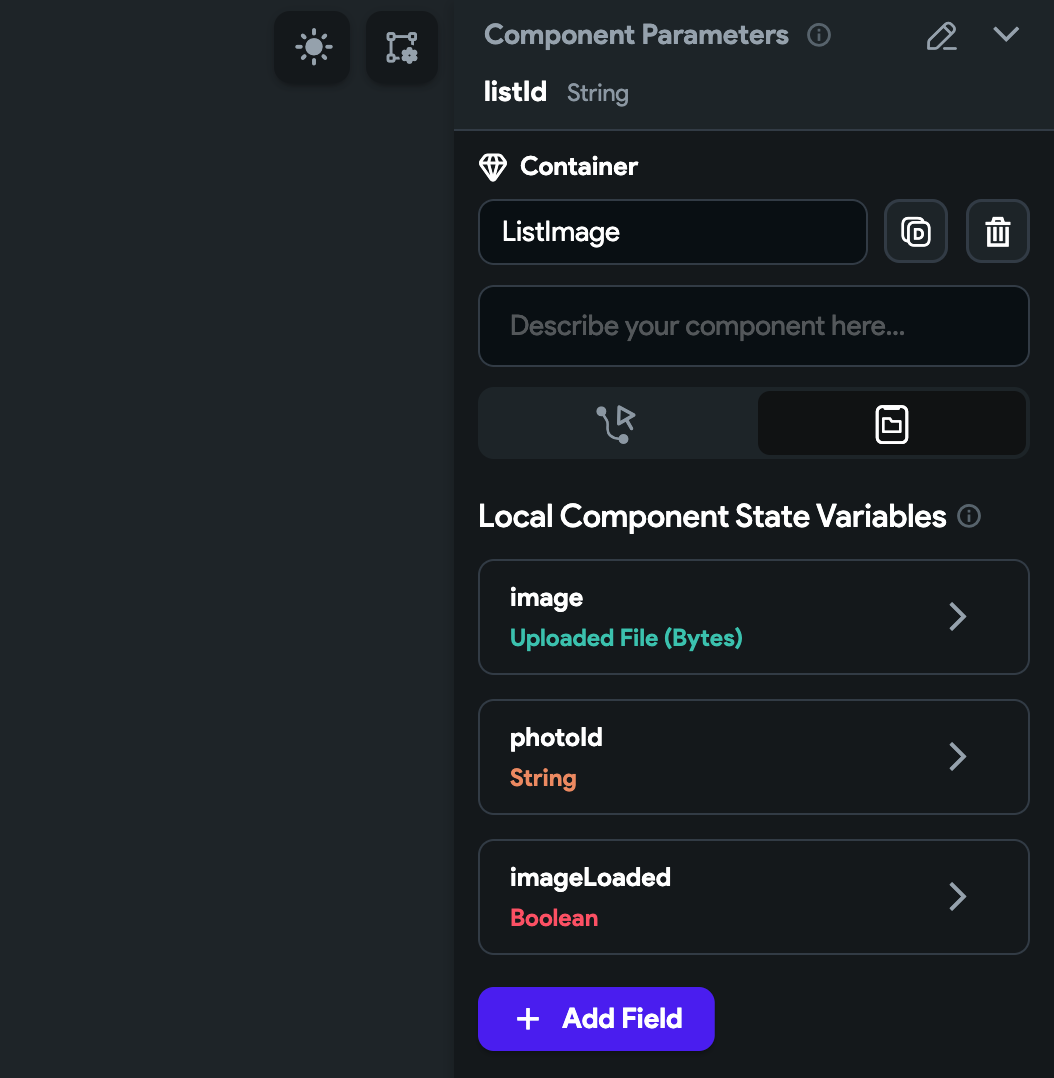
- In the same panel, add Local Component State Variables:
- Define a variable to store the image file:
- Click “Add Field”.
- Set its “Field Name” to
image. - Set its “Type” to
Uploaded File.
- Define a variable that stores the ID of the image:
- Click “Add Field” again.
- Set its “Field Name” to
photoId. - Set its “Type” to
String. - Check “Nullable.
- Define a variable that indicates whether an image is loaded or not. We’ll use this to set conditional visibility of the component:
- Click “Add Field” again.
- Set its “Field Name” to
imageLoaded. - Set its “Type” to
Boolean. - Toggle “Initial Field Value” on and off (click it twice) to set it to false.
- Click “Confirm”.
- Define a variable to store the image file:
Set conditional visibility and state
- Back under the “Widget Tree”, select the
Imagewidget.- In the “Properties” panel on the right, enable “Conditional” under “Visibility”.
- Click on “Unset”.
- Select the “Component State” ->
imageLoadedstate variable. - Click “Confirm”.
- Further down in the “Properties” panel, set the “Image Type” to “Uploaded File”.
- Select the “Component State” ->
imagestate variable. - Click “Confirm”.
- Select the “Component State” ->
- In the “Properties” panel on the right, enable “Conditional” under “Visibility”.
Define the Image widget logic
- Under the “Widget Tree”, select the “Column” component within your
ListImagecomponent.- Click “Add a child to this widget”.
- Add the “Container” widget.
- In the “Properties” panel on the right, set its “Width” and “Height” to 0 respectively. This container can be hidden.
- Back under the “Widget Tree”, click “Add a child to this widget” for the “Container”.
- Select the “Select the “Components and custom widgets imported from library projects” panel, and select the
PowerSyncStateUpdatercomponent.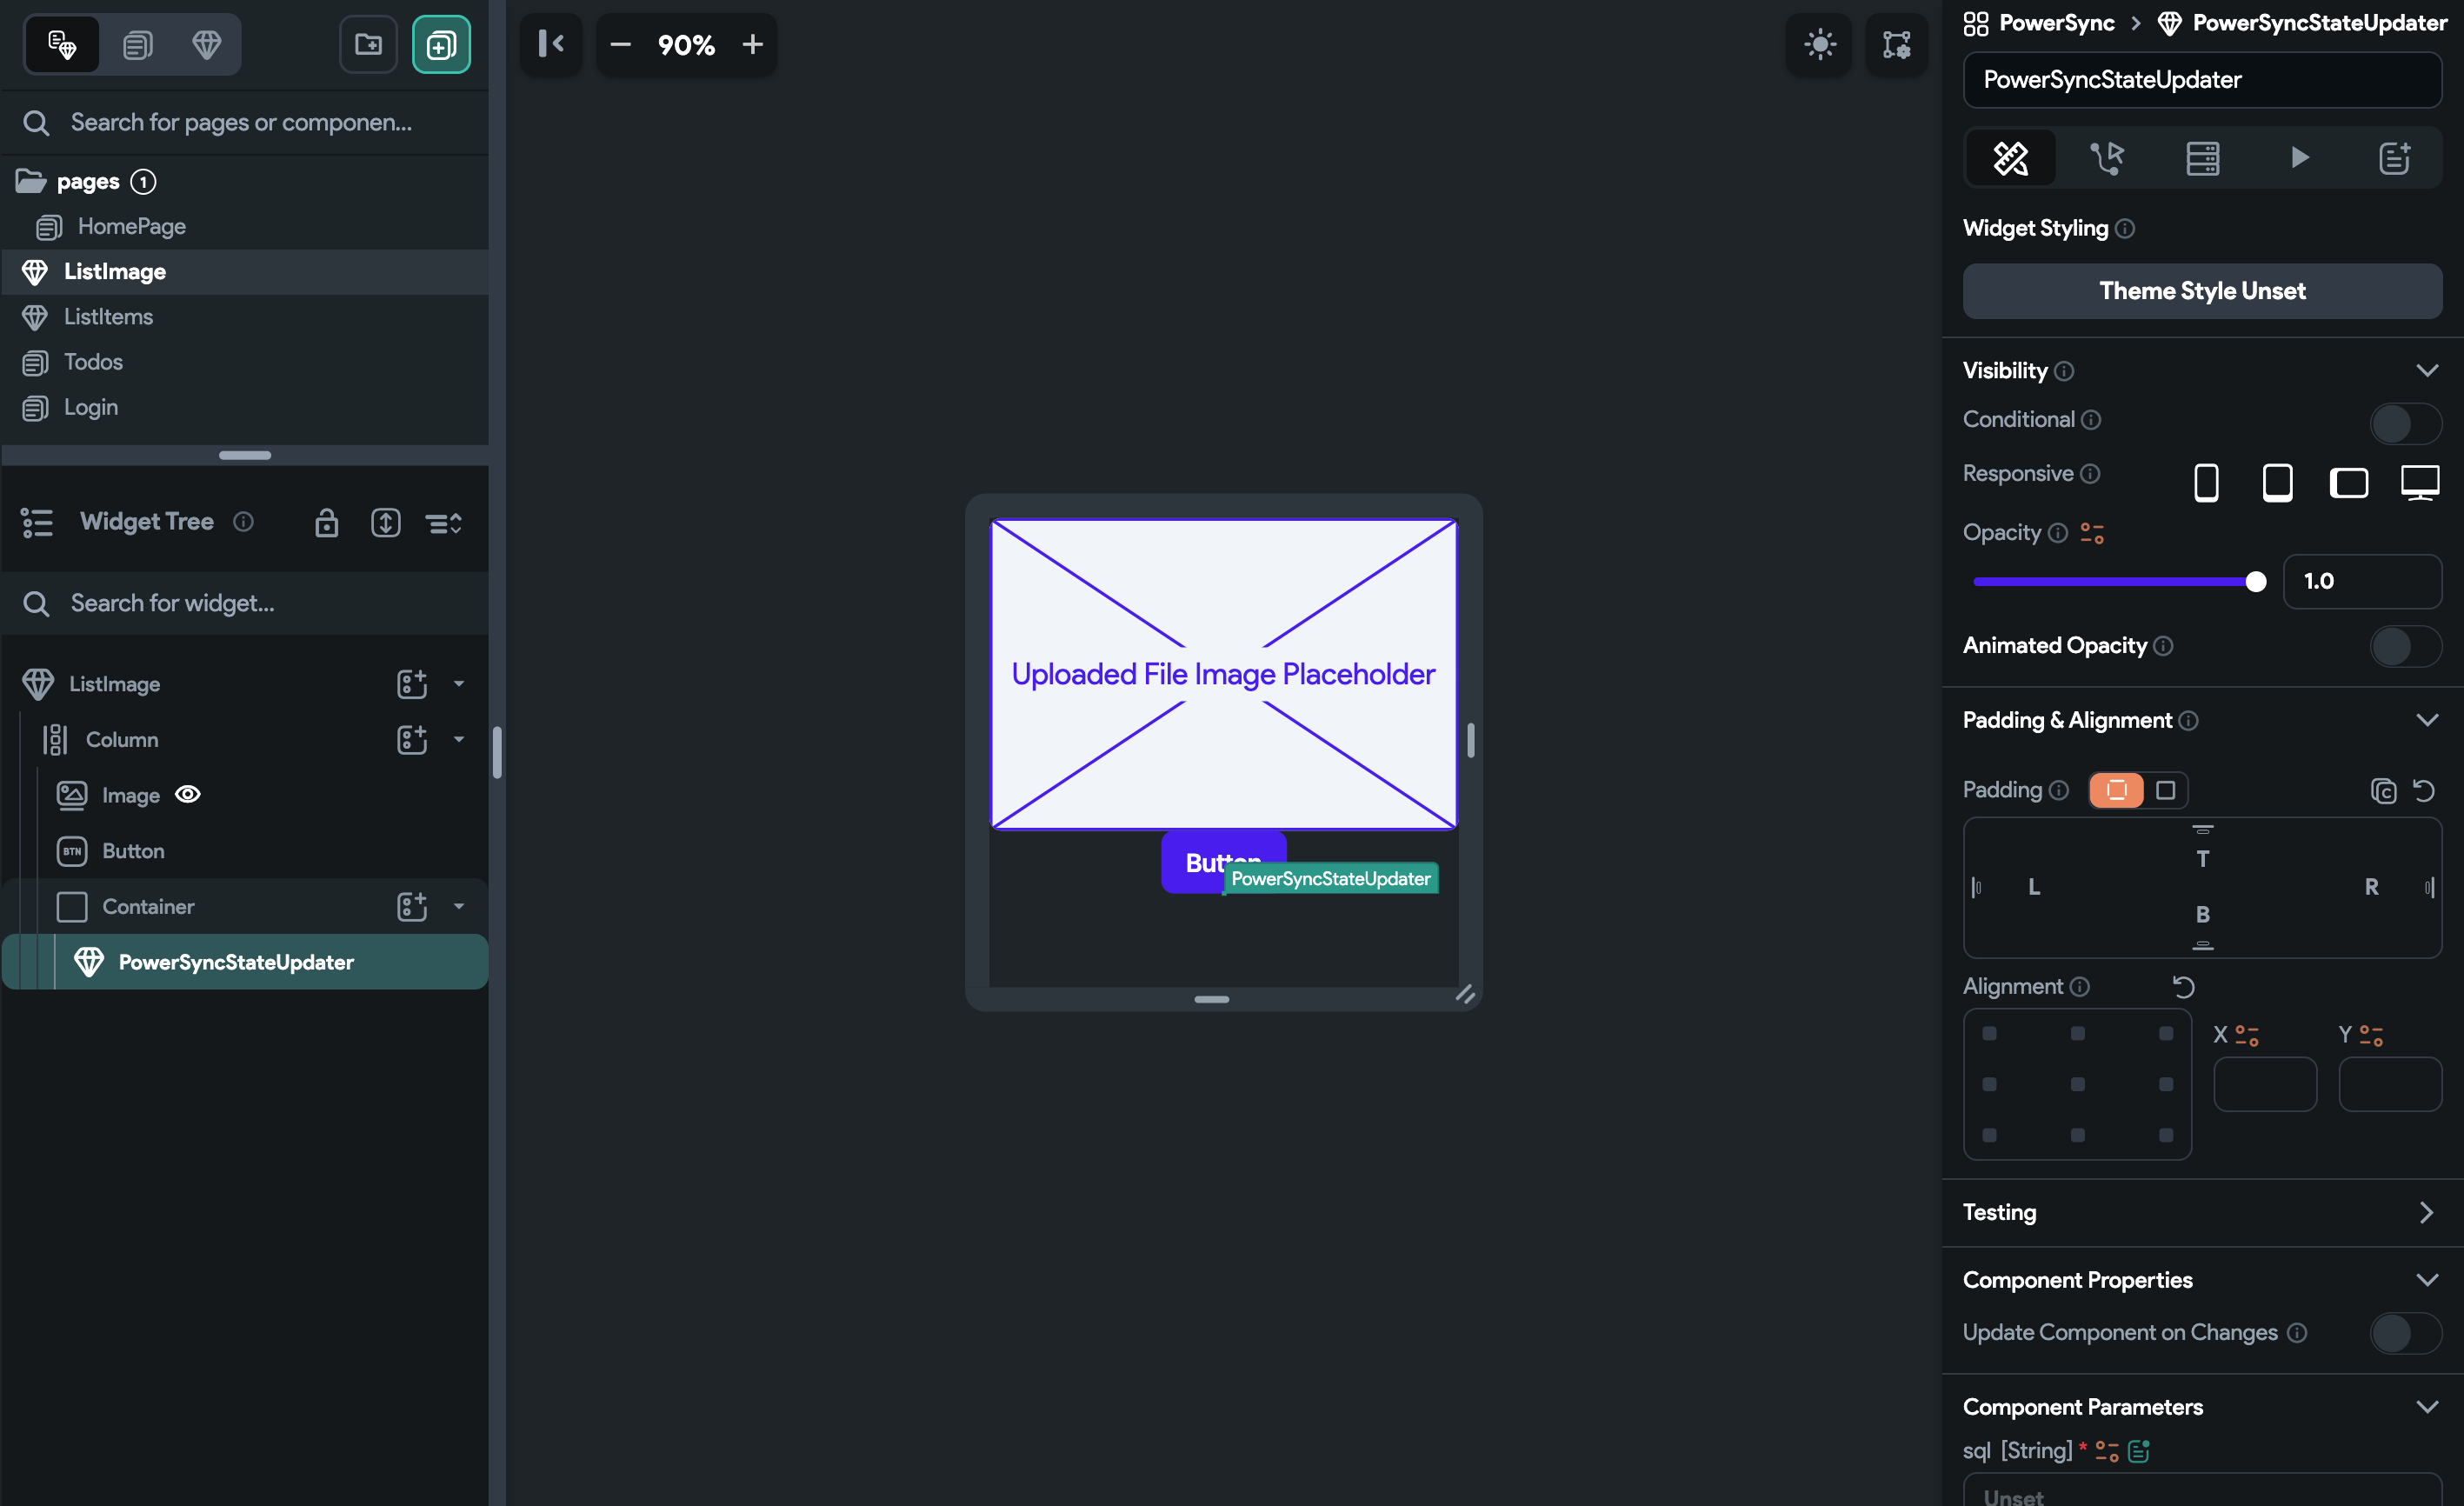
- In the “Properties” panel on the right, under the “Component Properties” section:
- Under the “sql” section, add the SQL query to set the photo:
select * from lists where id = :id; - Under the “parameters” section, set the
idparameter we’re using the above query: - Click on “UNSET”.
- Select “Create Map (JSON)” as the variable.
- Under “Add Map Entries”, click “Add Key Value Pair”.
- Set the “Key” to
id. - Set the Value to “Component Parameters” ->
listId. - Click “Confirm”.
- Check “watch [Boolean]”. This ensures that the query auto-updates.
- Configure the “onData” action:
- Open the “Action Flow Editor”.
- Select the “Callback” trigger type.
- Click “Add Action”.
- Search for “update com” and select “Update Component State”.
- Click “Add Field”.
- Select your
photoIdstate variable. - Set “Select Update Type” to “Set Value”.
- Set “Value to set” to “Callback Parameters” ->
rows. - Under “Available Options”, select “Item at Index”.
- Under “List Index Options” select “First”.
- Under “Available Options” select “JSON Path”.
- Set “JSON Path” to
$.photo_id. - Click “Confirm”.
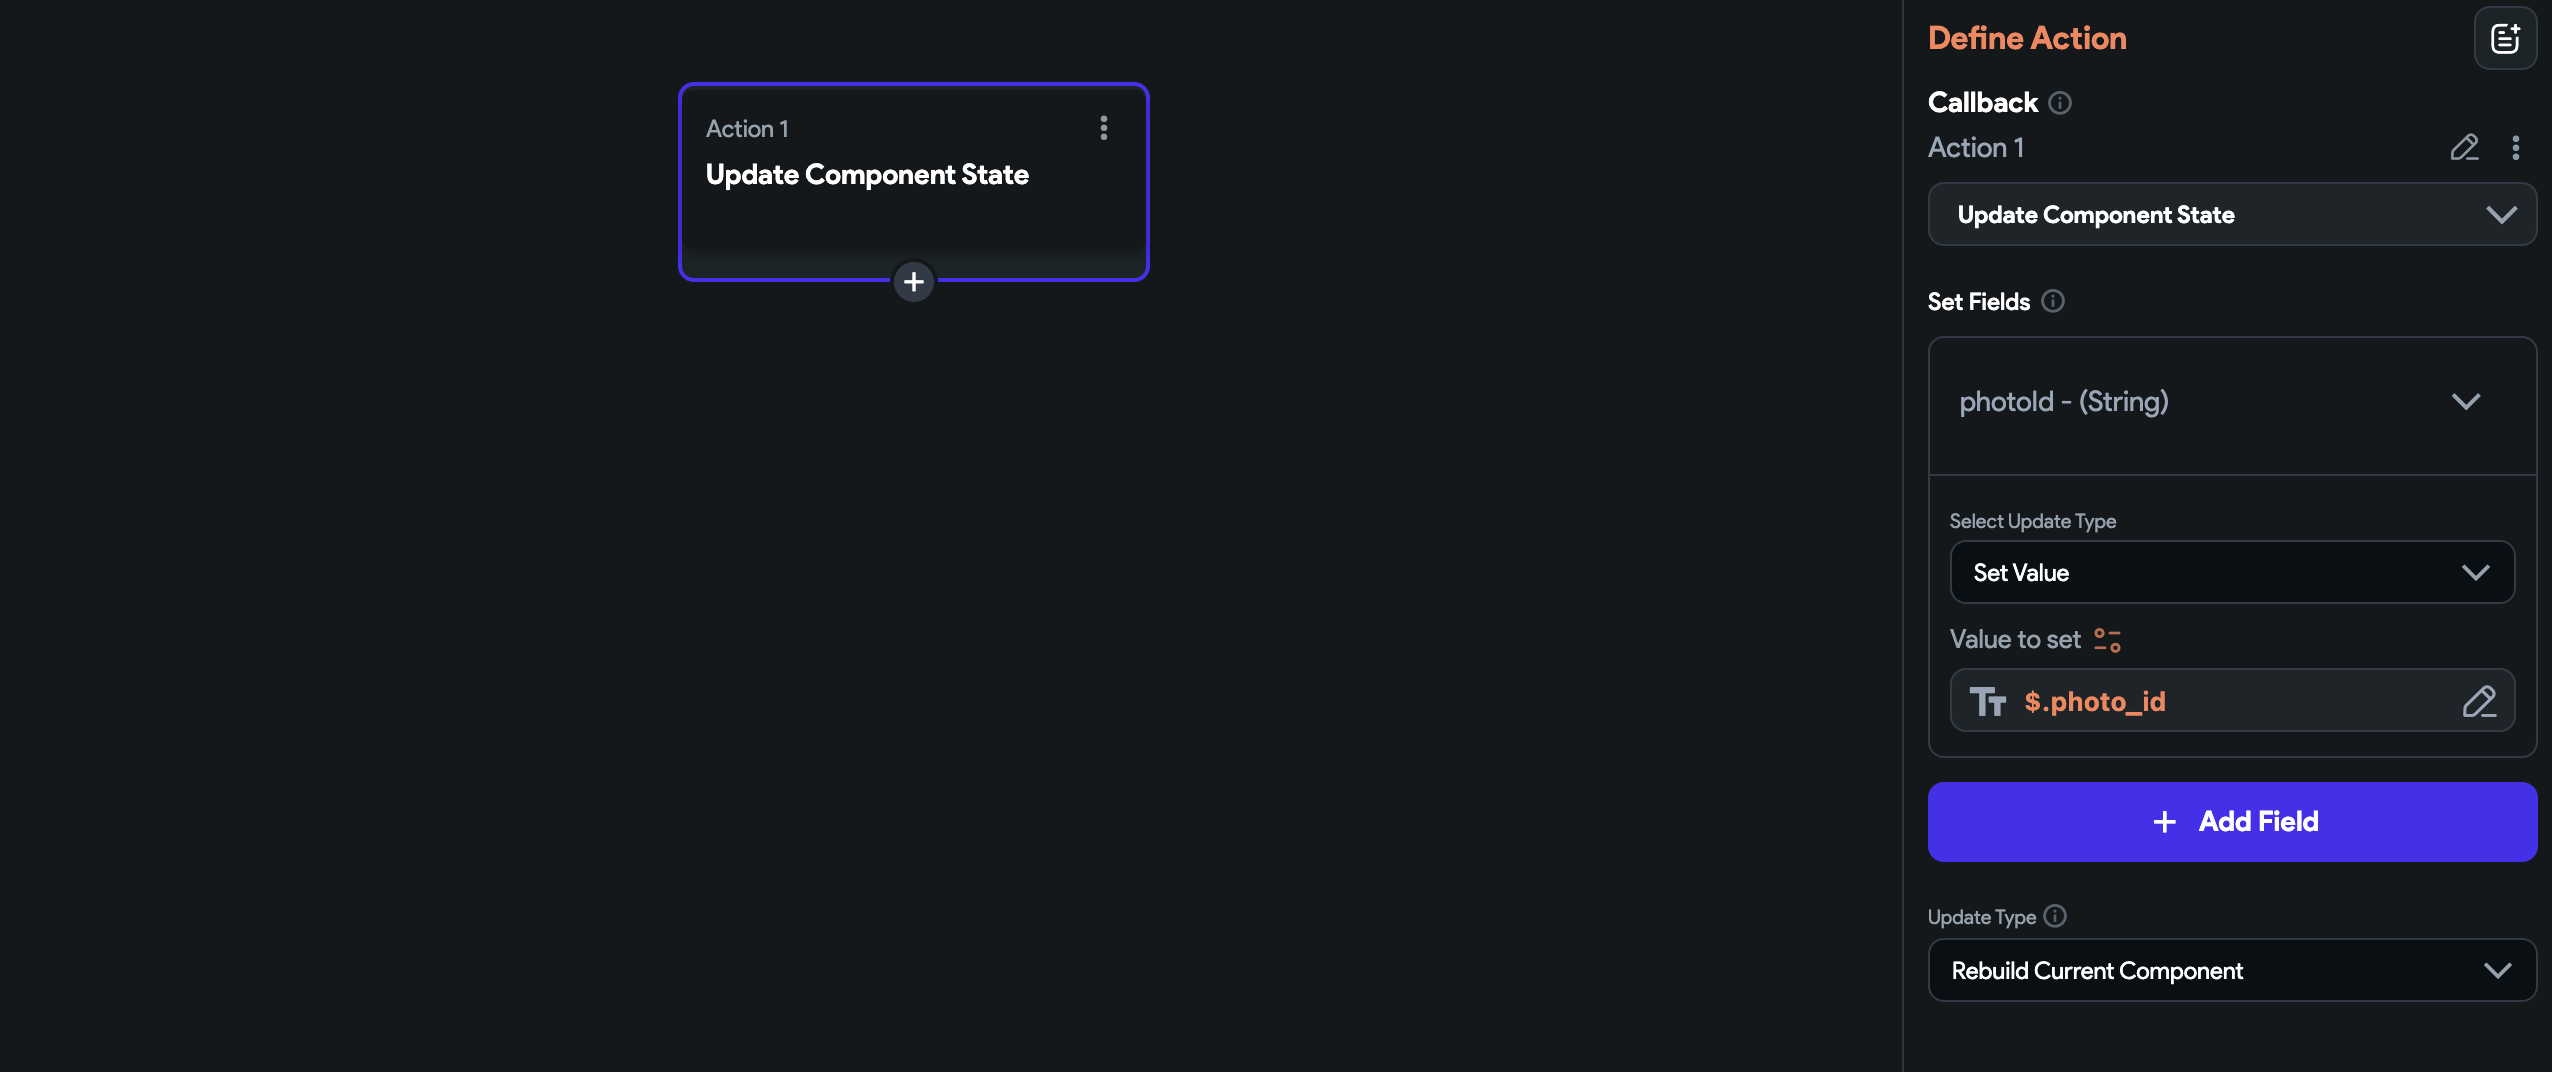
- Set “Update Type” to “No Rebuild”.
- Chain another action and select the
resolveItemPicturecustom action.- Under “Set Action Arguments”, click on the settings icon next to “Value”.
- Select “Callback Parameters” ->
rows. - Under “Available Options”, select “Item at Index”.
- Under “List Index Options” select “First”.
- Under “Available Options” select “JSON Path”.
- Set “JSON Path” to
$.photo_id. - Click “Confirm”.
- Set “Action Output Variable Name” to
picture.
- Chain another action, search for “update com” and select “Update Component State”.
- Click on “Add Field”.
- Select the “image - Uploaded File” state variable.
- Under “Select Update Type”, select “Set Value”.
- Set the “Value to set” to the “Action Outputs” ->
picturevariable. - Click “Confirm”.
- Click on “Add Field” again.
- Select the “imageLoaded” state variable.
- Under “Select Update Type”, select “Set Value”.
- Click on the settings icon next to “Value to set” and select “Code Expression”.
- Select “Code Expression”.
- Click on “Add argument”.
- Select the “var1” placeholder argument.
- Set its “Name” to
photoId. - Check “Nullable”.
- Set the “Value” to the “Component State” ->
photoIdstate variable. - Set the “Expression” to
photoId != null && photoId != 'null'. - Ensure there are no errors.
- Click “Confirm”.
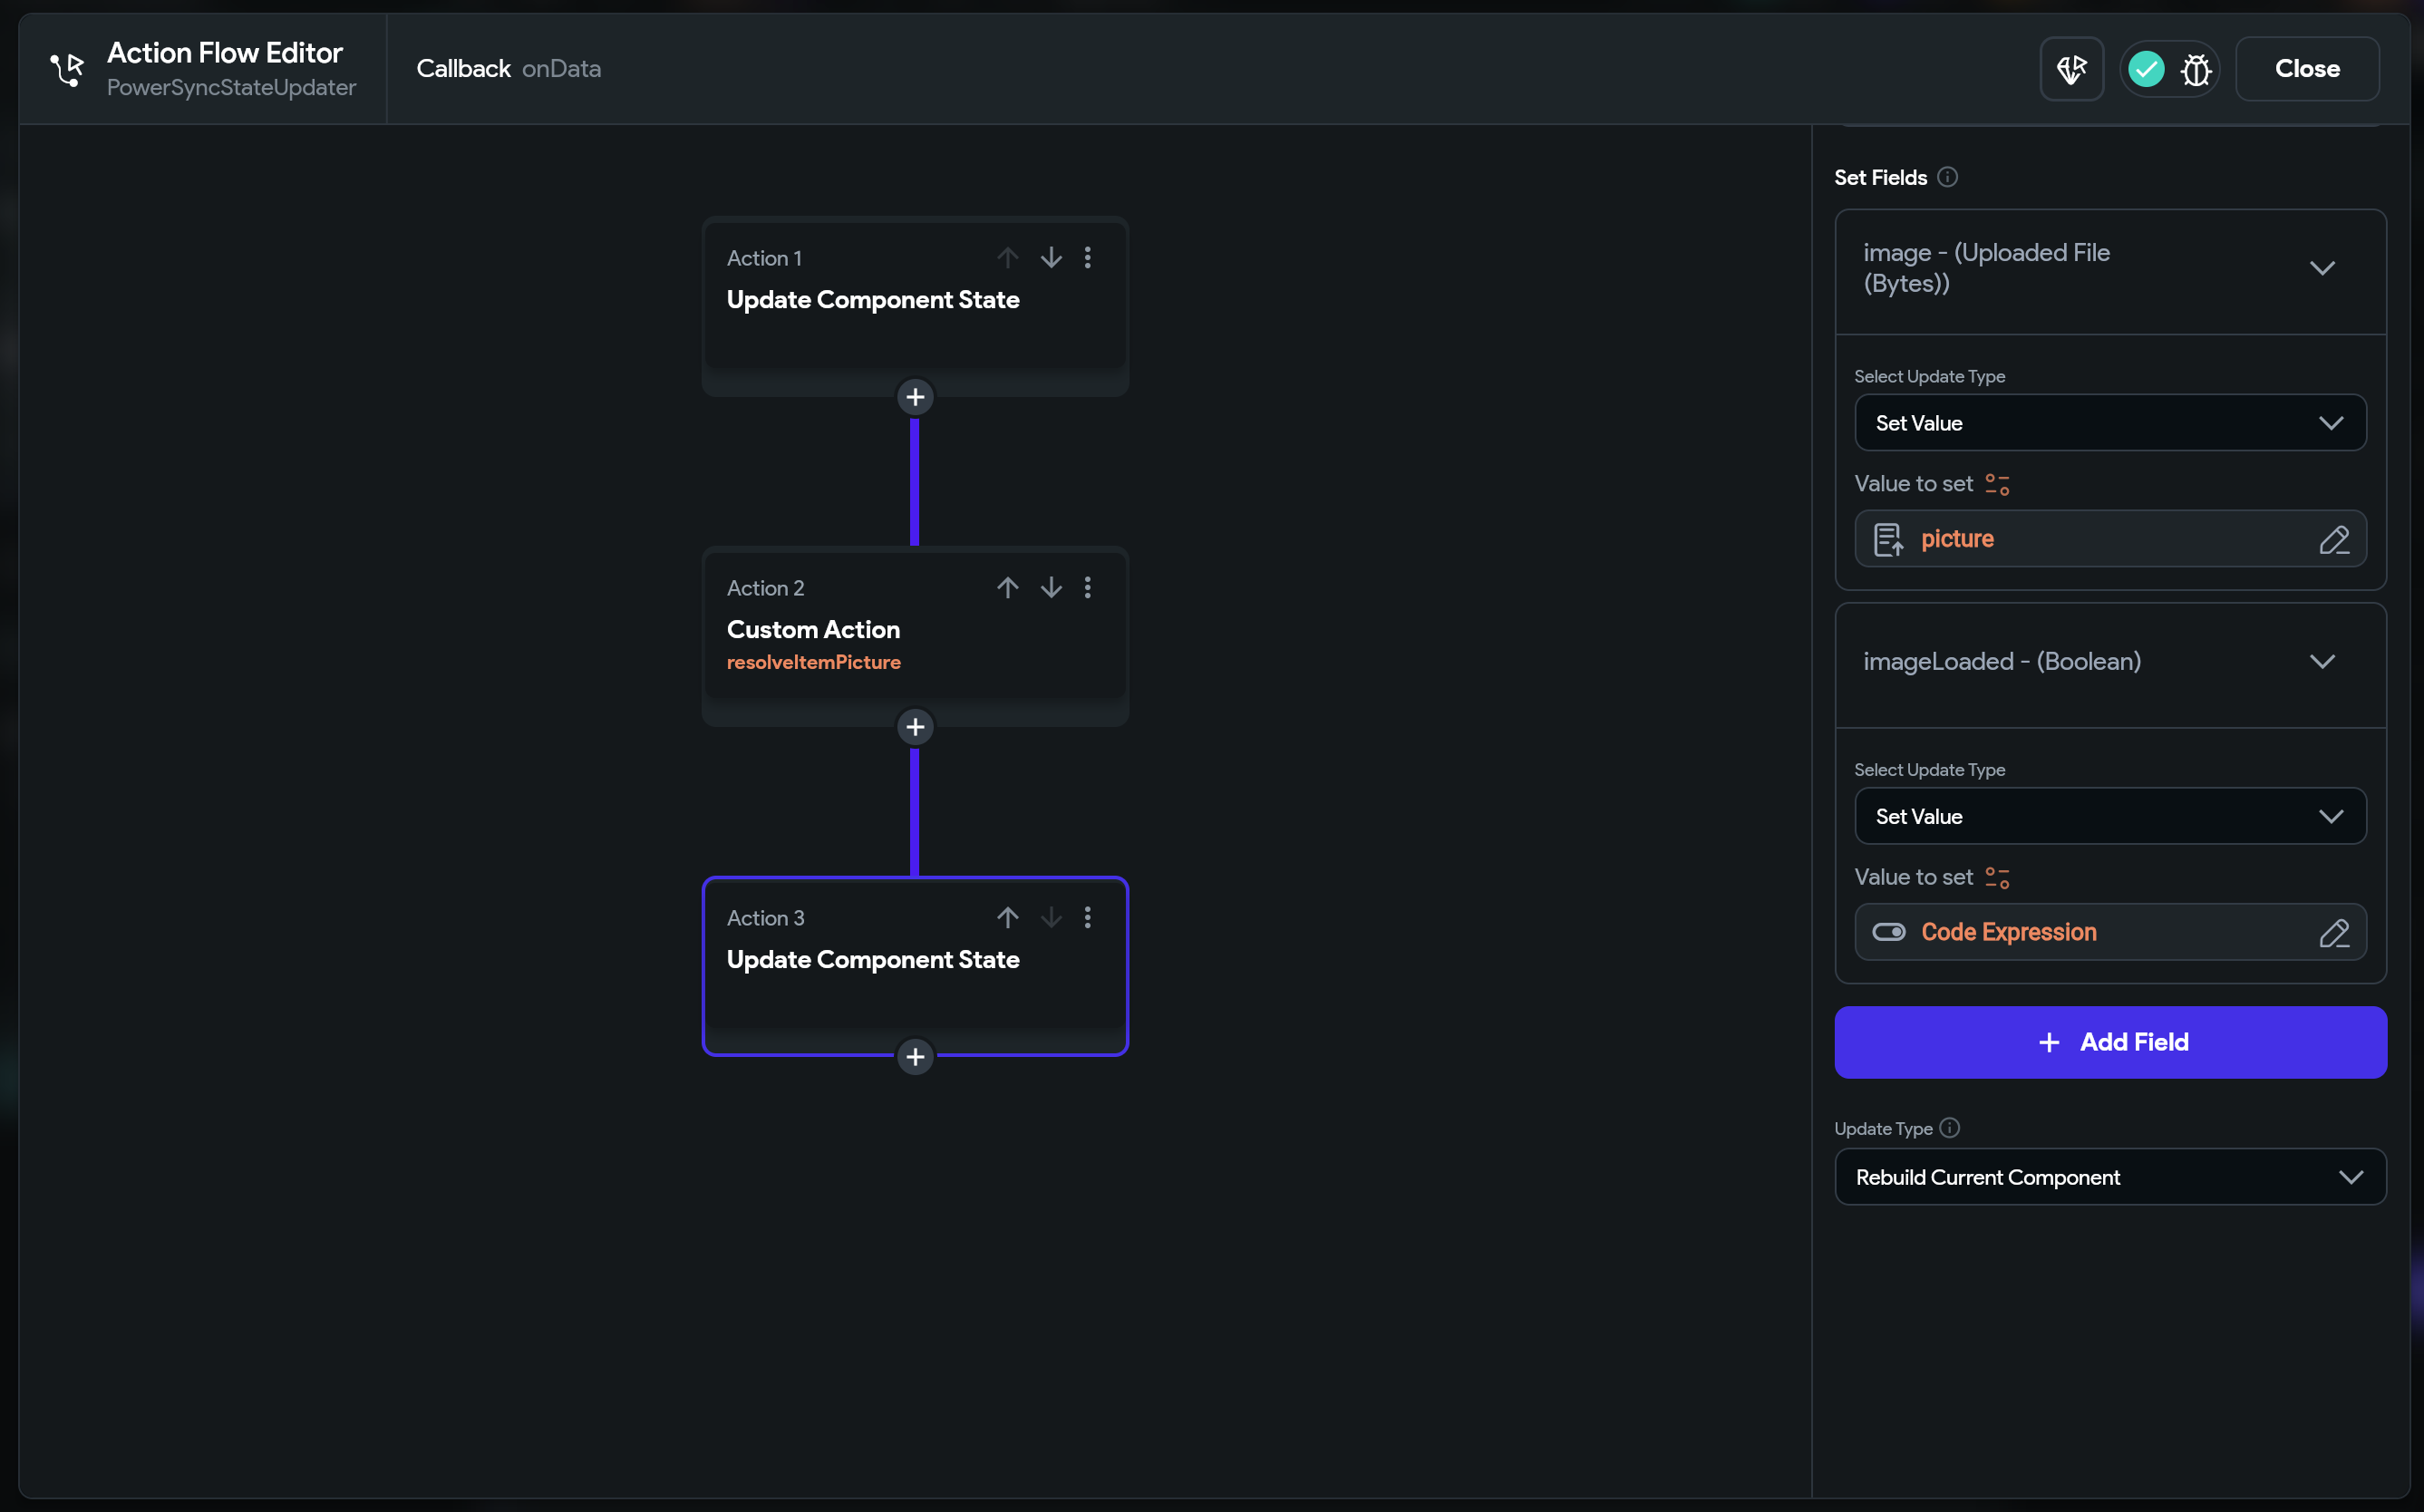
- Close the Action Flow Editor.
- Under the “sql” section, add the SQL query to set the photo:
Define the Button widget logic
- Under the “Widget Tree”, select the “Button” widget.
- In the “Properties” panel on the right, under “Button Text”, update the text to
Add/replace image. - Switch to the “Actions” panel and open the “Action Flow Editor”.
- Select the “On Tap” trigger type.
- Add an action, search for “media” and select “Upload/Save Media”.
- Under “Upload Type” select “Local Upload (Widget State).
- Chain another action and select the
setItemPicturecustom action. - Under “Set Action Arguments”, under the “picture” argument, set the “Value”, to the “Widget State” -> “Uploaded Local File” variable.
- Click “Confirm”.
- Under the “applyToDatabase” argument, add an action and under “Custom Action” -> “PowerSync”, select “powersyncWrite”.
- Under the “Set Action Arguments” -> “sql” section, add the SQL query to update the photo.
- Paste the following into the “Value” field:
update lists set photo_id = :photo where id = :id; - Under the “parameters” section, set the
photoparameter andidparameters we’re using the above query: - Click on “UNSET”.
- Select “Create Map (JSON)” as the variable.
- Under “Add Map Entries”, click “Add Key Value Pair”.
- Set the “Key” to
photo. - Set the “Value” to “Action Parameter” ->
photoId. - Click “Confirm”.
- Add another Key Value Pair.
- Set the “Key” to
id. - Set the Value to “Component Parameters” ->
listId. - Click “Confirm”.
- Paste the following into the “Value” field:
Add the ListImage Custom Component to your page
- Under the “Page Selector”, select the
Todospage. - Under the “Widget Tree”, right-click on the
PowerSyncStateUpdaterlibrary component.- Select “Wrap Widget”.
- Select the “Container” widget.
- In the “Properties” panel on the right, set the Container’s “Width” and “Height” to 0 respectively. This container can be hidden.
- Back under the “Widget Tree”, add a child to the “Column” widget.
- Select the “Components and custom widgets defined in this project” panel, and select the
ListImagecomponent.
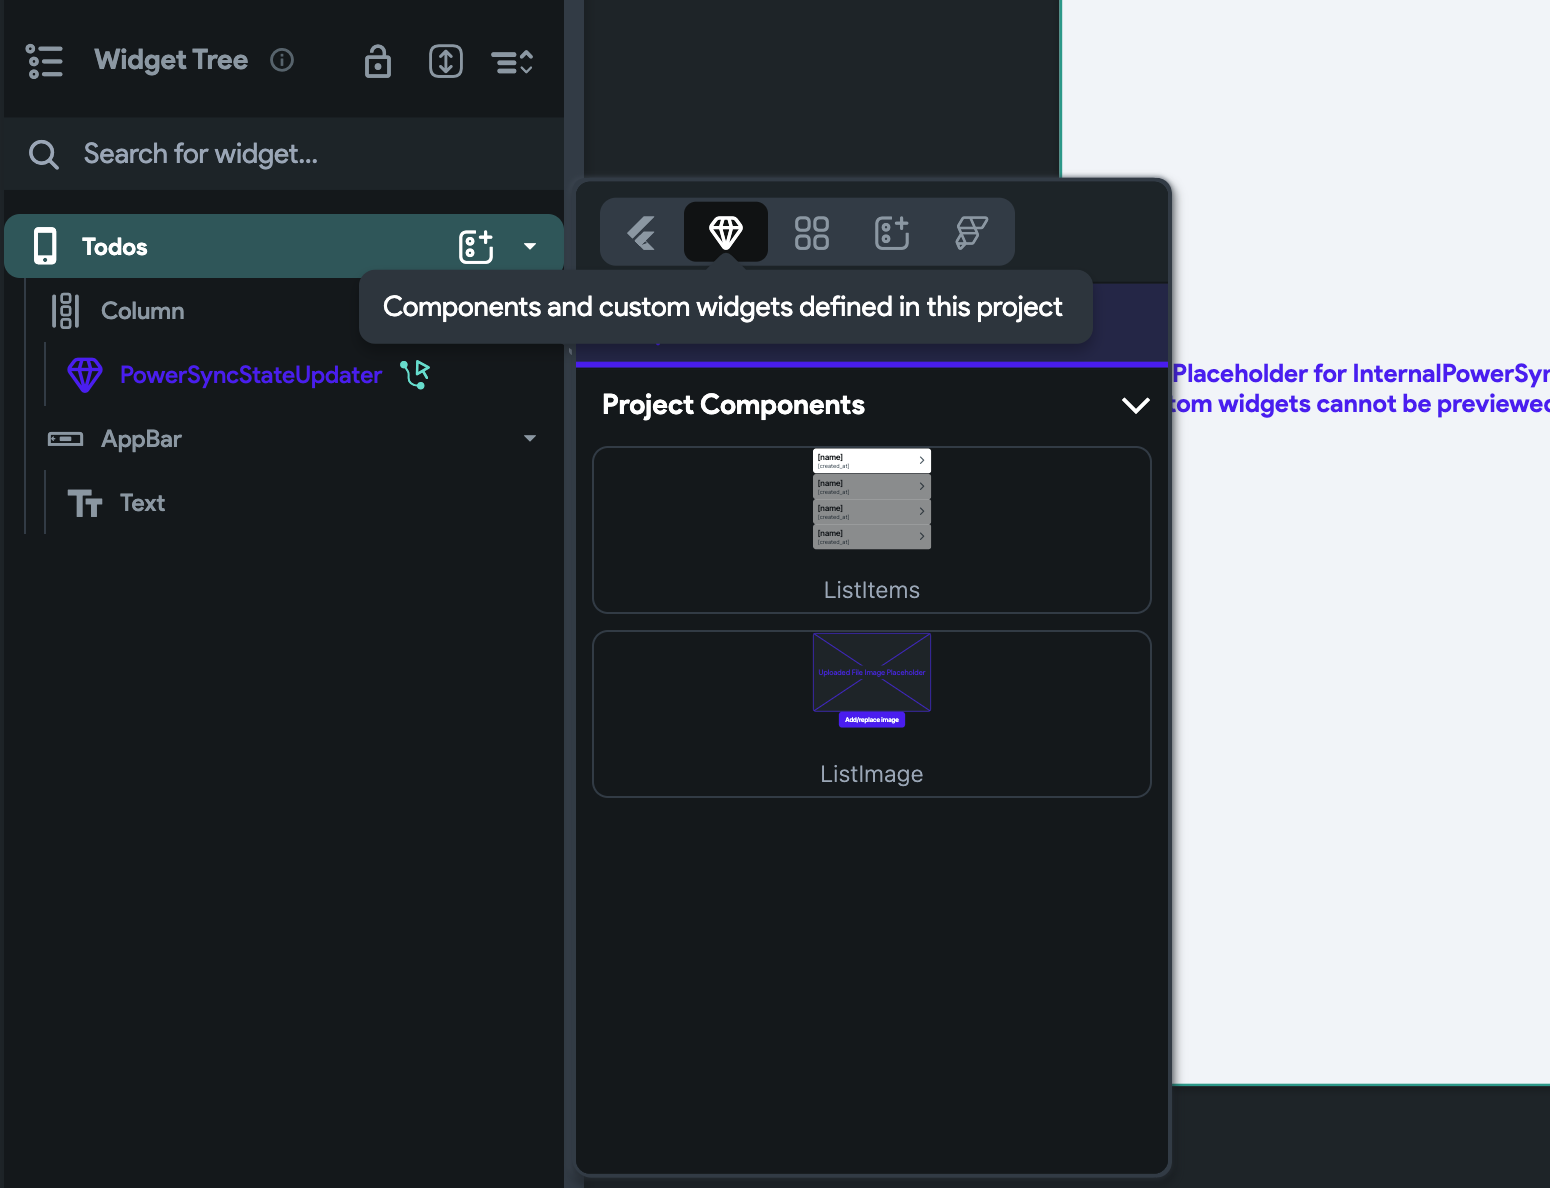
- In the
ListImage“Properties” panel on the right, under “Component Parameters”, click on the settings icons next to “listId [String]”. - Select the “Page Parameter” ->
idvariable. - Click “Confirm”.
- Select the “Components and custom widgets defined in this project” panel, and select the
Test your app:You should now be able to test your app, select a list item and add or replace an image on the next page: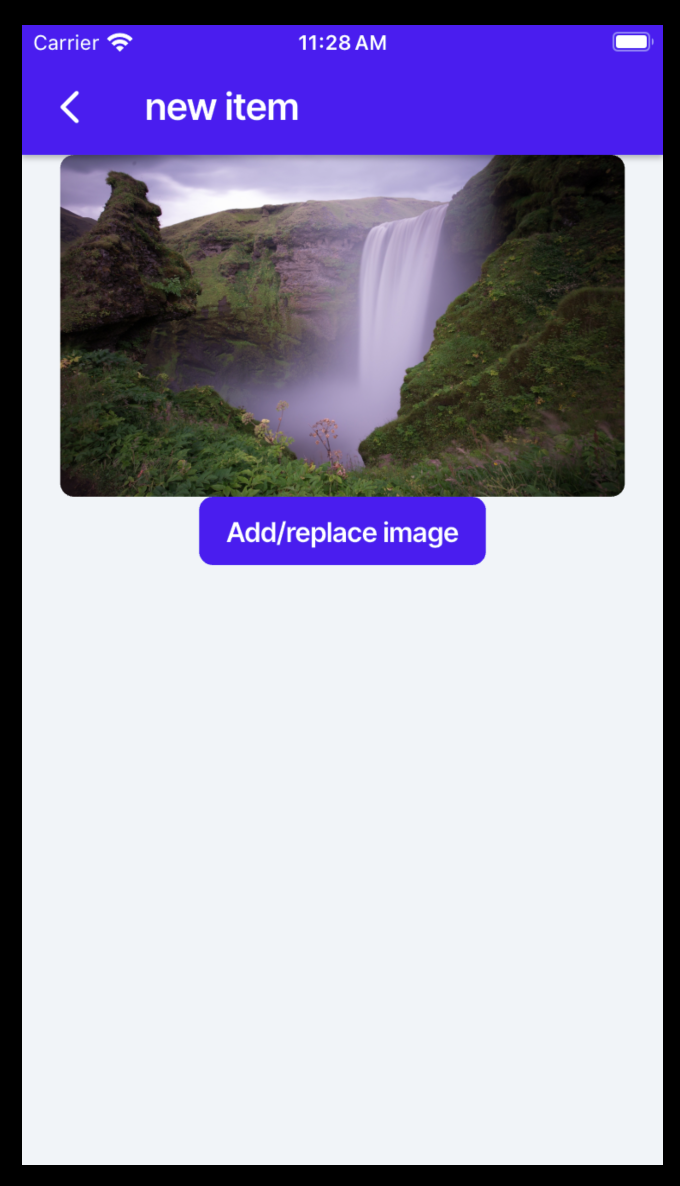

photo_id column set with a reference to the file.