Build local-first apps with FlutterFlow and PowerSync using Supabase as the backend.
Used in conjunction with FlutterFlow, PowerSync enables developers to build local-first apps that are robust in poor network conditions and that have highly responsive frontends while relying on Supabase for their backend. This guide walks you through configuring PowerSync within your FlutterFlow project that has Supabase integration enabled.
New and Improved integration: Welcome to our updated FlutterFlow integration guide. This version introduces a dedicated PowerSync FlutterFlow Library, offering a simpler and more robust solution compared to the previous version which required extensive custom code.Key improvements are:
Working Attachments package - learn how to sync attachments here.
Note that using libraries in FlutterFlow requires being on a paid plan with FlutterFlow. If this is not an option for you, you can use our legacy guide with custom code to integrate PowerSync in your FlutterFlow project.
This guide uses Supabase as the backend source database provider for its seamless integration with PowerSync. However, you can integrate a different backend using custom actions. For more information, refer to the Custom backend connectors section.
A paid plan with FlutterFlow for the ability to import a Library into a project.
This guide walks you through building a basic item management app from scratch and takes about 30-40 minutes to complete. You should then be able to use this knowledge to build and extend your own app.
To set up the Postgres database for our demo app, we will create a lists table. The demo app will have access to this table even while offline. Run the below SQL statement in your Supabase SQL Editor:
create tablepublic.lists ( id uuid not null default gen_random_uuid (), created_at timestamp with time zone not null default now(), name text not null, owner_id uuid not null, constraint lists_pkey primary key (id), constraint lists_owner_id_fkey foreign key (owner_id) references auth.users (id) on delete cascade) tablespace pg_default
PowerSync uses the Postgres Write Ahead Log (WAL) to replicate data changes in order to keep PowerSync SDK clients up to date. Run the below SQL statement in your Supabase SQL Editor to create a Postgres role/user with replication privileges:
-- Create a role/user with replication privileges for PowerSyncCREATE ROLE powersync_role WITH REPLICATION BYPASSRLS LOGIN PASSWORD 'myhighlyrandompassword';-- Set up permissions for the newly created role-- Read-only (SELECT) access is requiredGRANT SELECT ON ALL TABLES IN SCHEMA public TO powersync_role; -- Optionally, grant SELECT on all future tables (to cater for schema additions)ALTER DEFAULT PRIVILEGES IN SCHEMA public GRANT SELECT ON TABLES TO powersync_role;
To restrict read access to specific tables, explicitly list allowed tables for both the SELECT privilege, and for the publication mentioned in the next step (as well as for any other publications that may exist).
Create a Postgres publication using the SQL Editor. This will enable data to be replicated from Supabase so that your FlutterFlow app can download it.
-- Create a publication to replicate tables. The publication must be named "powersync"CREATE PUBLICATION powersync FOR ALL TABLES;
Note that the PowerSync Service has to read all updates present in the publication, regardless of whether the table is referenced in your Sync Streams. This can cause large spikes in memory usage or introduce replication delays, so if you’re dealing with large data volumes, you’ll want to specify a comma-separated subset of tables to replicate instead of FOR ALL TABLES.
The snippet above replicates all tables and is the simplest way to get started in a dev environment.
When creating a project in the PowerSync Dashboard, Development and Production instances of the PowerSync Service will be created by default. Select the instance you want to configure.If you need to create a new instance, follow the steps below.
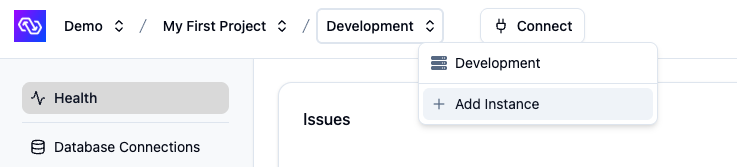
In the dashboard, select your project and open the instance selection dropdown. Click Add Instance.
Give your instance a name, such as “Production”.
[Optional] You can change the default cloud region. Available regions are US, EU, JP (Japan), AU (Australia), BR (Brazil), and IN (India).
Note: Additional cloud regions will be considered on request, especially for customers on our Enterprise plan. Please contact us if you need a different region.
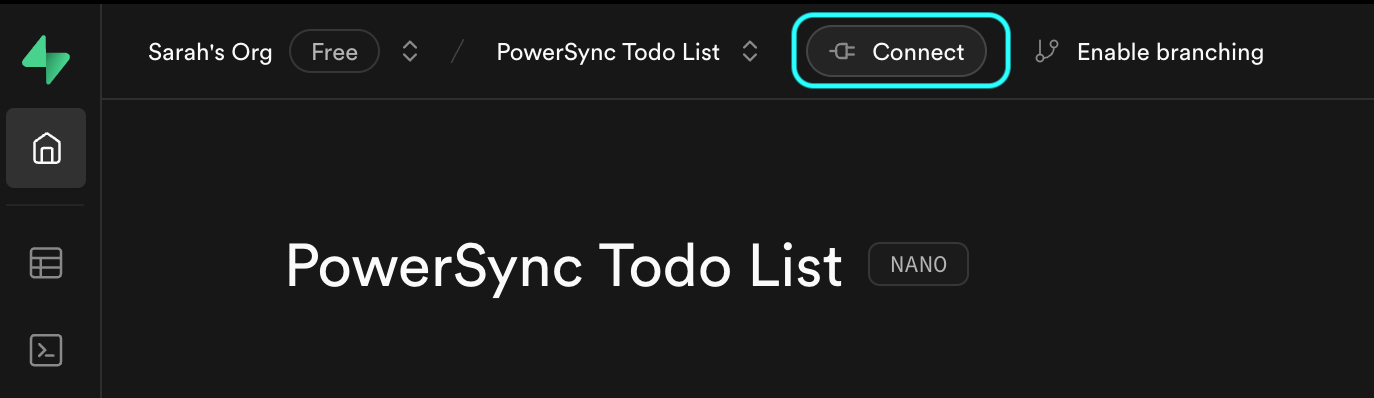
From your Supabase Dashboard, select Connect in the top navigation bar (or follow this link):
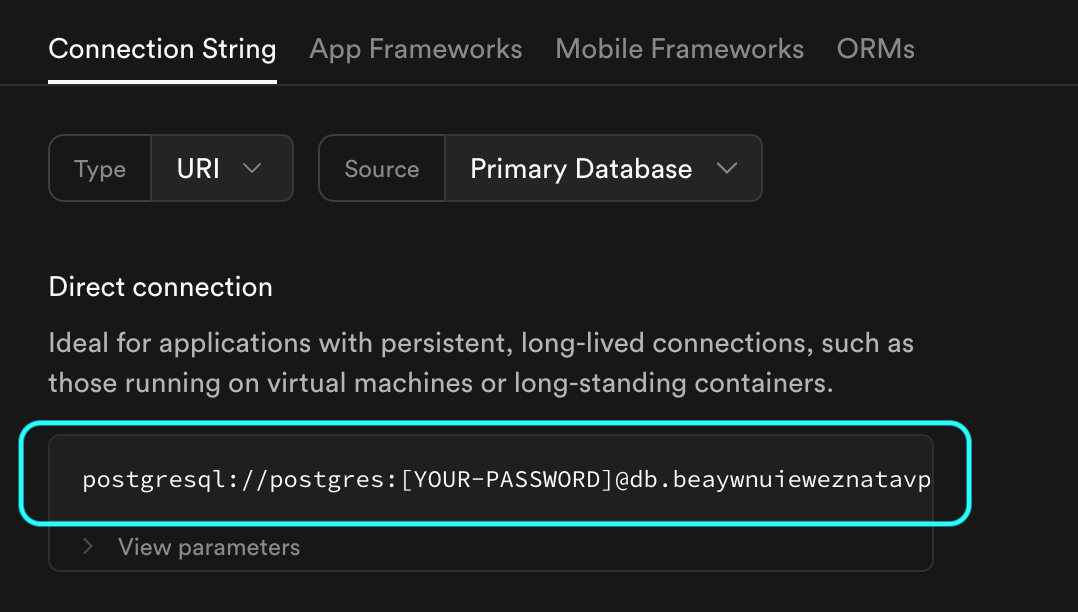
In the Direct connection section, copy the complete connection string (including the [YOUR-PASSWORD] placeholder):
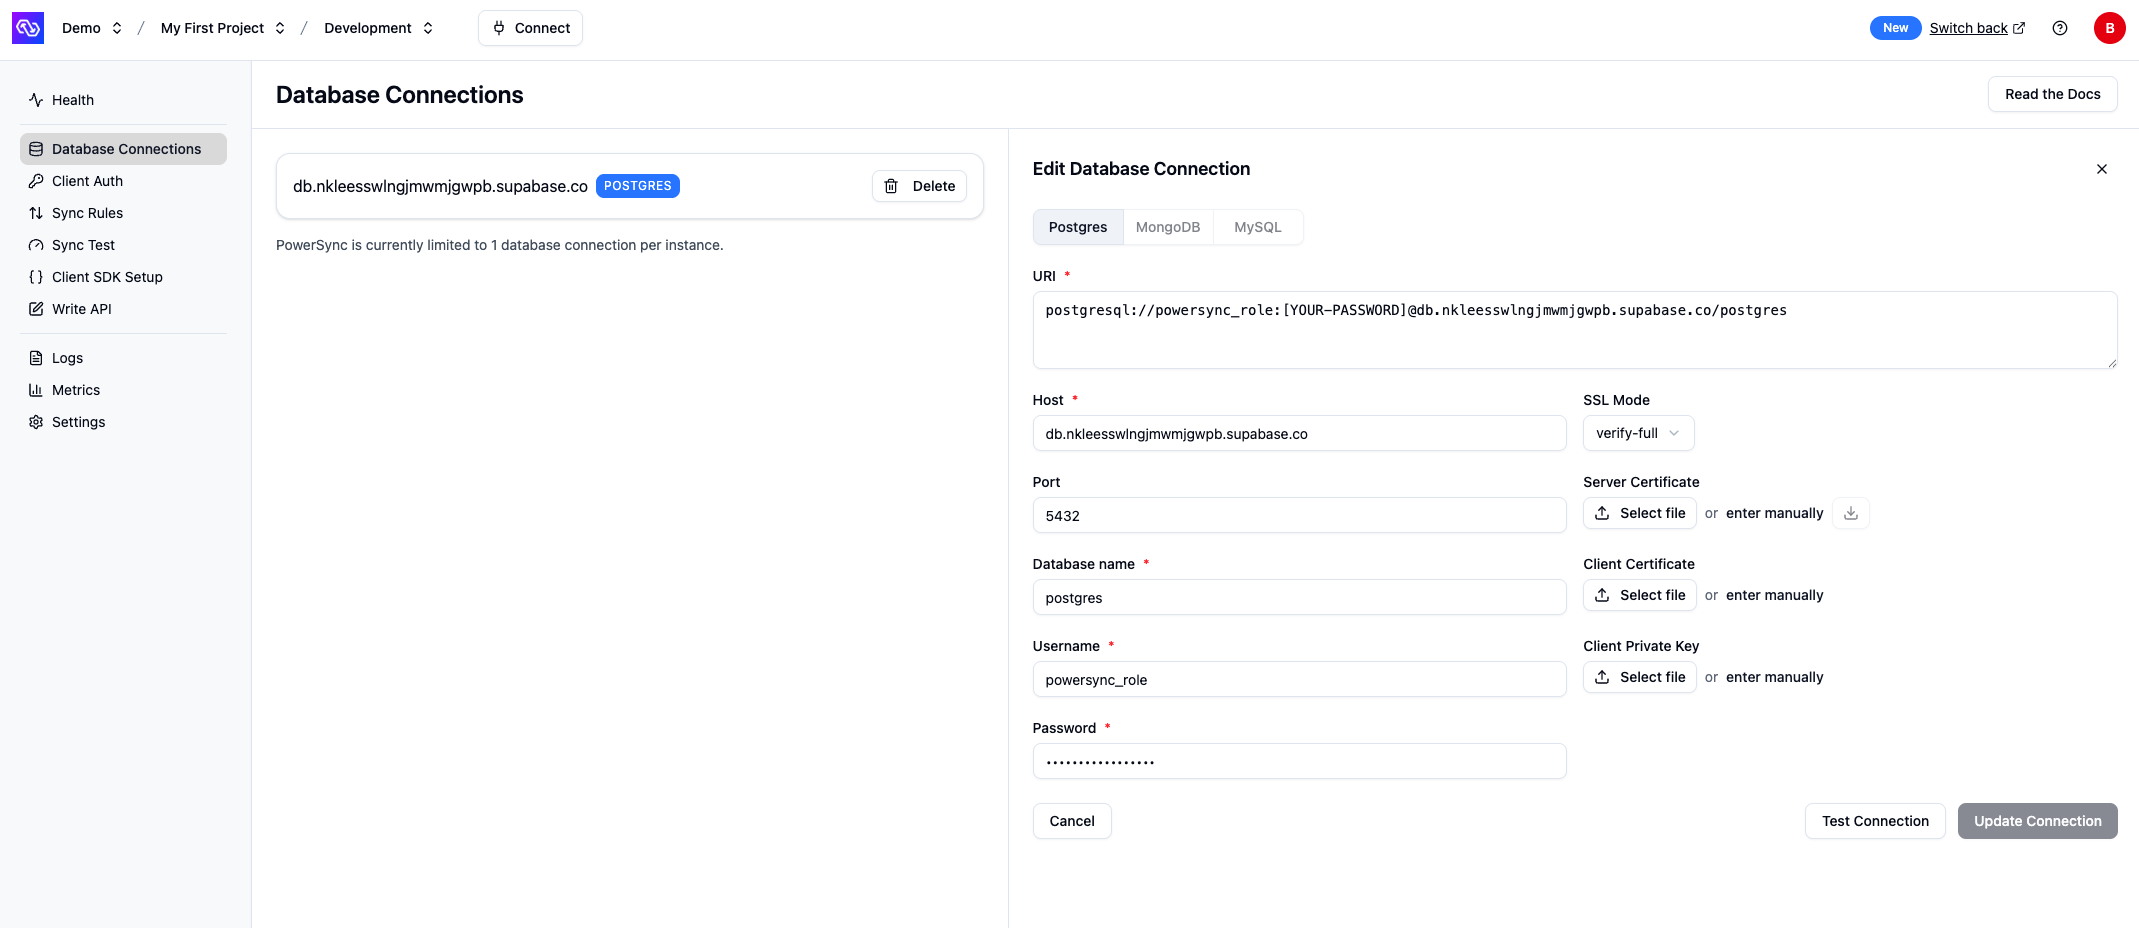
In the PowerSync Dashboard, select your project and instance and go to Database Connection.
Select the Postgres tab.
Paste the connection string into the URI field. PowerSync will automatically parse this URI to populate the database connection details.
Update the Username and Password fields to use the powersync_role and password you created when configuring your Supabase for PowerSync (see Source Database Setup).
Note: PowerSync includes Supabase’s CA certificate by default, so you can use verify-full SSL mode without additional configuration.
Your Supabase connection details should look similar to this.
Verify your setup by clicking Test Connection and resolve any errors.
Click Save Connection.
PowerSync will now create an isolated cloud environment for your instance. This typically takes a minute or two.
After your database connection is configured, enable Supabase Auth:
In the PowerSync Dashboard, go to Client Auth for your instance.
Enable the Use Supabase Auth checkbox.
If your Supabase project uses the legacy JWT signing keys, copy your JWT Secret from your Supabase project’s settings (JWT Keys) and paste the secret into the Supabase JWT Secret (optional) Legacy field in the PowerSync Dashboard. If you’re using Supabase’s new JWT signing keys, you can leave this field empty (PowerSync will auto-configure the JWKS endpoint for your project).
Sync Rules allow developers to control which data gets synced to which user devices using a SQL-like syntax in a YAML file. For the demo app, we’re going to specify that each user can only see their own lists.
In the PowerSync Dashboard, select your project and instance and go to the Sync Rules view.
Edit the Sync Rules in the editor and replace the contents with the below:
# This will sync the entire table to all users - we will refine this laterbucket_definitions: global: data: - SELECT * FROM lists
Click “Validate” and ensure there are no errors. This validates your Sync Rules against your Postgres database.
Click “Deploy” to deploy your Sync Rules.
Confirm in the dialog and wait a couple of minutes for the deployment to complete.
For additional information on PowerSync’s Sync Rules, refer to the Sync Rules documentation.
If you’re wondering how Sync Rules relate to Supabase Postgres RLS, see this subsection.
Under “App Settings” -> “Integrations”, enable “Supabase”.
Enter your Supabase “API URL” and public “Anon Key”. You can find these under “Project Settings” -> “API Keys” -> anonpublic in your Supabase dashboard.
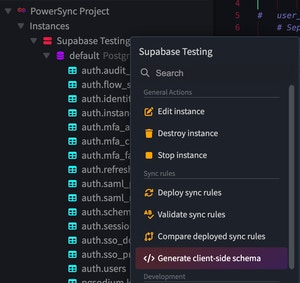
In the PowerSync Dashboard, select your project and instance and click the Connect button in the top bar to generate the client-side schema based on your Sync Rules. Select “FlutterFlow” as the language.
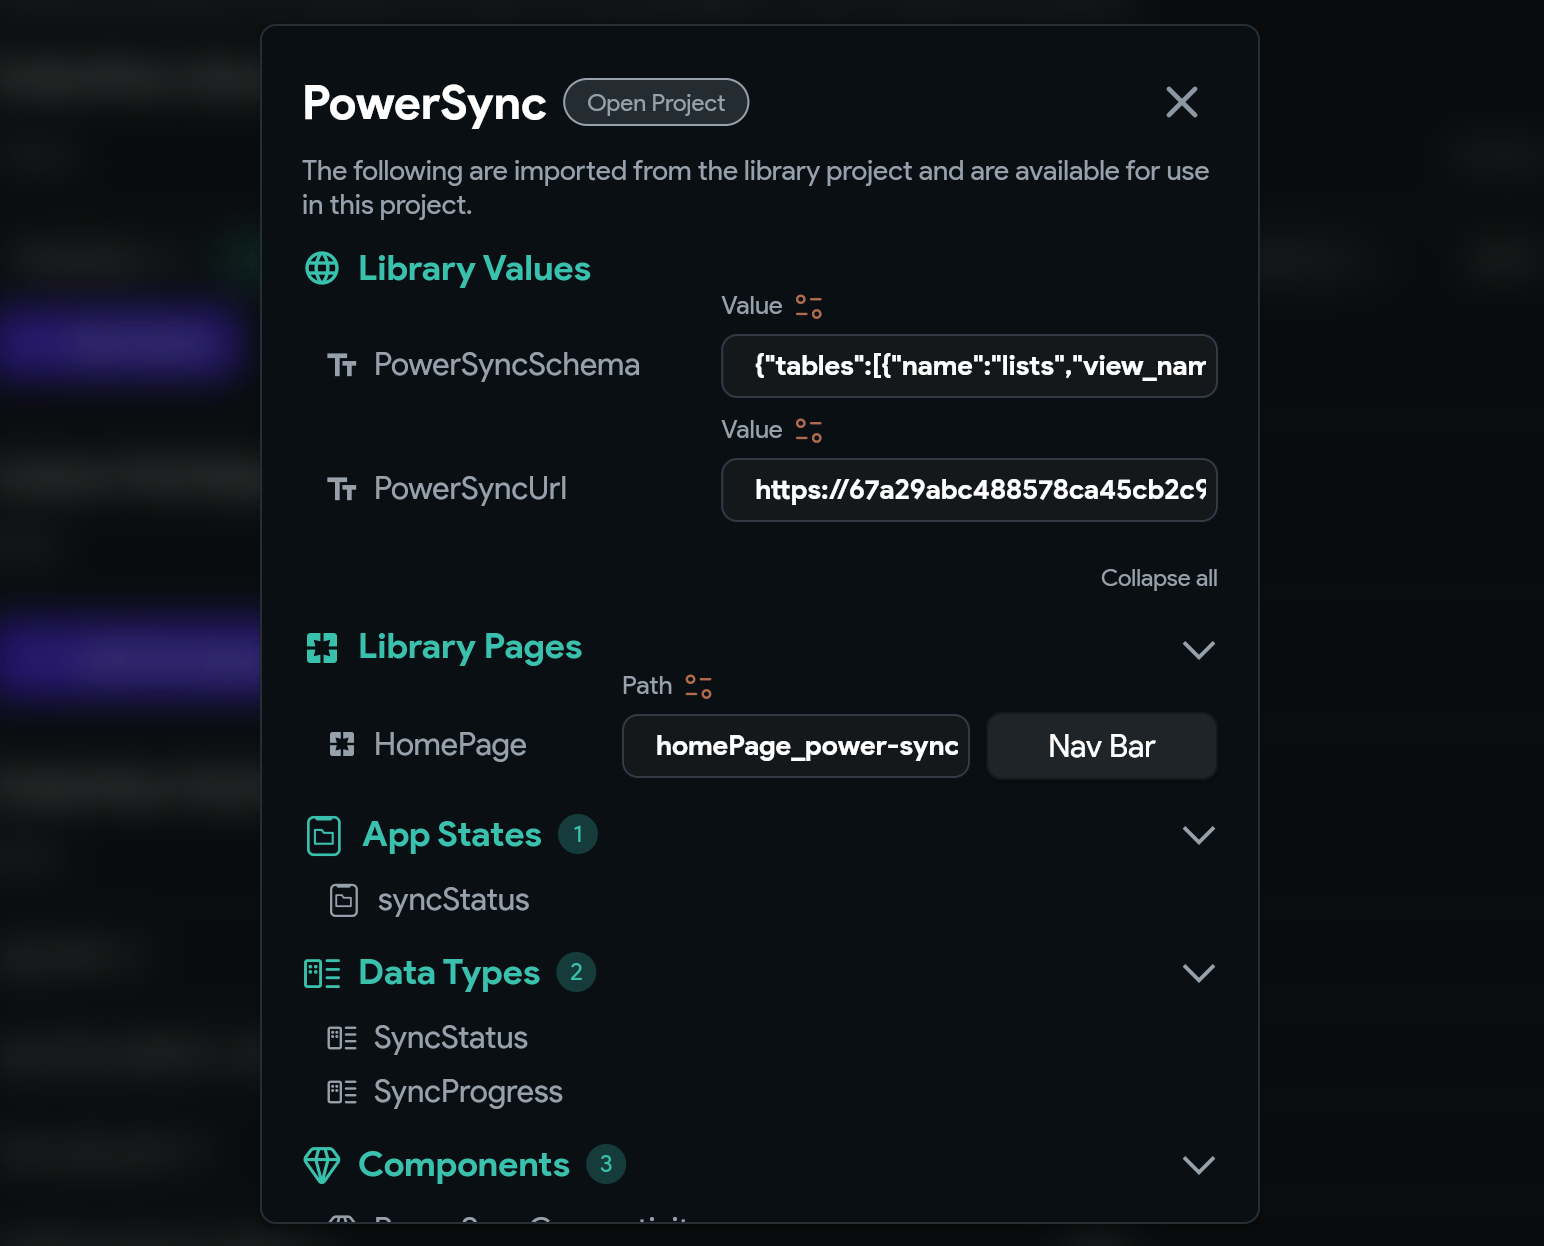
Copy and paste the generated schema into the “PowerSyncSchema” field.
Copy and paste your PowerSync instance URL into the “PowerSyncUrl” field.
Note: The default path for the “HomePage” field under “Library Pages” can be left as is and ignored. FlutterFlow does not currently provide a way to remove it.
Close the library config.
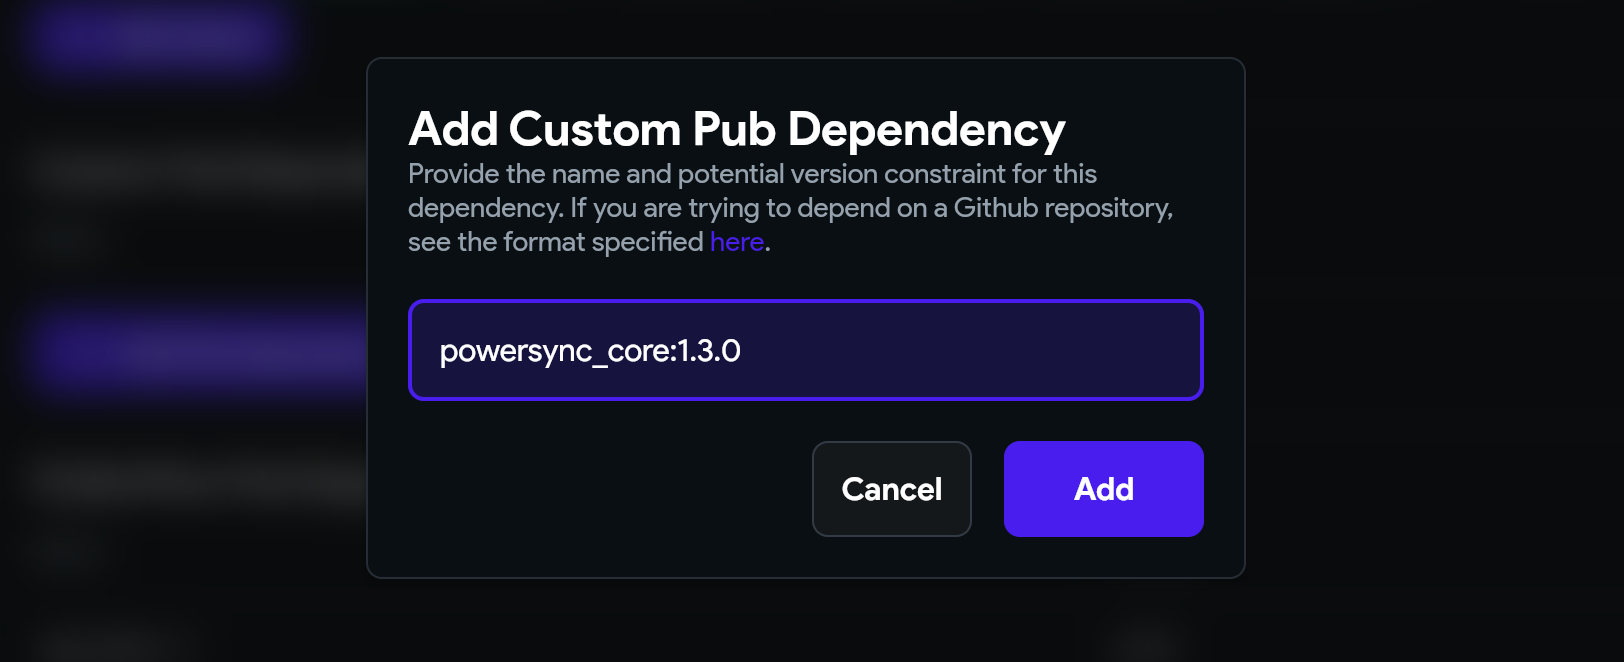
Under “Custom Pub Dependencies”, add a dependency on powersync_core:1.3.0:
This version of powersync_core is required for running FlutterFlow on Web.
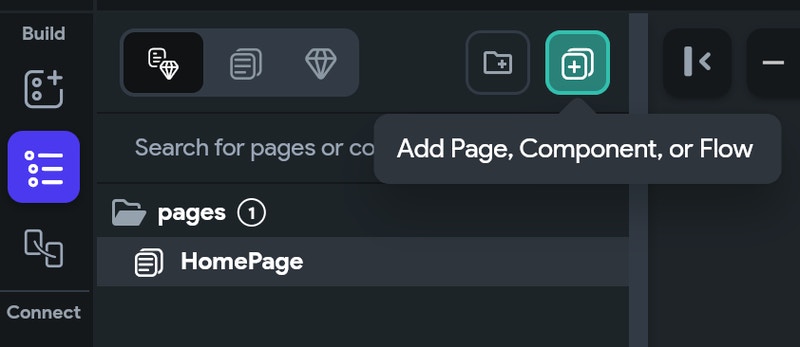
Under the “Page Selector”, click “Add Page, Component, or Flow”.
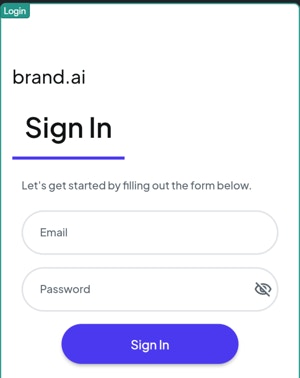
Select the “Auth 1” template and name the page Login.
Delete the Sign Up, Forgot Password and Social Login buttons — we will only be supporting Sign In for this demo app.
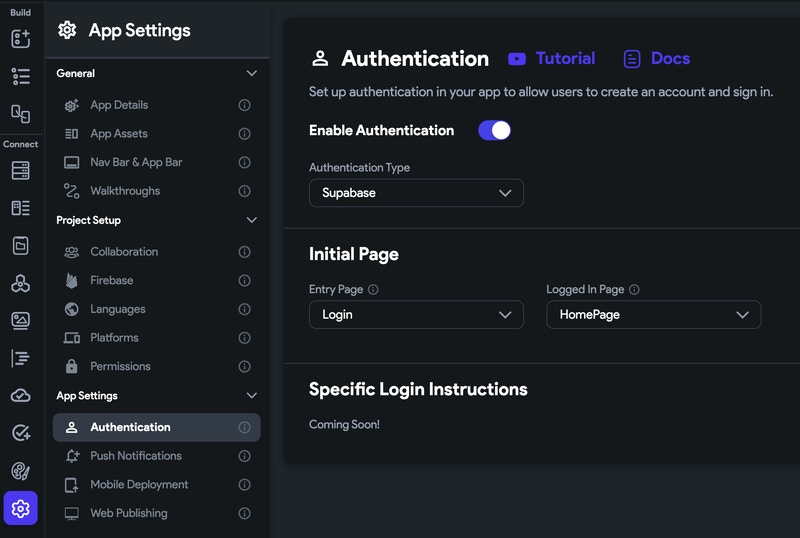
Under “App Settings” -> “App Settings” -> “Authentication”:
Enable Authentication.
Set “Authentication Type” to “Supabase”.
Set “Entry Page” to the Login page you just created.
Set “Logged In Page” to “HomePage”.
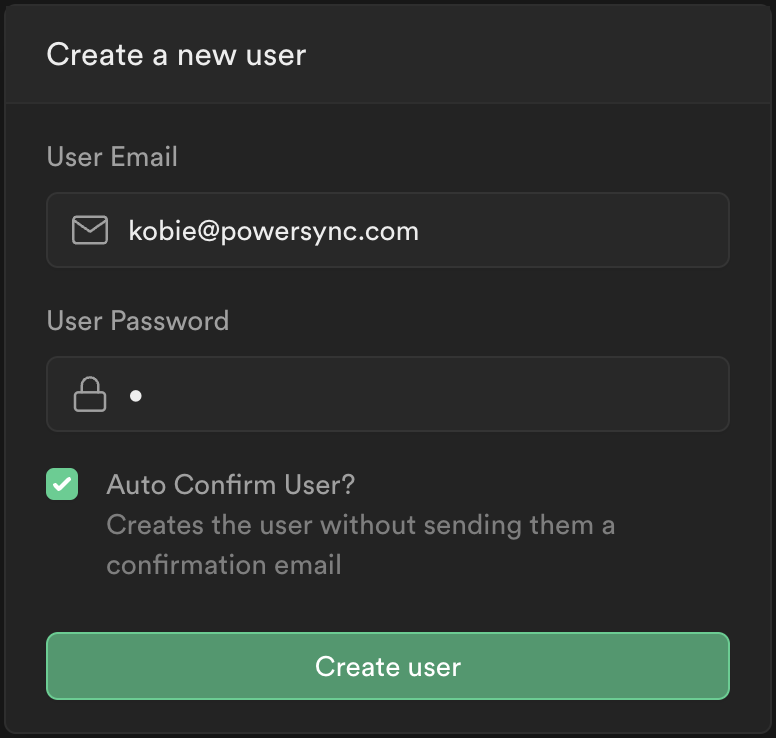
In your Supabase Dashboard, under “Authentication”, click on “Add User” -> “Create new user” and create a user for yourself to test with:
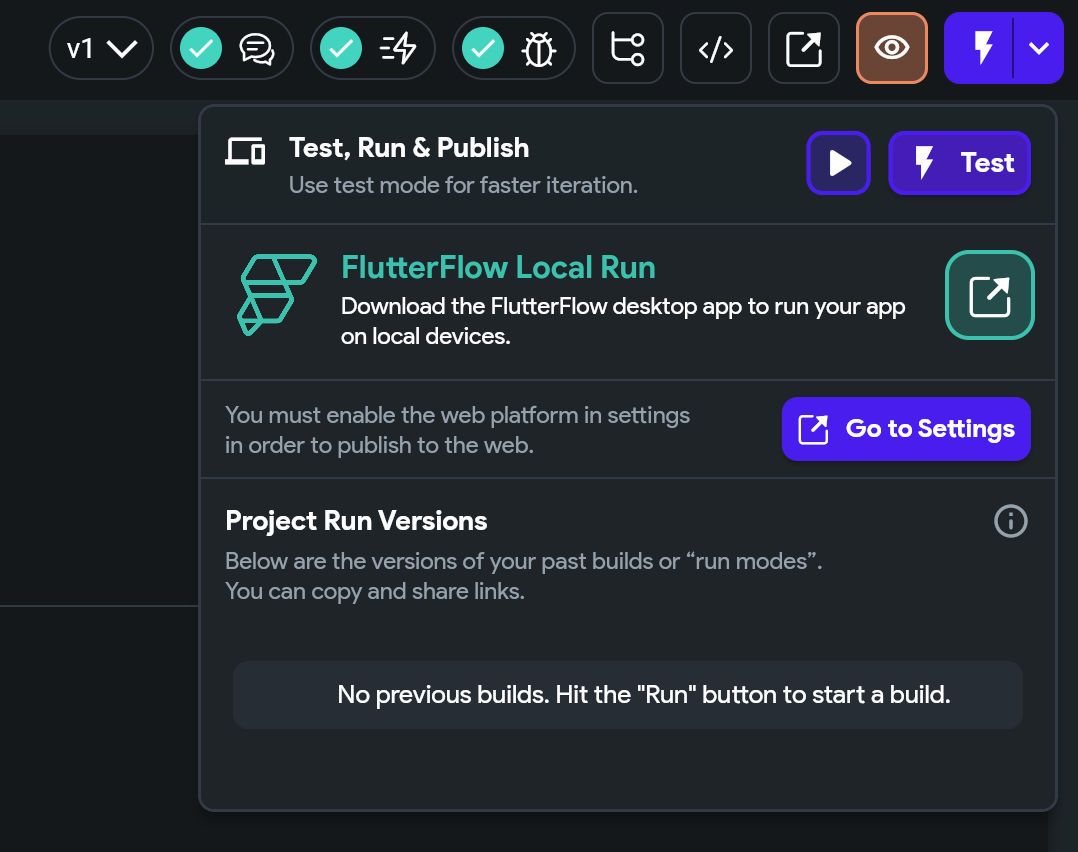
Test your app with test mode:
Click on 'Test'
Checkpoint: You should now be able to log into the app using the Supabase user account you just created. After logging in you should see a blank screen.
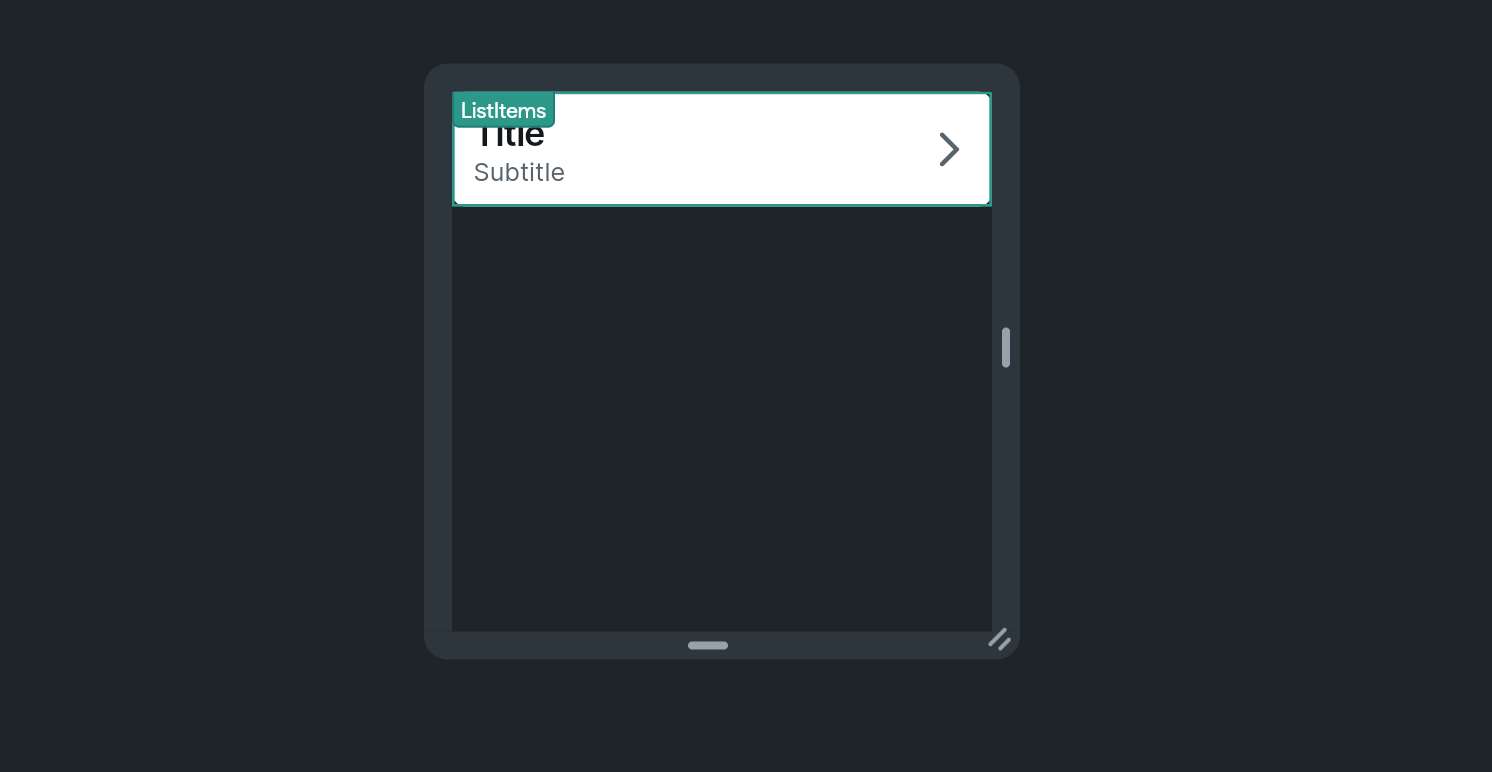
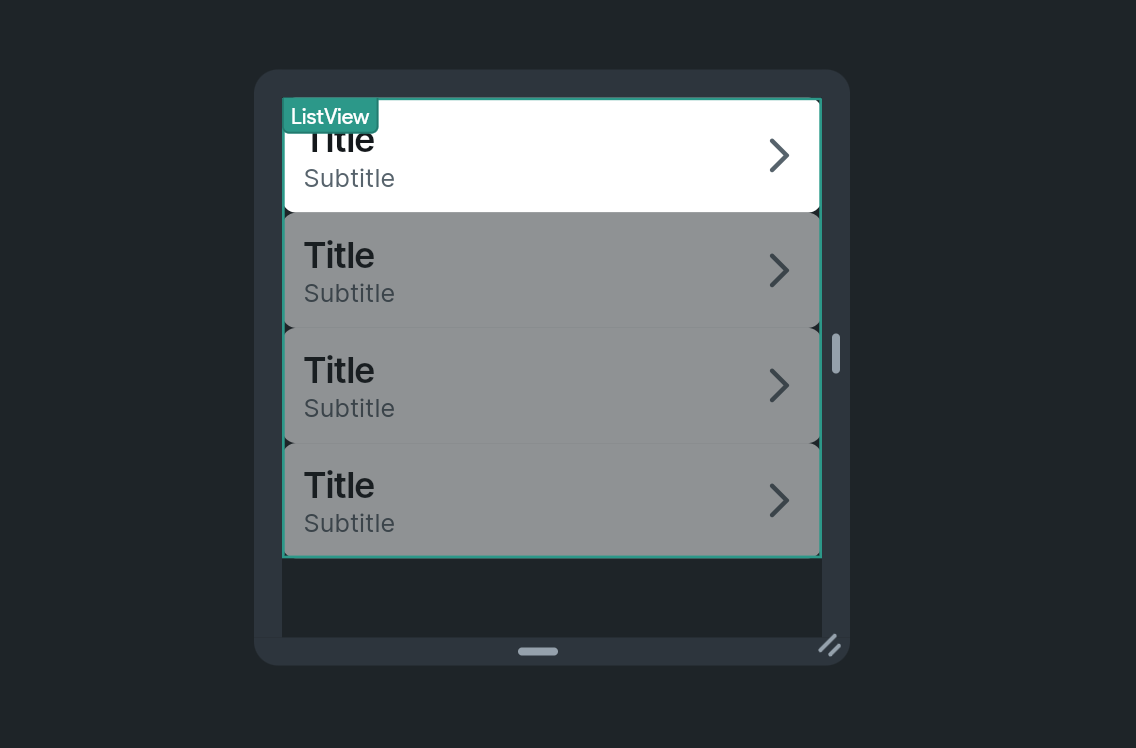
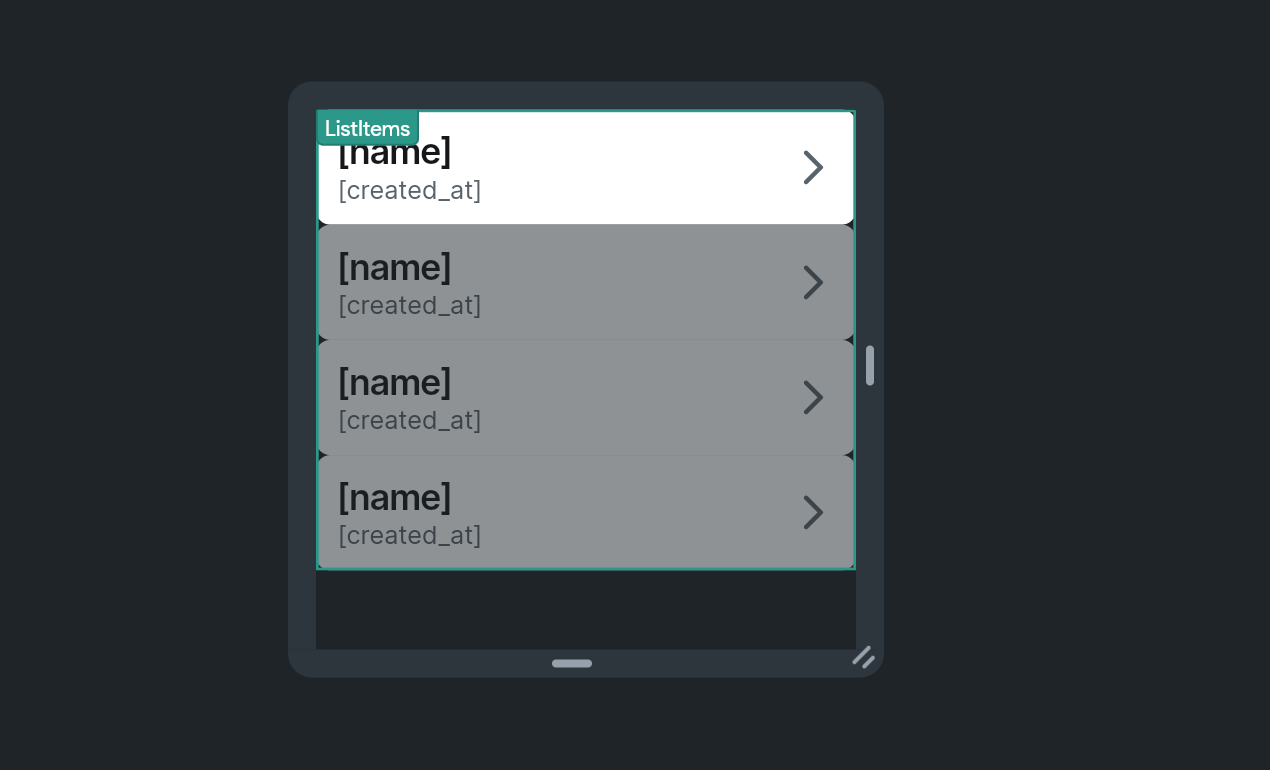
We will now create our first UI and bind it to the data in the local SQLite database on the device.There are three ways to read data from the SQLite database using PowerSync’s FlutterFlow library:
Auto-updating queries for Layout Elements with Dynamic Children e.g. the ListView Element
This uses the library’s PowerSyncQuery component.
Auto-updating queries for basic Layout Elements e.g. Text Elements.
This uses the library’s PowerSyncStateUpdater component.
Once-off reads for static data.
This uses the library’s PowerSyncQueryOnce custom action.
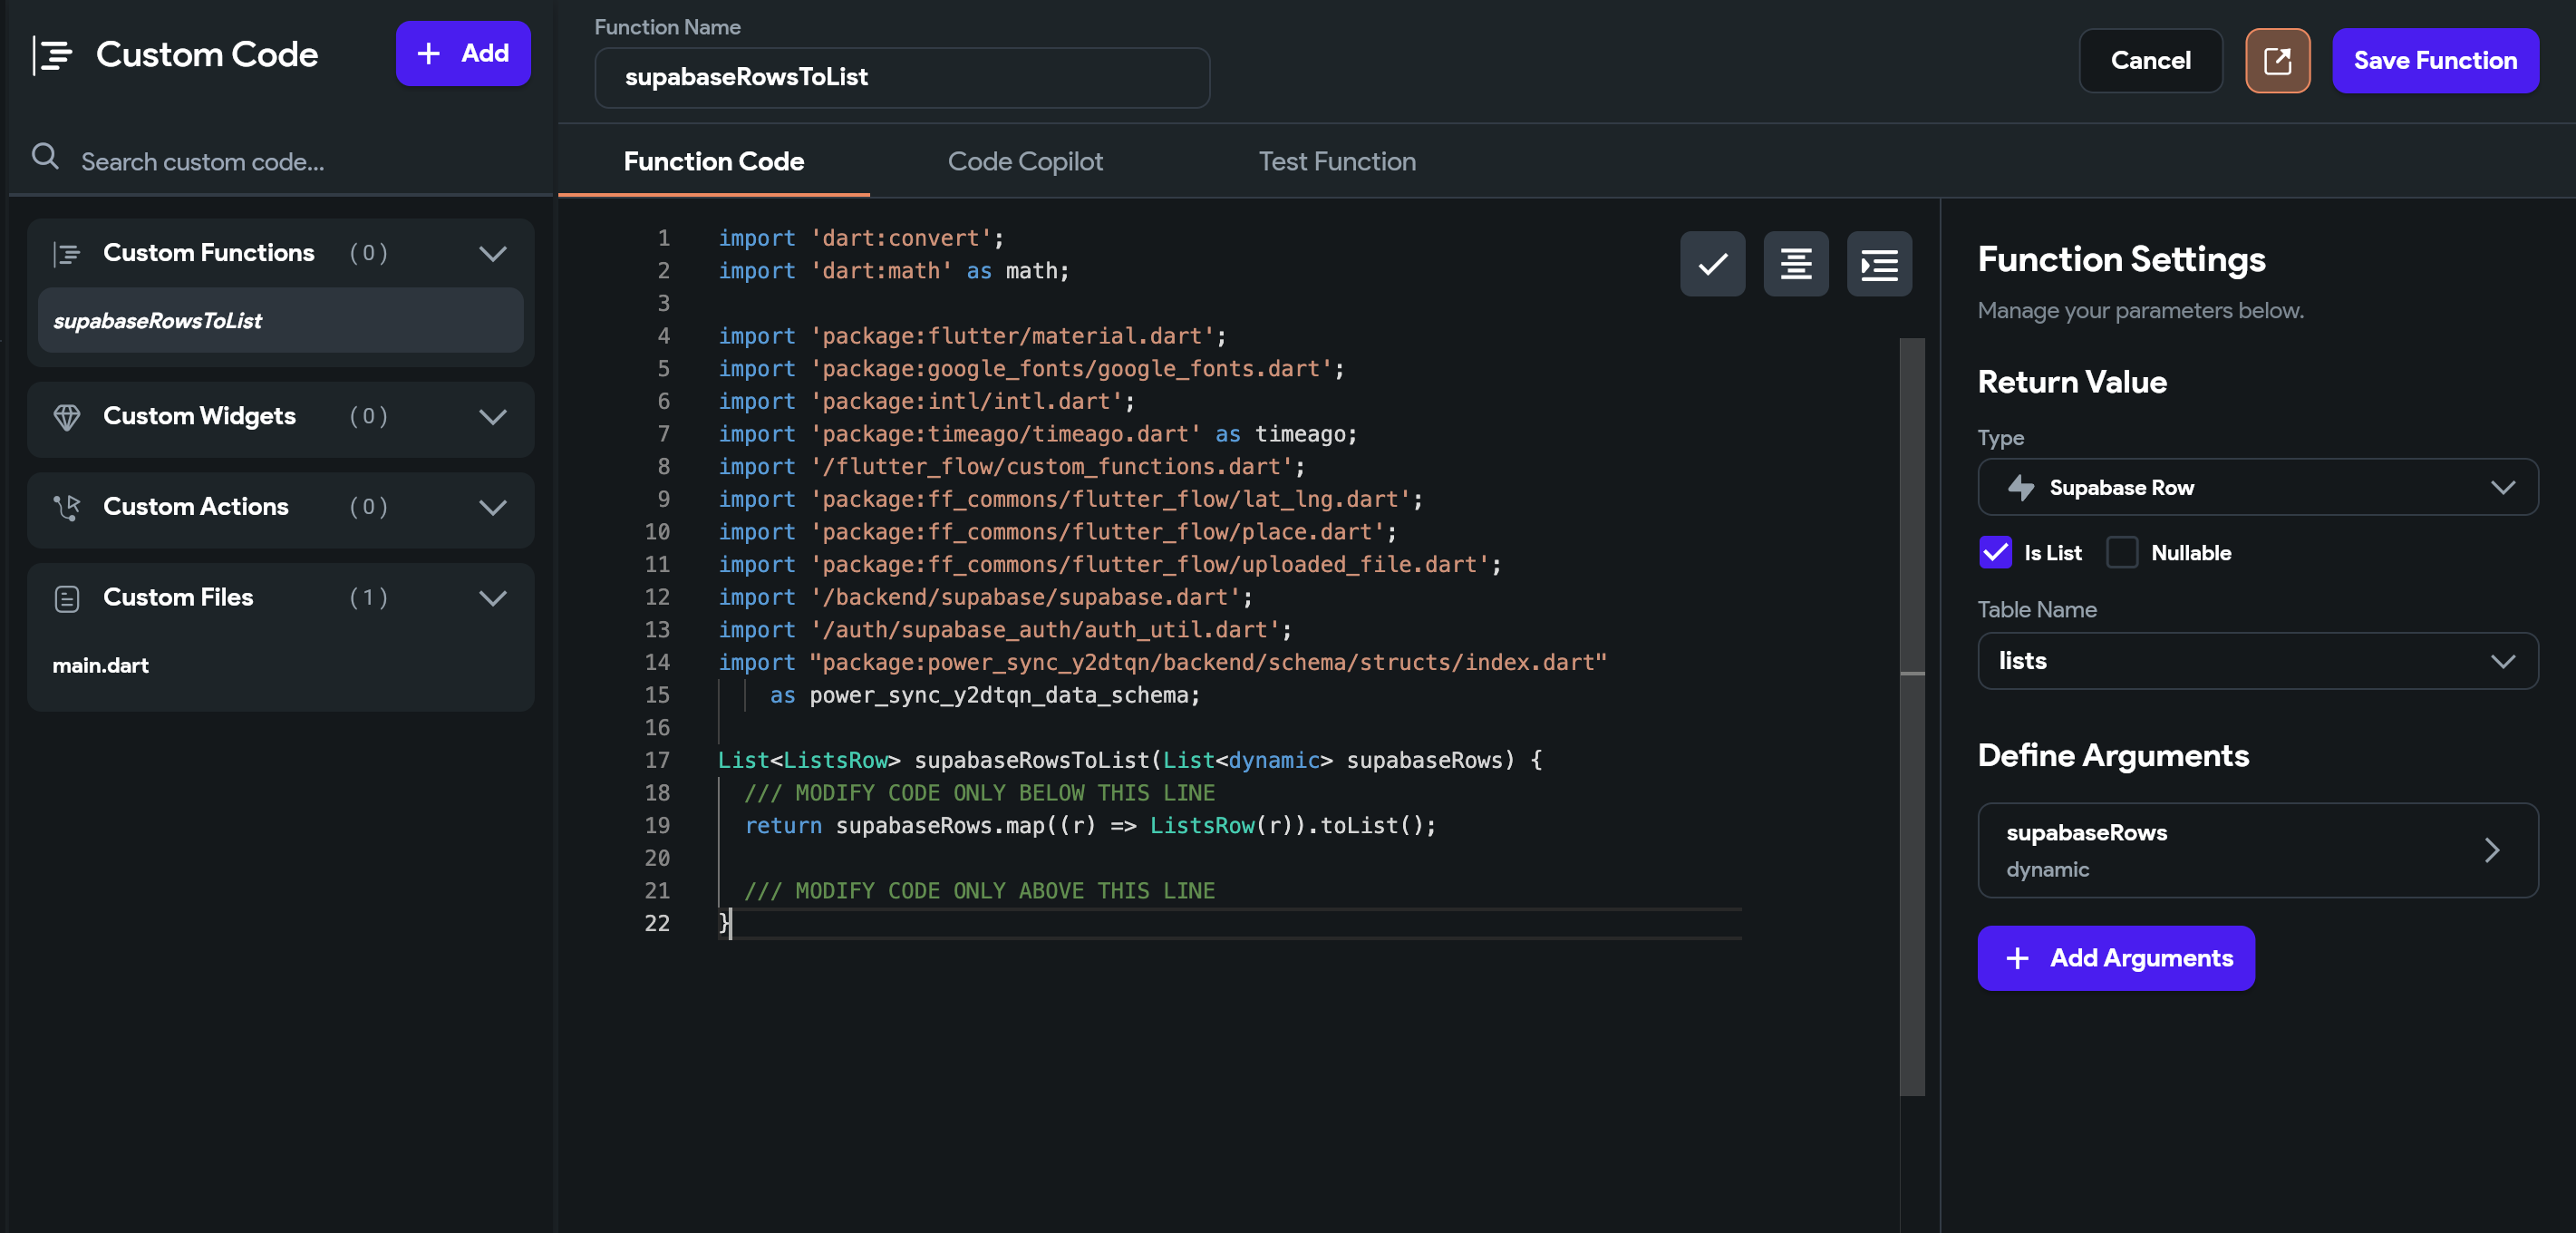
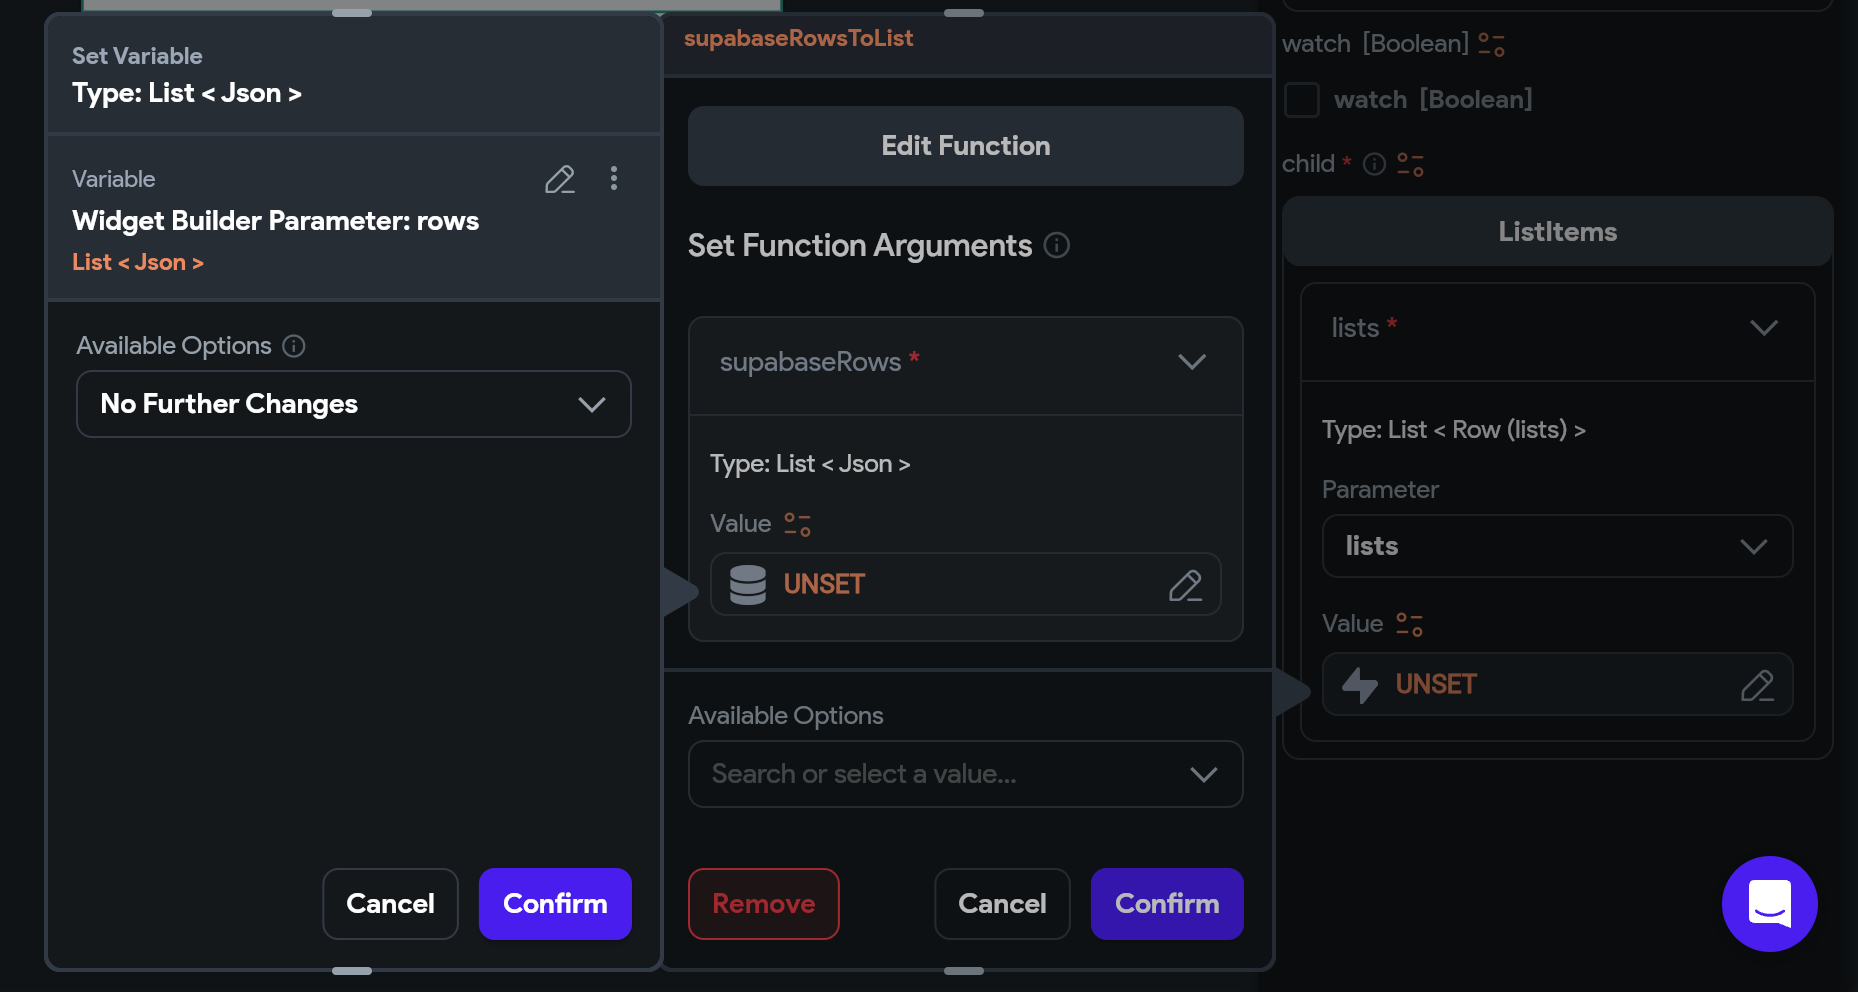
For reading data in FlutterFlow, you need a Custom Function per Supabase table to map Supabase rows to data that can be used by the library. This is because FlutterFlow Libraries do not support Supabase classes.
Navigate to “Custom Code” and add a Custom Function.
Name the function supabaseRowsToList (if your Supabase table name is “Customers”, you would name this supabaseRowsToCustomers).
Under Function Settings on the right, set the “Return Value” to Supabase Row
Check “Is List”.
Uncheck “Nullable”.
Under “Table Name”, select lists.
Also under Function Settings, click “Add Arguments”.
Set its “Name” to supabaseRows
Set its “Type” to “JSON”.
Check “Is List”.
Uncheck “Nullable”.
In the Function Code, paste the following code:
/// MODIFY CODE ONLY BELOW THIS LINEreturn supabaseRows.map((r) => ListsRow(r)).toList();
Click “Save Function”.
Custom function to map the lists table from Supabase
Notice that your homepage is still blank. This is because the lists table is empty in Supabase. Create a test row in the table by clicking on “Insert” -> “Insert Row” in your Supabase Table Editor.
Leave id and created_at blank.
Enter a name such as “Test from Supabase”.
Click “Select Record” for owner_id and select your test user.
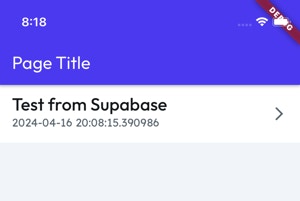
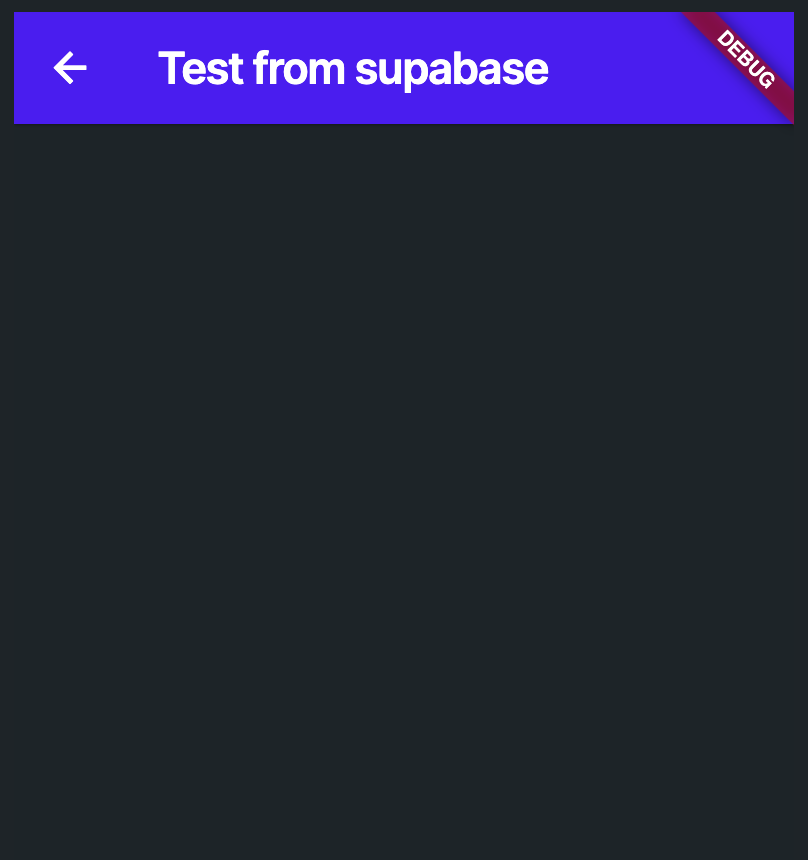
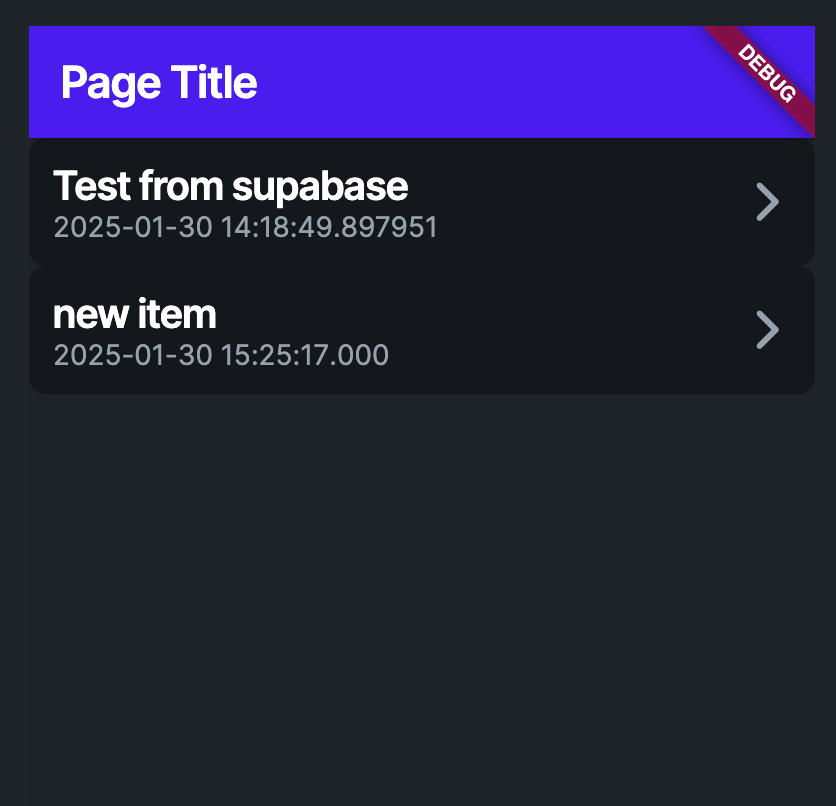
Checkpoint: You should now see your single test row magically appear in your app:
2. Auto-Updating Queries for Basic Layout Elements
In this section, we will be making the ListView component clickable and navigate the user to a page which will eventually display the list’s To-Do items. This page will show the selected list’s name in the title bar (“AppBar”). This uses Page State and the PowerSyncStateUpdater library component.
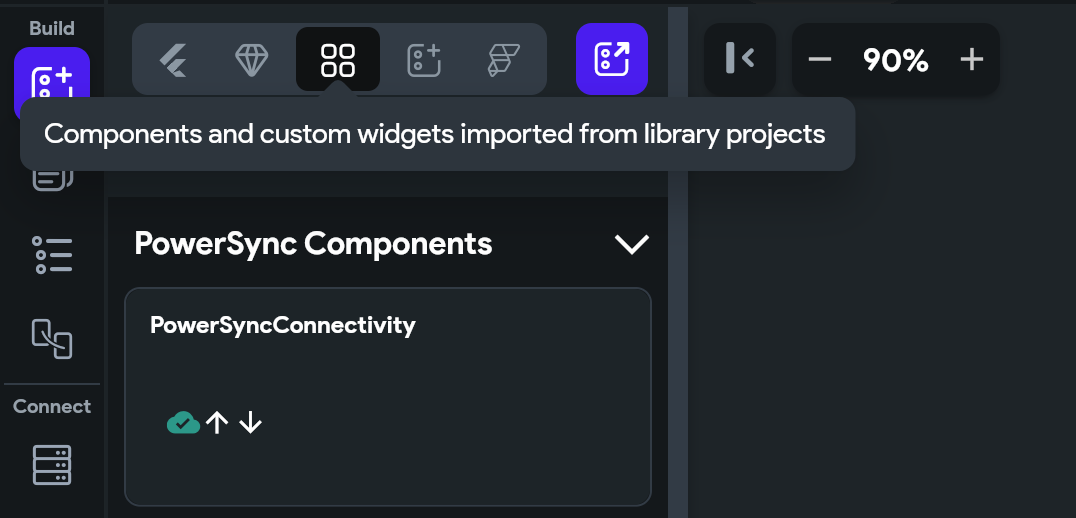
Under the “Widget Palette”, select the “Components and custom widgets imported from library projects” panel.
Drag the PowerSyncStateUpdater library component into your page.
Under the “Widget Tree”, select the PowerSyncStateUpdater component.
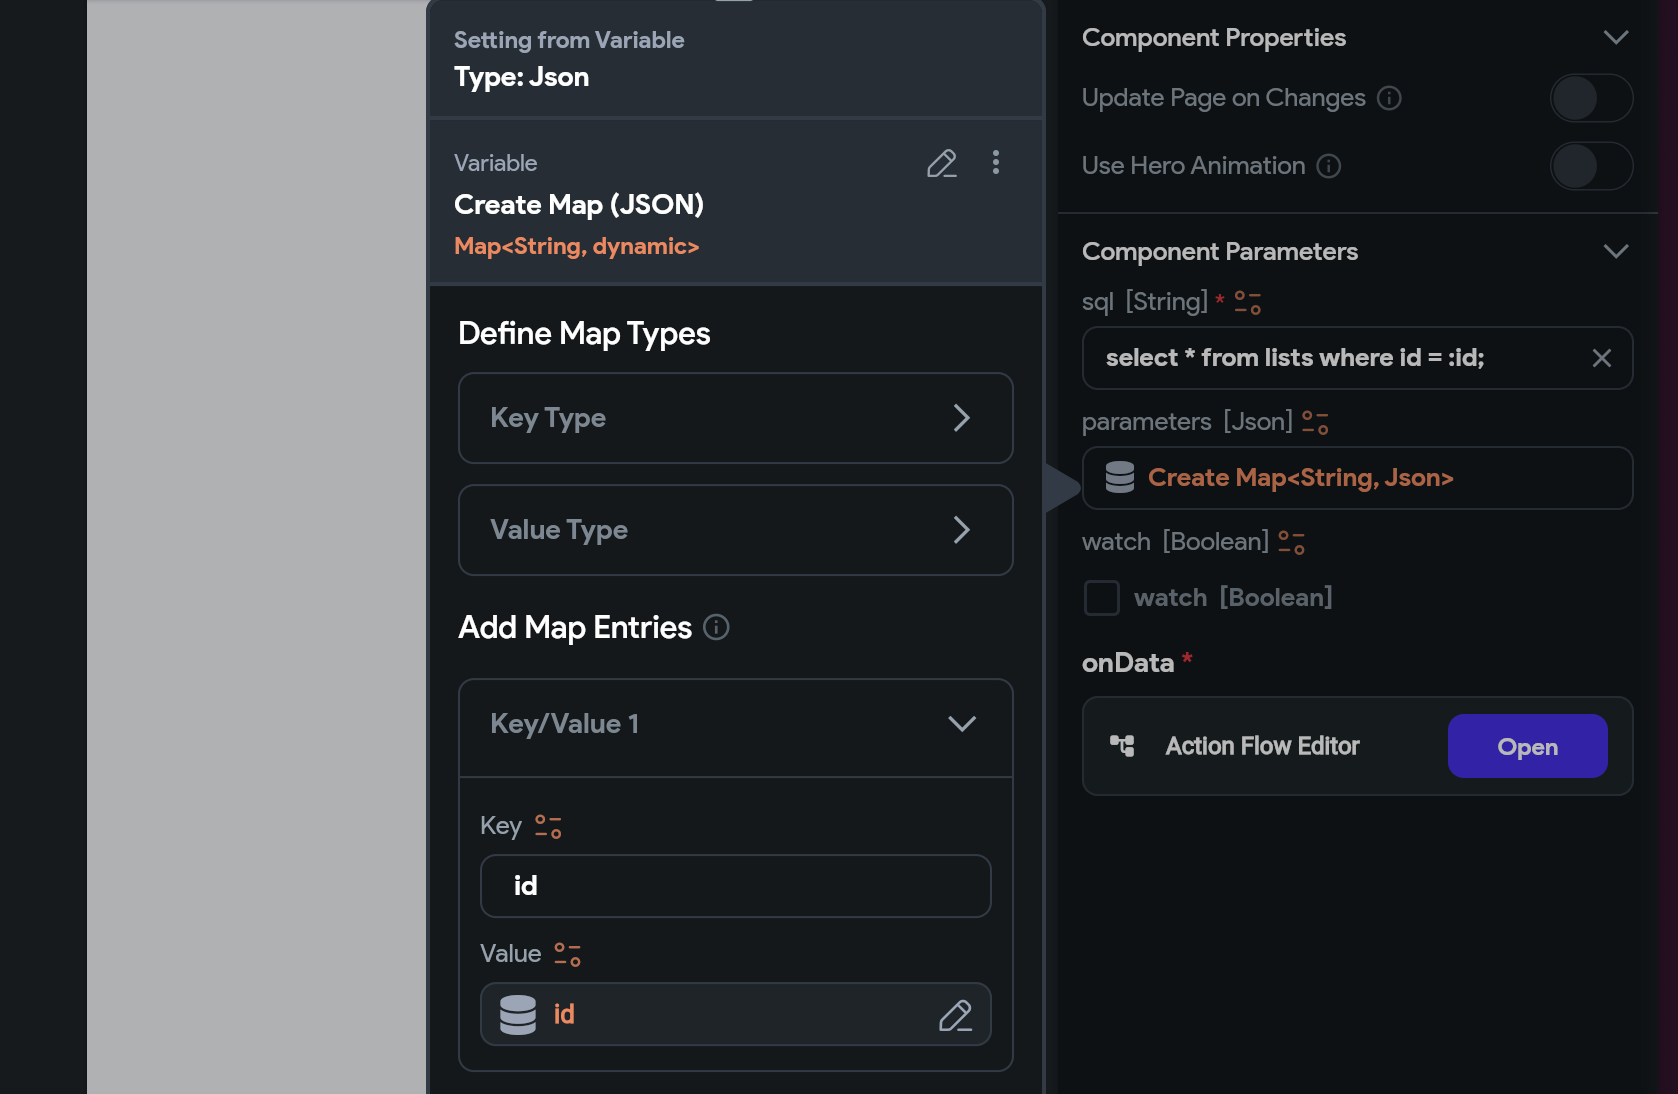
In the “Properties” panel on the right, under “Component Parameters”:
Add the SQL query to fetch the selected list from the SQLite database. Paste the following into the “sql [String]” field: select * from lists where id = :id;
Click on “parameters [Json]” select “Create Map (JSON)” as the variable.
Under “Add Map Entries”, click “Add Key Value Pair”.
Set the “Key” to id.
Set the “Value” to the page parameter created previously called id.
Check “watch [Boolean]”. This ensures that the query auto-updates.
Click “Confirm”.
Still under “Component Parameters”, configure the onData action:
Open the “Action Flow Editor”.
Select the “Callback” trigger type.
Click “Add Action”.
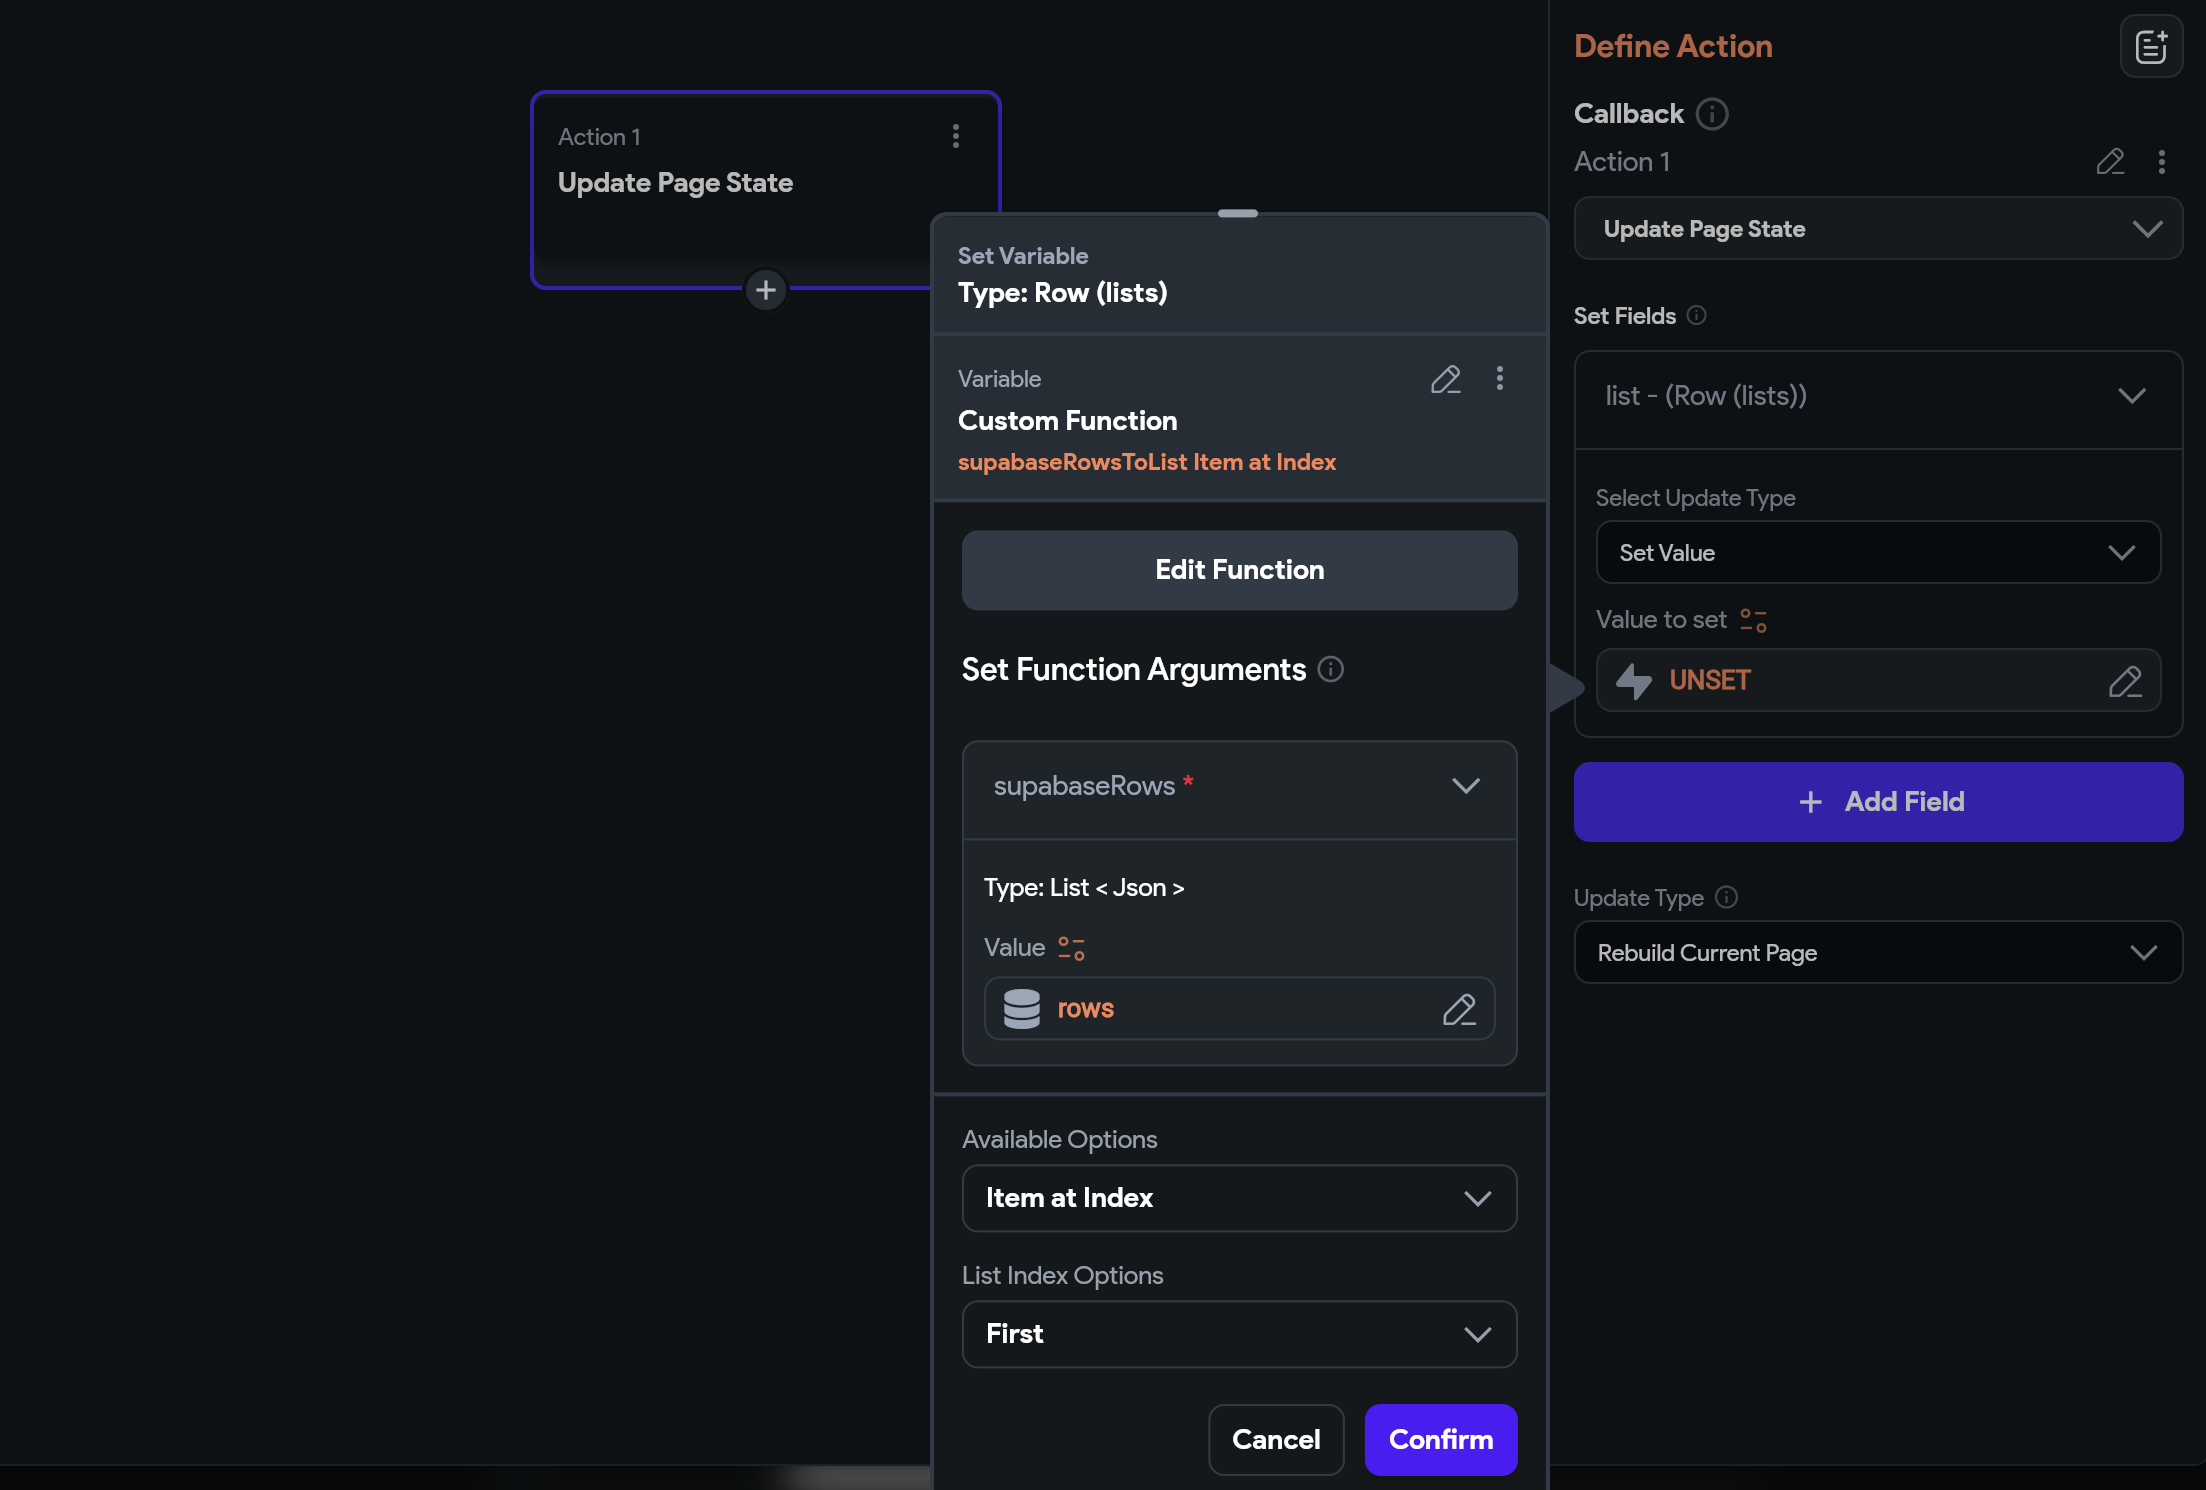
Search for “update page” and select “Update Page State”.
Click “Add Field”.
Select your list page state variable.
Set “Select Update Type” to “Set Value”.
Set “Value to set” to “Custom Functions” -> supabaseRowsToList.
Set the “Value” to “Callback Parameters” -> rows
Click “Confirm”.
Under “Available Options”, select “Item at Index”.
Set “List Index Options” to “First”
Click “Confirm”.
Close the Action Flow Editor.
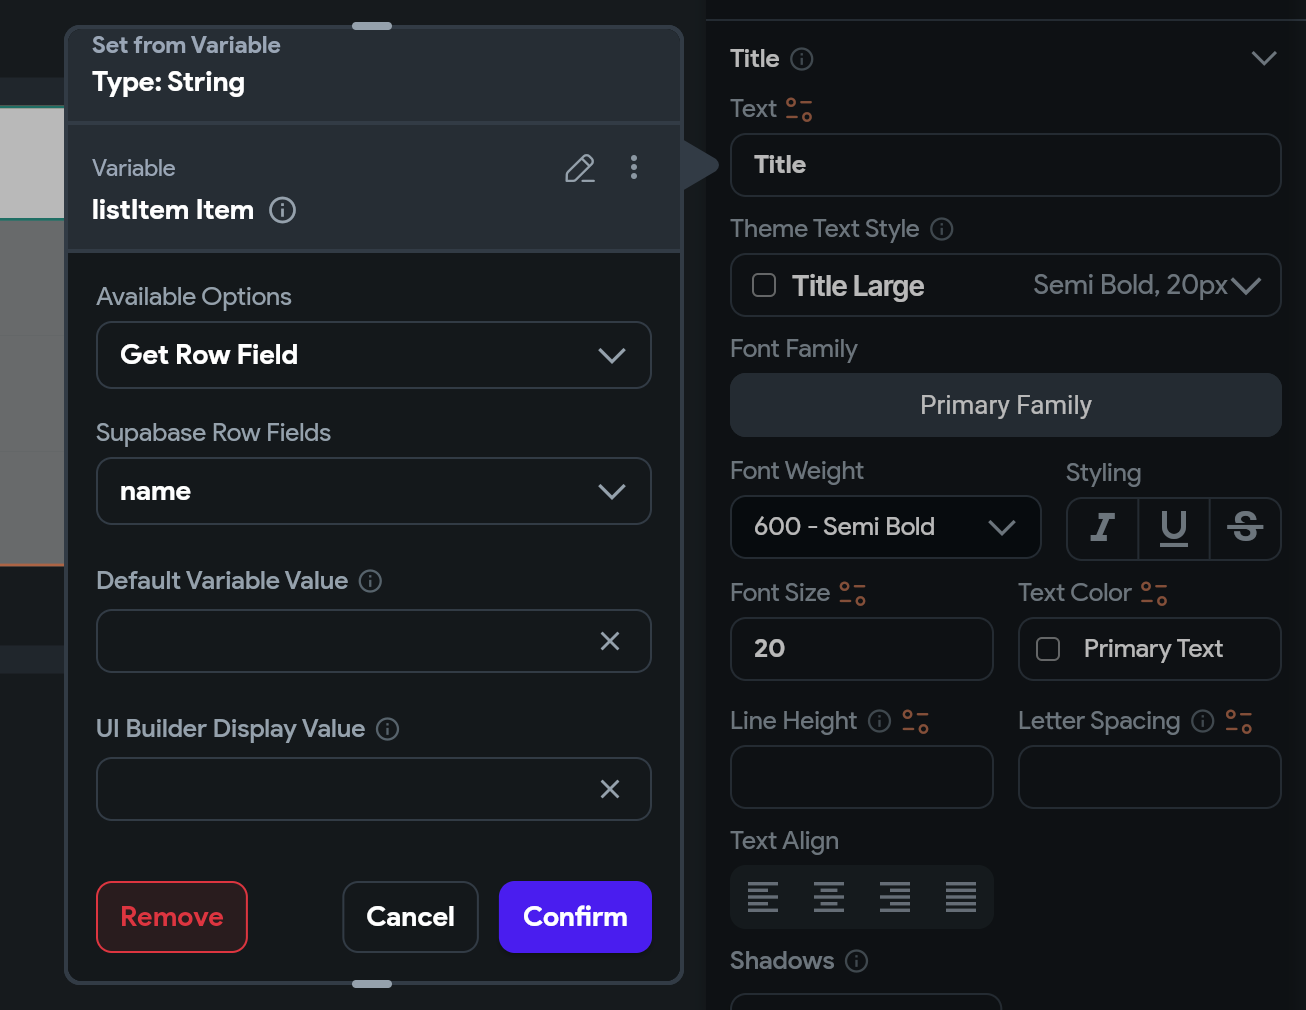
Still under the “Widget Tree”, select the “AppBar” -> “Text” widget.
In the “Properties” panel on the right, click on settings icon next to “Text”.
Click on “Page State” -> “List”.
Set “Supabase Row Fields” to “name”.
(Optional) Set the “Default Variable Value” to List Name.
You will now update the app so that we can capture new list entries.
Under the “Page Selector”, select your HomePage page.
Under the “Widget Palette”, search for “float” and drag the “FAB” widget onto your page.
In the “Actions” panel on the right, click “Add Action”.
Under “Custom Action” -> “PowerSync”, select powersyncWrite.
Under the “Set Action Arguments” -> “sql” section, add the SQL query to create a new list item. For the purpose of this guide we are hardcoding the list’s name, normally you would build UI for this.
Paste the following into the “Value” field: INSERT INTO lists(id, created_at, name, owner_id) VALUES(uuid(), datetime(), 'new item', :userId);
Under the “parameters” section, set the userId parameter we’re using the above query:
Click on “UNSET”.
Select “Create Map (JSON)” as the variable.
Under “Add Map Entries”, click “Add Key Value Pair”.
Set the “Key” to userId.
Set the “Value” to “Authenticated User” -> “User ID”.
Click “Confirm”.
Checkpoint: Reload your app and click on the + floating action button. A new list item should appear, which also automatically syncs to Supabase:
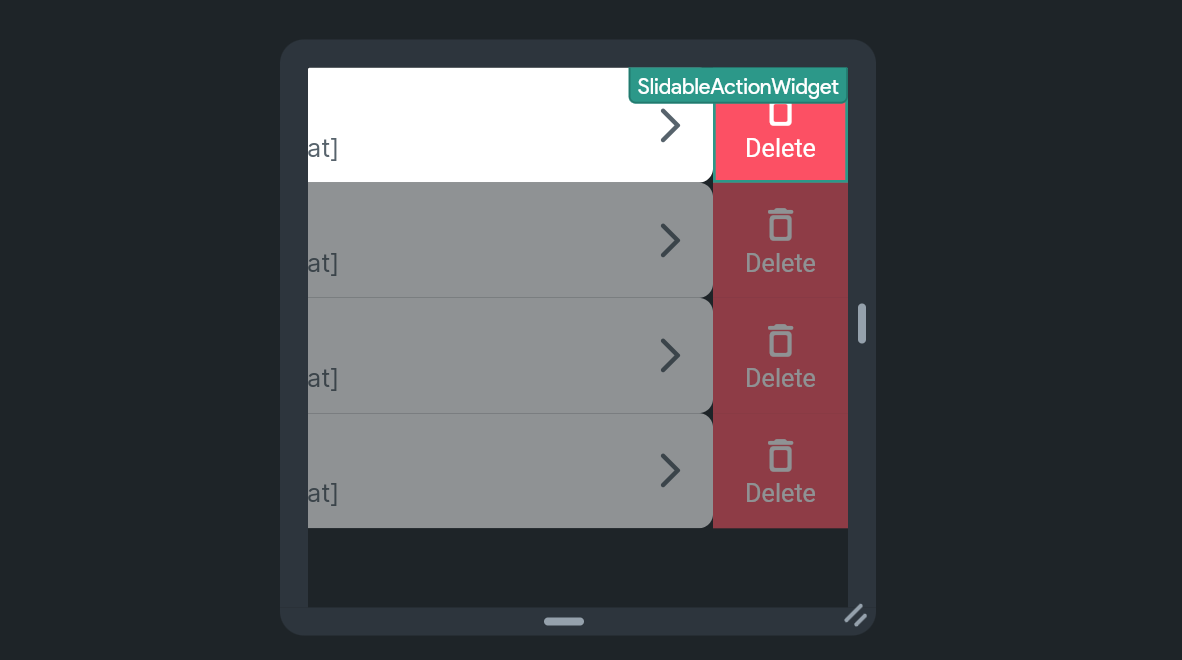
Updating data is possible today using the powersyncWrite helper of the Library, and a guide will be published soon. In the mean time, use the section below about Deleting Data as a reference. Please reach out on our Discord if you have any questions.
Navigate to “Custom Code” and create a new Custom Action called signOut without Arguments or Return Values and paste the below code:
In the below code, power_sync_b0w5r9 is the project ID of the PowerSync library. Update it if it changes.
// Automatic FlutterFlow importsimport '/backend/supabase/supabase.dart';import "package:power_sync_b0w5r9/backend/schema/structs/index.dart" as power_sync_b0w5r9_data_schema;import 'package:ff_theme/flutter_flow/flutter_flow_theme.dart';import '/flutter_flow/flutter_flow_util.dart';import '/custom_code/actions/index.dart'; // Imports other custom actionsimport '/flutter_flow/custom_functions.dart'; // Imports custom functionsimport 'package:flutter/material.dart';// Begin custom action code// DO NOT REMOVE OR MODIFY THE CODE ABOVE!import 'package:power_sync_b0w5r9/custom_code/actions/initialize_power_sync.dart' as ps;Future signOut() async { final database = await ps.getOrInitializeDatabase(); //await database.disconnectAndClear(); // this will completely delete all the local data, use with caution as there may be items still in the upload queue await database .disconnect(); //this will simply disconnect from the PowerSync Service and preserve all local data}// Set your action name, define your arguments and return parameter,// and then add the boilerplate code using the green button on the right!
Click “Save Action”.
Under the “Page Selector”, select your HomePage page.
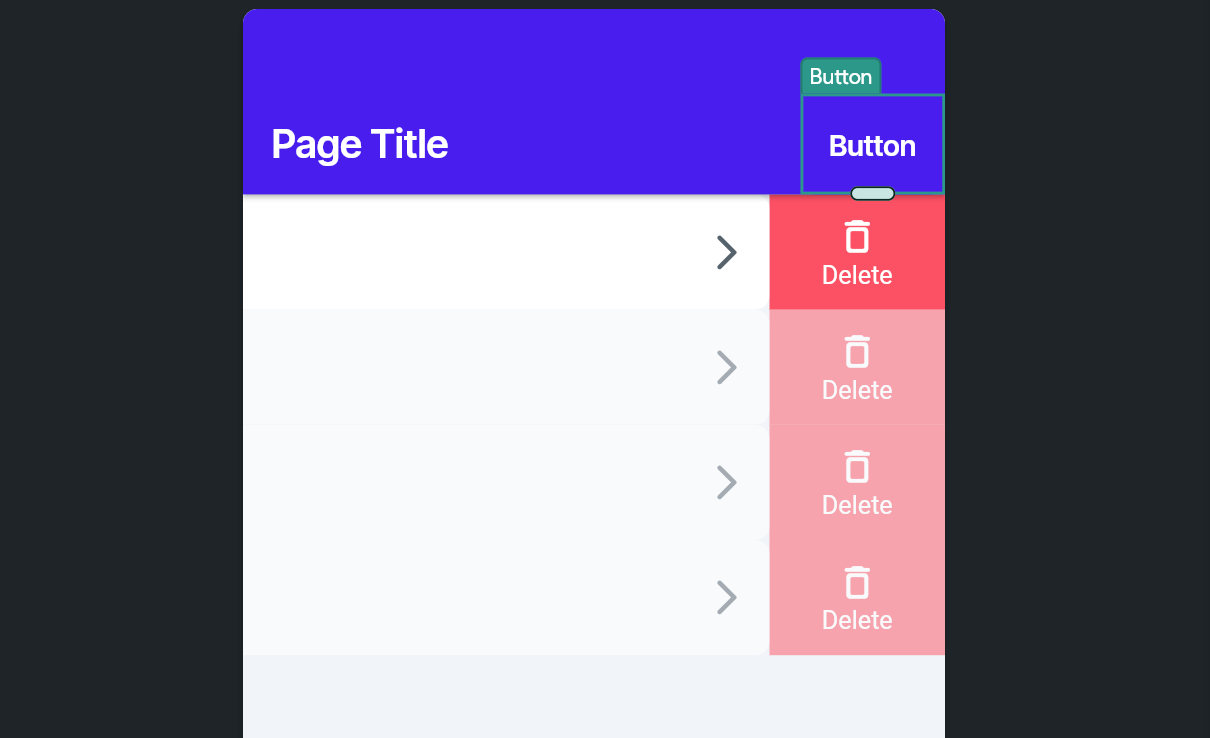
Under the “Widget Palette”, drag a “Button” onto the right of your “AppBar”.
In the “Properties” panel on the right, rename the “Button Text” to Sign Out.
Switch to the “Actions” panel and open the “Action Flow Editor”.
Select “On Tap” as the action trigger.
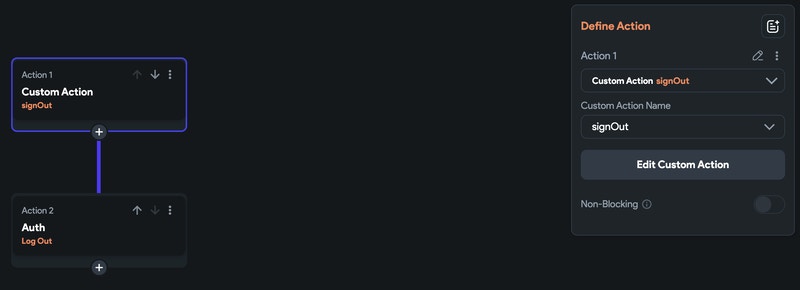
Click “Add Action” and add a call to the signOut Custom Action.
Chain another Action and call to “Supabase Authentication” -> “Log Out”:
Click “Close”.
Checkpoint: You should now be able to reload your app and sign out and in again.
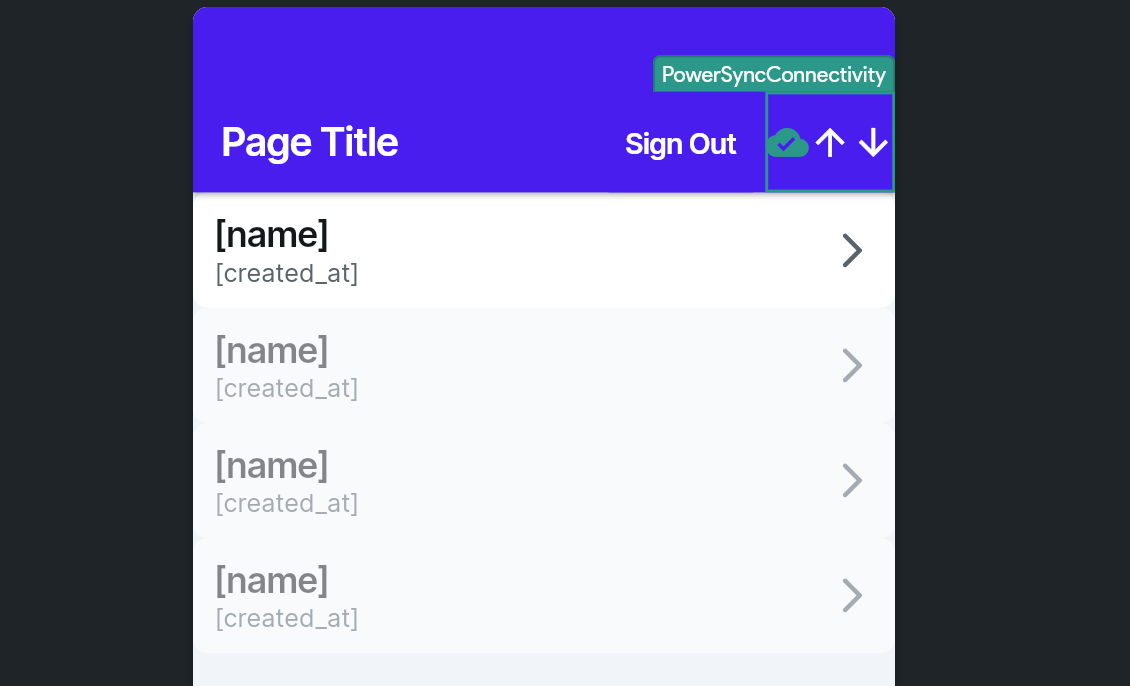
The PowerSync library provides a built-in component that displays real-time connectivity and sync status. Since the sync state is available globally as part of your app state, you can easily monitor the database status throughout your application. To add this status indicator:
Under the Widget Palette, select the “Components and custom widgets imported from library projects” panel.
Drag the PowerSyncConnectivity component into your home page’s “AppBar”.
PowerSync’s Sync Rules and Supabase’s support for Row Level Security (RLS) can be used in conjunction. Here are some high level similarities and differences:
RLS should be used as the authoritative set of security rules applied to your users’ CRUD operations that reach Postgres.
Sync Rules are only applied for data that is to be downloaded to clients — they do not apply to uploaded data.
Sync Rules can typically be considered to be complementary to RLS, and will generally mirror your RLS setup.
Currently all lists are synced to all users, regardless of who the owner of the list is. You will now update this so that only a user’s lists are synced to their device:
In the PowerSync Dashboard, select your project and instance and go to the Sync Rules view.
Edit the Sync Rules in the editor and replace the contents with the below:
bucket_definitions:
  user_lists:
    parameters: select request.user_id() as user_id
    data:
      - select * from lists where owner_id = bucket.user_id
Click “Validate”.
Click “Deploy” to deploy your Sync Rules.
Wait for the deploy to complete.
Checkpoint: Your app should continue running seamlessly as before.
For column values, PowerSync supports three basic types: Integers, doubles, and strings. These types have been chosen because they’re natively supported by SQLite while also being easy to transport as JSON.Of course, you may want to store other values in your Postgres database as well. When syncing a value that doesn’t fit into the three fundamental types, PowerSync will encode it as a JSON string. To use those values in your app, you’ll need to apply a mapping so that you display the correct values and use the correct representation when uploading data.As an example, let’s consider an added tags column on the lists table used in this guide. These tags will be encoded as a string array in Postgres:
Like all array values, PowerSync will transport this as a JSON string. For instance, a row with the default tags would be represented as this string: ["default", "tags"]. FlutterFlow does not support extracting a list from that string, so the custom functions responsible for mapping SQLite rows to FlutterFlow classes needs to be aware of the transformation and reverse it:
/// MODIFY CODE ONLY BELOW THIS LINEreturn supabaseRows.map((r) { return ListsRow({ ...r, 'tags': jsonDecode(r['tags'] as String), });}).toList();
This transforms the '["default", "tags"]' value as it appears into ["default", "tags"], the list value expected for this row.A similar approach is necessary when making local writes. The local database should be consistent with the data synced with PowerSync. So all local writes should write array and JSON values as strings by encoding them as JSON.Finally, the PowerSync mapping also needs to be reverted when uploading rows to Postgres. For a text[] column for instance, the local string value would not be accepted by Supabase. For this reason, the upload behavior for columns with advanced types needs to be customized.
New feature: This option has been added in version 0.0.7 of the PowerSync FlutterFlow library. Please make sure you’re using that version or later.
To customize the uploading behavior, create a new custom action (e.g. applyPowerSyncOptions). After the default imports, put this snippet:
import 'package:power_sync_b0w5r9/custom_code/actions/initialize_power_sync.dart';Future applyPowerSyncOptions() async { // Add your function code here! powerSyncOptions.transformData = (table, data) { switch (table) { case 'lists': data['tags'] = jsonDecode(data['tags'] as String); } };}
Also, add this function to your main.dart as a final action.When setting powersyncOptions.transformData, a callback is invoked every time a created or updated row is uploaded to Supabase. This allows you to customize how individual values are represented for Postgres. In this case, the tags column of the lists table is decoded as JSON so that it’s uploaded as a proper array while being stored as a list locally.
To enable an easy setup, the PowerSync FlutterFlow library integrates with Supabase by default. This means that as long as you use Supabase for authentication in your app, PowerSync will automatically connect as soon as users log in, and can automatically upload local writes to a Supabase database.For apps that don’t use Supabase, you can disable this default behavior and instead rely on your own backend connectors. For this, create your own custom action (e.g. applyPowerSyncOptions). It’s important that this action runs before anything else in your app uses PowerSync, so add this action to your main.dart as a final action.
import 'package:power_sync_b0w5r9/custom_code/actions/initialize_power_sync.dart';import 'package:powersync/powersync.dart' as ps;Future applyPowerSyncOptions() async { // Disable the default Supabase integration powerSyncOptions.useSupabaseConnector = false; final db = await getOrInitializeDatabase(); // TODO: Write your own connector and call connect/disconnect when a user logs // in. db.connect(connector: _MyCustomConnector());}final class _MyCustomConnector extends ps.PowerSyncBackendConnector { @override Future<ps.PowerSyncCredentials?> fetchCredentials() { // TODO: implement fetchCredentials throw UnimplementedError(); } @override Future<void> uploadData(ps.PowerSyncDatabase database) { // TODO: implement uploadData throw UnimplementedError(); }}
Deploying to the Apple App Store currently requires some workarounds due to limitations in FlutterFlow:
Download the code from FlutterFlow.
Open the Podfile located in the ios/ directory.
The following option in the Podfile needs to be updated from use_frameworks! :linkage => :static to use_frameworks! (remove everything after the exclamation sign).
After removing that option, clean the build folder and build the project again.
You should now be able to submit to the App Store.
Exporting the code from FlutterFlow using the “Download Code” action in FlutterFlow requires the same workaround listed above.
The PowerSync FlutterFlow Library does not currently support encryption at rest.
Other common issues and troubleshooting techniques are documented here: Troubleshooting.